ASSEMBLY
BLADE GUARD
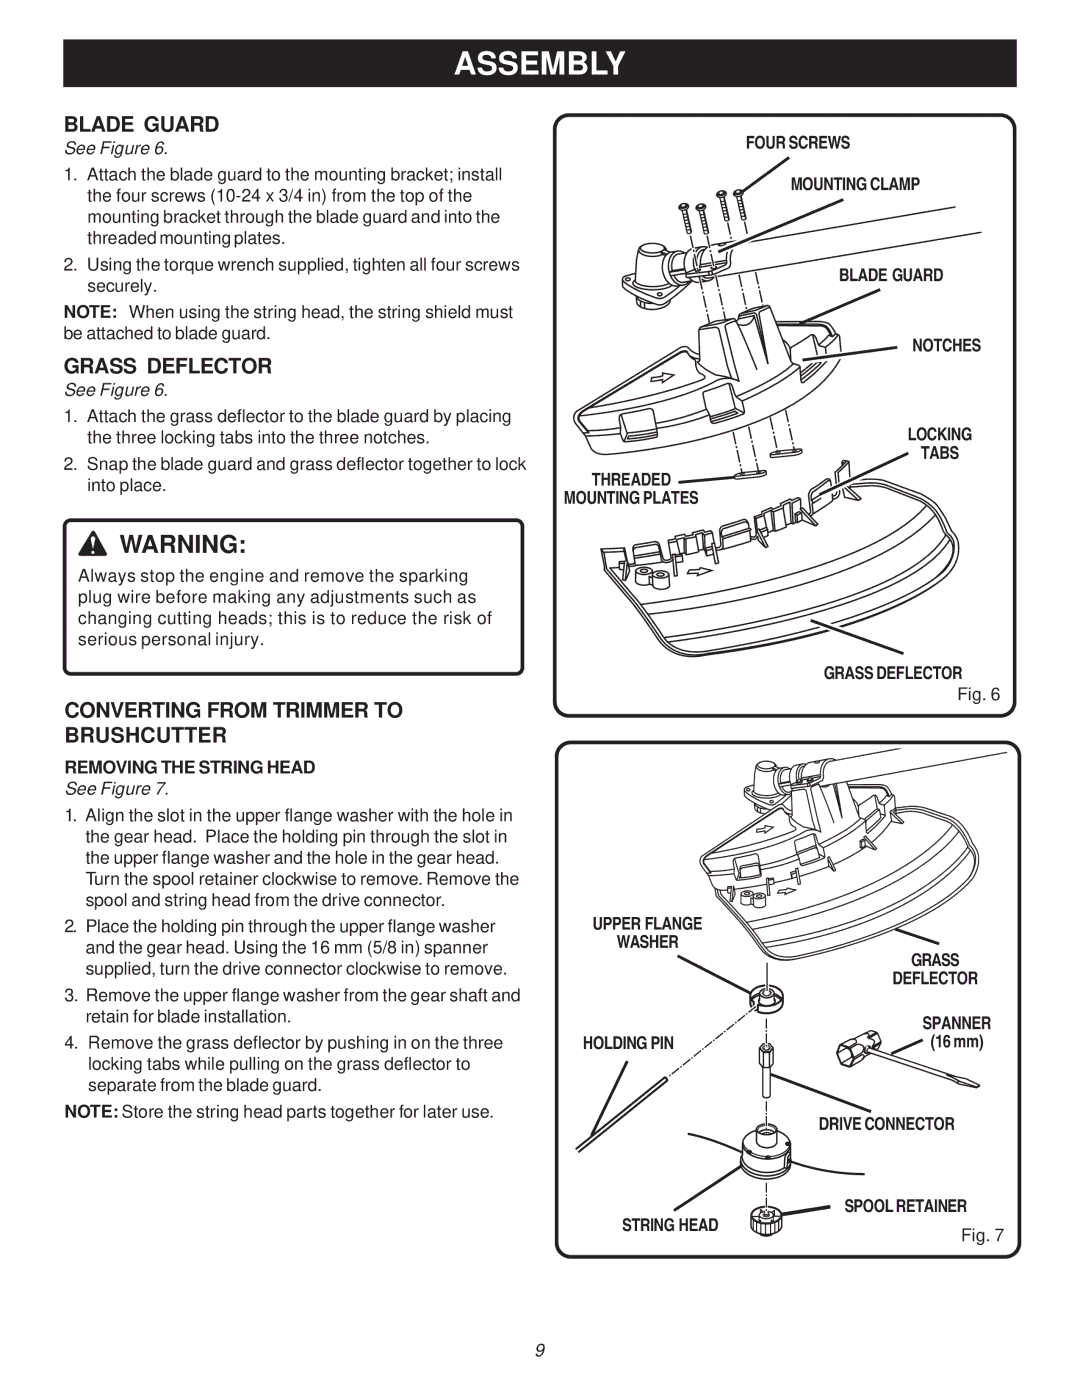
See Figure 6.
1.Attach the blade guard to the mounting bracket; install the four screws
2.Using the torque wrench supplied, tighten all four screws securely.
NOTE: When using the string head, the string shield must be attached to blade guard.
GRASS DEFLECTOR
See Figure 6.
1.Attach the grass deflector to the blade guard by placing the three locking tabs into the three notches.
2.Snap the blade guard and grass deflector together to lock
into place. | THREADED | |
MOUNTING PLATES | ||
|
WARNING:
Always stop the engine and remove the sparking plug wire before making any adjustments such as changing cutting heads; this is to reduce the risk of serious personal injury.
FOUR SCREWS
![]() MOUNTING CLAMP
MOUNTING CLAMP
BLADE GUARD
NOTCHES
LOCKING
TABS
GRASS DEFLECTOR
Fig. 6
CONVERTING FROM TRIMMER TO
BRUSHCUTTER
REMOVING THE STRING HEAD
See Figure 7.
1.Align the slot in the upper flange washer with the hole in the gear head. Place the holding pin through the slot in the upper flange washer and the hole in the gear head.
Turn the spool retainer clockwise to remove. Remove the spool and string head from the drive connector.
2.Place the holding pin through the upper flange washer and the gear head. Using the 16 mm (5/8 in) spanner supplied, turn the drive connector clockwise to remove.
3.Remove the upper flange washer from the gear shaft and retain for blade installation.
4.Remove the grass deflector by pushing in on the three locking tabs while pulling on the grass deflector to separate from the blade guard.
NOTE: Store the string head parts together for later use.
UPPER FLANGE
WASHER
HOLDING PIN
GRASS
DEFLECTOR
SPANNER
(16 mm)
DRIVE CONNECTOR
SPOOL RETAINER
STRING HEAD
Fig. 7
9
