Using the Optional SP01 Shock-Mount
Using the Optional SP01 “Spider” Shock-Mount
For additional isolation the C01 can be fit- ted on the optional SP01 “Spider” shock mount. Follow the steps below the to install the SP01.
•First, screw the SP01 shock mount onto your mic stand or boom arm. If you’re using a US 5/8” mic stand or boom, remove the Euro adapter.
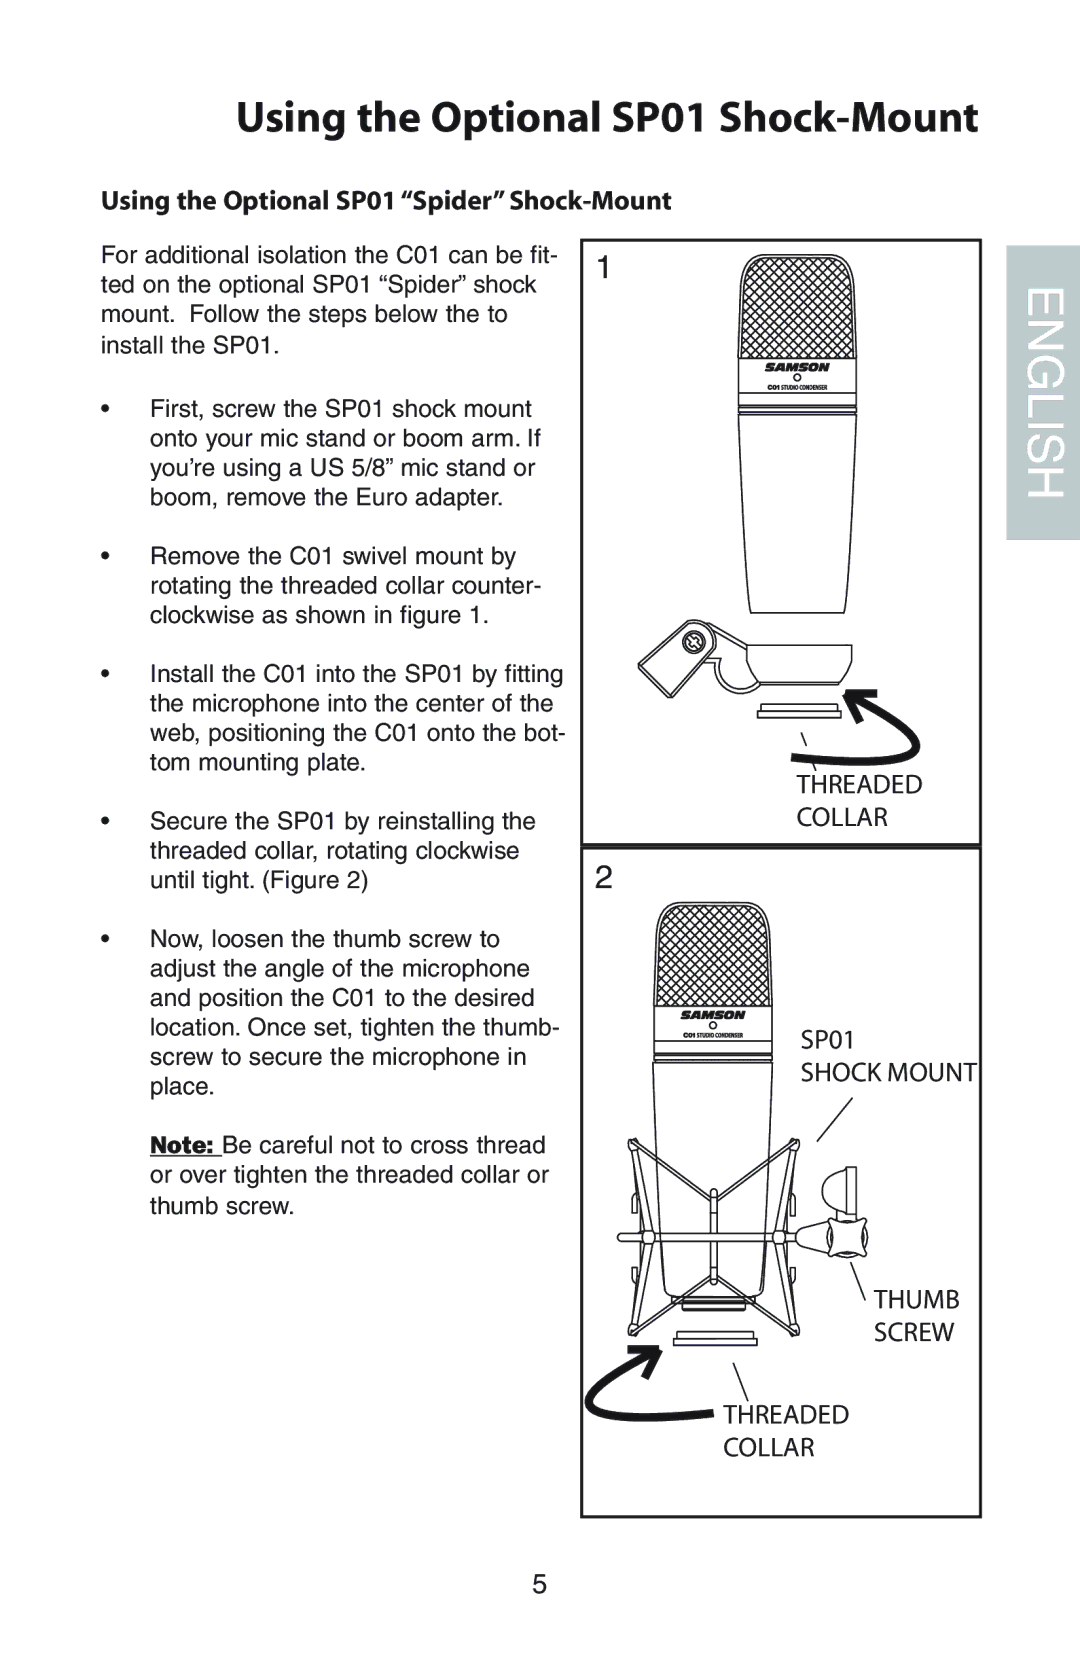
•Remove the C01 swivel mount by rotating the threaded collar counter- clockwise as shown in figure 1.
•Install the C01 into the SP01 by fitting the microphone into the center of the web, positioning the C01 onto the bot- tom mounting plate.
•Secure the SP01 by reinstalling the threaded collar, rotating clockwise until tight. (Figure 2)
•Now, loosen the thumb screw to adjust the angle of the microphone and position the C01 to the desired location. Once set, tighten the thumb- screw to secure the microphone in place.
Note: Be careful not to cross thread or over tighten the threaded collar or thumb screw.
1
2
THREADED
COLLAR
SP01
SHOCK MOUNT
![]() THUMB
THUMB
SCREW
THREADED
COLLAR
ENGLISH
5