Page
Getting to Know your camera
Instructions
Page
Content
Pausing while recording a movie Successive Recording
Display Language
Content
Included items
System chart
Optional Items
AC adapter SAC-47 Software CD
Front & Top
Identification of features
Back
Function button
Bottom
Self-timer lamp
Mode icon
Camera Status Lamp
„ Number of images and battery life Using the SLB-10A
Connecting to a Power Source
Still image Movie
Number of images
Connecting to a Power Source
„ How to charge the rechargeable battery SLB-10A
„ Charging LED of the AC Adapter
Charging LED
Inserting the battery
Battery
Inserting the memory card
Instructions on how to use the memory card
Recorded Super Fine Normal
When Using the Camera for the First Time
Setting up the date, time and date type
Setting up the Language
Description Icons
LCD monitor indicator in recording mode
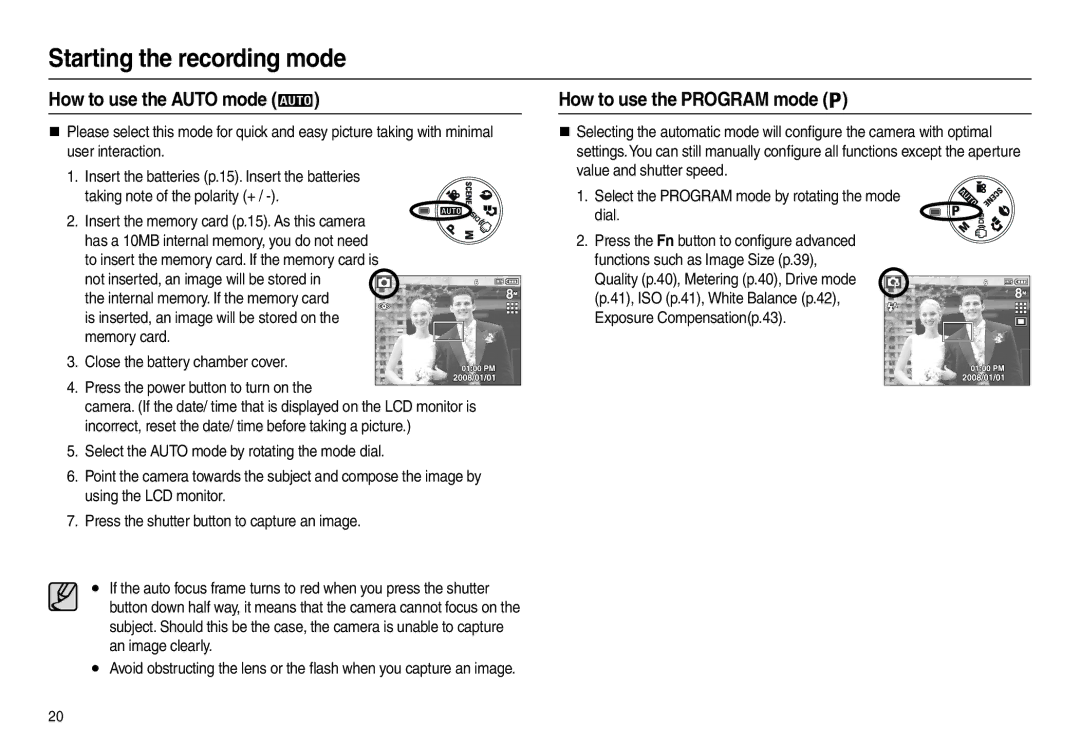
Starting the recording mode
How to use the Auto mode
How to use the Program mode
How to use the Manual mode
How to use the DIS mode
If the image size is or , the DIS mode cant be selected
Photo Help Guide
Using the Photo Help Guide mode
How to use the Portrait mode
How to use the Scene modes
Mode Icon Description
Pausing while recording a movie Successive Recording
How to use the Movie mode
Recording the movie without sound
Image size and type are listed below
Things to Watch Out for When Taking Pictures
Power button
Setting up the recording function using the camera buttons
Used for turning the camera’s power on / off
Shutter button
Tele zoom
Function Description / Info / Up button
Macro / Down button
„ Function description
Auto Program
„ Types of focus mode and focus range W Wide, T Tele
Focus lock
Flash / Left button
Normal Macro Auto macro
Icon Flash mode Description
„ Available flash mode, by recording mode Selectable
Self-timer / Right button
Motion Icon & Self-timer lamp
Icon Mode
FD Face Detection button
Menu / OK button
„ OK button
Press the shutter button fully to take a picture
Face detection does not work when setting the effect mode
Digital zoom is not activated in this mode
Focus on the nearest person
Portrait, Beach & Snow
Effect button
„ Available Effects, by recording mode
Effect button Colour
Colour
Effect button Contrast
Effect button Sharpness
Image
„ You can change the contrast of the image
Effect button Saturation
This menu is only available in the Children scene mode
Fn button
Saved. Take a picture pressing the Shutter button
How to use the Fn menu
Size
Still Icon Image
Mode Still Image mode Movie mode
Quality / Frame rate
Metering
Drive mode
White balance
Icon Description
Shutter button
Menu Sub menu Available mode
Setting up the recording function using the LCD monitor
Exposure compensation
Voice Mute
Setting up the recording function using the LCD monitor
How to use the menu
Use the UP and Down buttons to select a sub menu
Voice Memo
ACB
Voice Recording
Pausing while recording a voice
Recording the movie without voice
Press the shutter button to record a voice
Starting play mode
Select the Play mode by pressing the play mode button
Playing back a still image
again
Playing back a movie Movie capture function
again will cause the movie file to restart
FFbutton
Playing back a recorded voice Playing back a voice memo
Setting up the play back function using the camera buttons
LCD monitor Indicator in play back mode
Thumbnail / Enlargement button
On/Off
Setting up the play back function using the camera buttons
Image size Maximum
Enlargement
Play & Pause / Down button
Info / Up button
Left / Right / Menu / OK button
Delete button
Printer button
Effect button Resize
Effect button Rotating an image
Press the play mode button and press the E button
Rotate menu tab
UP / Down button
Brightness control Effect button Image editing
Red eye Removal
Saturation control
Contrast control
Change the contrast by pressing the Left/ Right button
Menu Tab Main Menu
Setting up the play back function using the LCD monitor
Menu Tab Main Menu Sub Menu
4X6
Selecting Images
Multi slide show
Start the multi slide show
Are played back
Setting Background Music
Configure multi slide show effects Setting play interval
At set interval
Images are displayed with a special effect
Playback
Protecting images
Up / Down / Left / Right Select an
Up/ Down/ Left/ Right Select an image
Deleting images
Press the Right button again Standard sub menu will display
Select a desired sub menu by pressing
Select Selection window for an image to Print is displayed
Copy To Card
„ Print size
Zoom W / T Button Change the print Size
Movies and voice files cannot be printed
PictBridge
Names start from after the last stored file name
Copied folder is displayed on the LCD monitor
„ Easy printing
PictBridge Picture Selection
You can select images you want to print
Press the Up / Down button to select the number of prints
PictBridge Reset
PictBridge Print Setting
Initialises user-changed configurations
Menu Function Sub menu
Sound menu
Volume
Sound
Start up sound
Beep Sound
Setup menu
AF sound
Self Portrait
Logo
Setting up the Date / Time / Date type
Start Image
Language sub menu
LCD brightness
Start up image
Aires, Newfoundland, Caracas, La Paz
Honolulu, Hawaii, Samoa, Midway
Quick view
Formatting a memory
LCD save
File name
Initialisation
Imprinting the recording date
Auto power off
„ Connecting to an external monitor
Movie output signal from the camera can be Ntsc or PAL
Selecting Video out type
A, Canada, Japan, South Korea, Taiwan, Mexico
Auto Focus lamp
Software Notes
System Requirements
About the software
For Windows For Macintosh
Setting up the application software
Setting up the application software
Camera
„ Connecting the camera to a PC
Starting PC mode
Computer are connected
External device selection menu will be
„ Downloading stored images
Connect the camera to your PC with the USB cable
An image file is transferred from the camera to your PC
Removing the removable disk
Using the USB Driver for MAC
Setting up the USB Driver for MAC
Samsung Master
Removing the USB Driver for Windows 98SE
Samsung Master
Saturation
Edit Clip
Name
Windows media asf file types
Specifications
Sharpness
Flash
Color Effect
White Balance
Dimensions WxHxD
Power Source
Weight
Operating Temperature
Sand can be particularly troublesome to cameras
Important notes
Extremes in temperature may cause problems
File Error
Card Error
Low Battery
Card Locked
Before contacting a service centre
Incorrect date and time is displayed
flash does not fire
Camera buttons do not operate
Images don’t play back
Cable
How to temporarily disable the program
Connect the supplied USB cable Case
Manager
Correct Disposal of This Product
Correct disposal of batteries in this product
FCC notice
„ Note
Memo
100