DPOF : Taille de l'impression

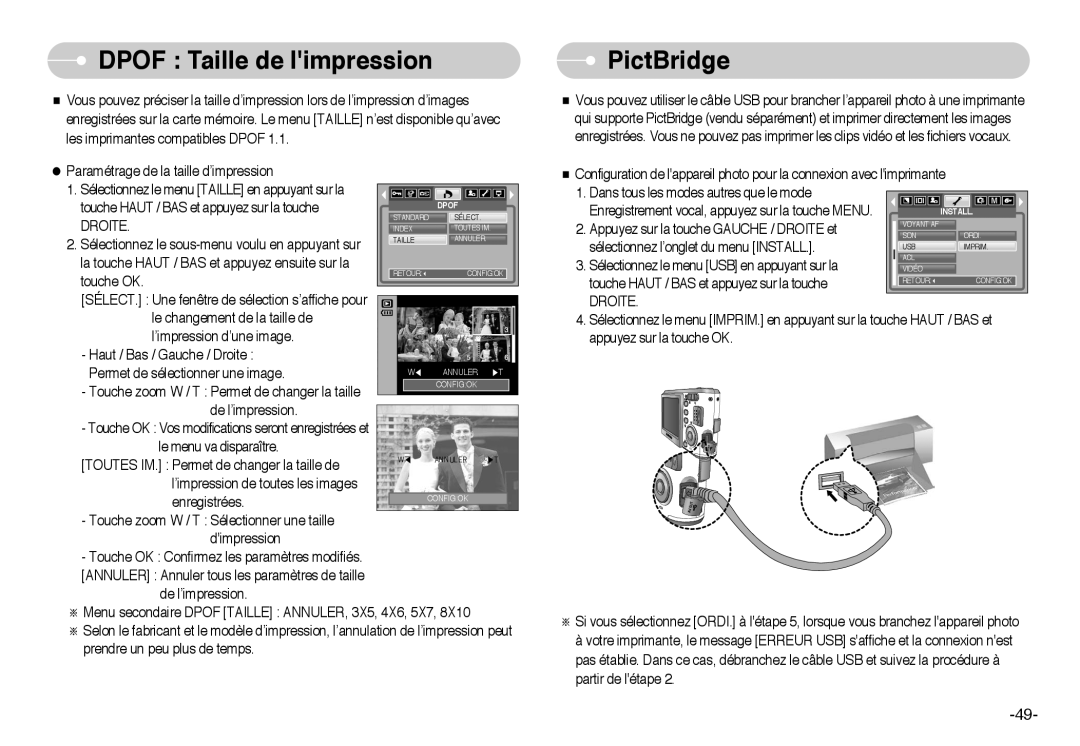
Vous pouvez préciser la taille d’impression lors de l’impression d’images enregistrées sur la carte mémoire. Le menu [TAILLE] n’est disponible qu’avec les imprimantes compatibles DPOF 1.1.

Paramétrage de la taille d’impression


1. Sélectionnez le menu [TAILLE] en appuyant sur la


touche HAUT / BAS et appuyez sur la touche


DPOF


STANDARD

SÉLECT.


DROITE.


INDEX

TOUTES IM.


2. Sélectionnez le sous-menu voulu en appuyant sur


TAILLE

ANNULER


la touche HAUT / BAS et appuyez ensuite sur la


touche OK.


RETOUR:


CONFIG:OK


[SÉLECT.] : Une fenêtre de sélection s’affiche pour


le changement de la taille de


l’impression d’une image.


- Haut / Bas / Gauche / Droite :


Permet de sélectionner une image.


W

ANNULER

T

- Touche zoom W / T : Permet de changer la taille


CONFIG:OK


de l’impression.


- Touche OK : Vos modifications seront enregistrées et


le menu va disparaître.


[TOUTES IM.] : Permet de changer la taille de


?


)66=4-:

<


l’impression de toutes les images


enregistrées.


CONFIG:OK


-Touche zoom W / T : Sélectionner une taille d'impression

-Touche OK : Confirmez les paramètres modifiés. [ANNULER] : Annuler tous les paramètres de taille

de l’impression.

Menu secondaire DPOF [TAILLE] : ANNULER, 3X5, 4X6, 5X7, 8X10

Selon le fabricant et le modèle d’impression, l’annulation de l’impression peut prendre un peu plus de temps.

PictBridge

Vous pouvez utiliser le câble USB pour brancher l’appareil photo à une imprimante qui supporte PictBridge (vendu séparément) et imprimer directement les images enregistrées. Vous ne pouvez pas imprimer les clips vidéo et les fichiers vocaux.

Configuration de l'appareil photo pour la connexion avec l'imprimante 1. Dans tous les modes autres que le mode

Enregistrement vocal, appuyez sur la touche MENU.


INSTALL.

2. Appuyez sur la touche GAUCHE / DROITE et


VOYANT AF


SON

ORDI.

sélectionnez l’onglet du menu [INSTALL.].


USB

IMPRIM.

3. Sélectionnez le menu [USB] en appuyant sur la


ACL


VIDÉO


touche HAUT / BAS et appuyez sur la touche


RETOUR:

CONFIG:OK


DROITE.


4.Sélectionnez le menu [IMPRIM.] en appuyant sur la touche HAUT / BAS et appuyez sur la touche OK.

Si vous sélectionnez [ORDI.] à l'étape 5, lorsque vous branchez l'appareil photo

àvotre imprimante, le message [ERREUR USB] s'affiche et la connexion n'est pas établie. Dans ce cas, débranchez le câble USB et suivez la procédure à partir de l'étape 2.

-49-

Page 50
Image 50
Samsung EC-L60ZZSBA/FR manual Dpof Taille de limpression, PictBridge

EC-L60ZZSBA/FR specifications

The Samsung EC-L60ZZSBA/E1 is a versatile digital camera designed for users who want a combination of quality, convenience, and functionality in their photography experience. This model, along with its variants EC-L60ZZBAA, EC-L60ZZSBB/E1, EC-L60ZZSBA/US, and EC-L60ZZSBA/FR, showcases a compelling blend of advanced features and user-friendly technologies.

One of the standout characteristics of the EC-L60 series is its impressive 14 Megapixel resolution, which enables users to capture stunningly detailed images. The camera is equipped with a powerful 5x optical zoom lens, offering a focal length range of 26-130 mm. This allows for a wide variety of shooting options, from expansive landscapes to intimate portraits, fulfilling the needs of diverse photography styles. Additionally, the integrated Optical Image Stabilization helps minimize the effects of camera shake, ensuring clearer and sharper images, even in challenging shooting conditions.

The camera's design incorporates a 3-inch LCD screen, providing an intuitive interface for framing shots, reviewing images, and navigating settings. The display offers vibrant color reproduction and clarity, allowing users to compose their photographs with ease. The EC-L60 also includes several shooting modes, including Smart Auto, which intelligently selects the best settings based on the scene, making it ideal for novice photographers who want to achieve great results without extensive technical knowledge.

In terms of connectivity, this digital camera supports USB connectivity for easy file transfers to computers and other devices. Users can quickly share their photos with friends and family or upload them to social media platforms. The camera’s compact size ensures it is portable, making it an excellent choice for travel and everyday use.

Samsung’s EC-L60 series incorporates various scene modes and special effects, allowing users to explore their creativity and enhance their images with ease. From capturing beautiful sunsets to creating artistic black-and-white shots, the camera enables photographers to express their vision.

In summary, the Samsung EC-L60ZZSBA/E1 and its variants offer a blend of high-resolution imaging capabilities, user-friendly features, and creative options. Whether you're a beginner or an experienced photographer, this camera can help you capture life’s moments with clarity and style, making it a worthwhile investment for anyone looking to elevate their photography journey.