WB210
Informace k bezpečnosti a ochraně zdraví
Nerozebírejte, ani se nepokoušejte opravit fotoaparát
Nesahejte na přístroj mokrýma rukama
Chraňte zrak objektu
Informace k bezpečnosti a ochraně zdraví
Baterie používejte pouze ke schválenému účelu
Průběhu činnosti blesku se jej nedotýkejte
Nepoužívaný nabíječ odpojte od sítě
Nepoužívejte poškozené nabíječe, baterie ani karty
Před použitím vyzkoušejte, zda fotoaparát pracuje správně
Uspořádání návodu k použití
Informace o autorských právech
Ikony použité v návodu
Zkratky použité v návodu
Další informace
Bezpečnostní a další upozornění
Výrazy použité v návodu
Použití tlačítka spouště
Objekt, pozadí a kompozice
Expozice jas
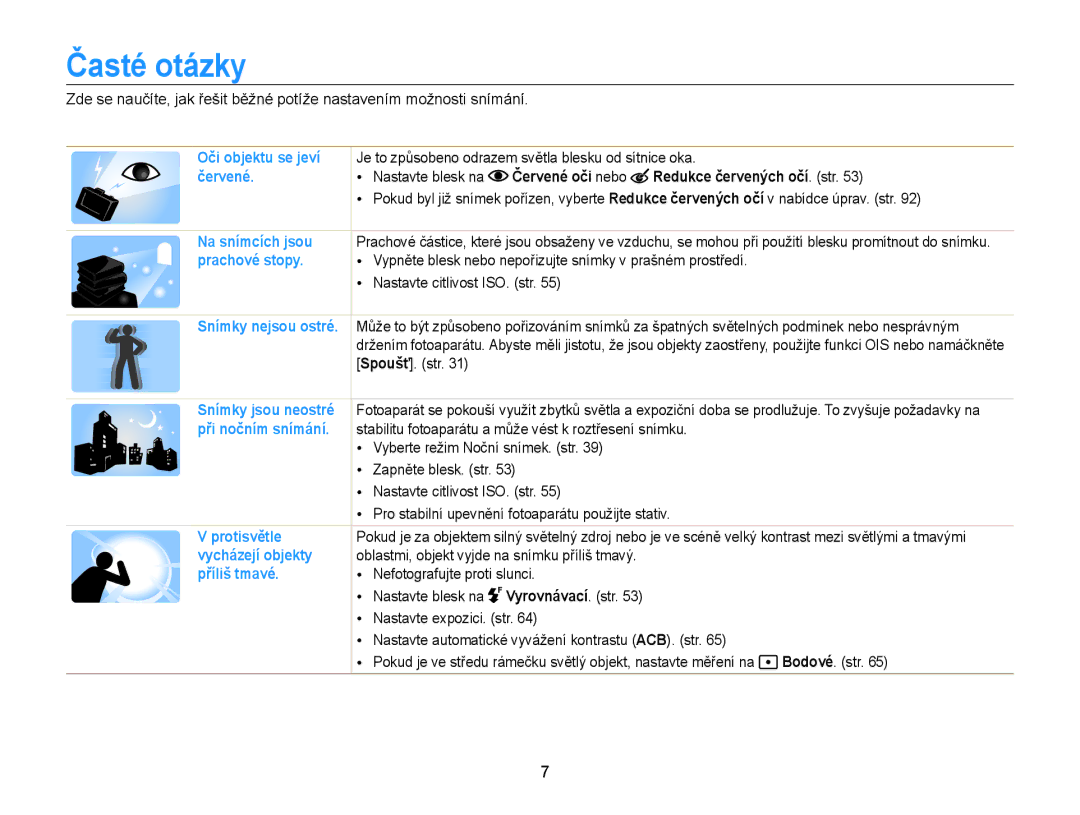
Časté otázky
Červené oči nebo Redukce červených očí. str
Náhled
Pořizování snímků osob
Obsah
Nabíjení akumulátoru a zapnutí fotoaparátu
Obsah
Pořízení snímku úsměvu Detekce zavřených očí mrknutí
Přenos souborů do počítače s operačním
Nastavení dotykové obrazovky a zvuku ……
Použití domácí obrazovky ……………………
Použití režimu Nápověda ……………………
Pořizování snímků ……………………………
Rozbalení
Volitelné příslušenství
Uspořádání fotoaparátu
Vypínač Tlačítko spouště Blesk Objektiv Zásuvka USB a A/V
Zásuvka Hdmi
Reproduktor
Uspořádání fotoaparátu
Tlačítko transfokátoru Režimu Snímání Zvětšení a
Zmenšení
Mikrofon Stavová kontrolka
Vložení baterie a paměťové karty
Kartu vložte tak, aby
Paměťová karta
Uvolněte baterii
Nabíjení akumulátoru a zapnutí fotoaparátu
Nabíjení akumulátoru
Zapnutí fotoaparátu
Oranžová Chyba
Provedení úvodního nastavení
Klepněte na Časové pásmo
Provedení úvodního nastavení
Nastavte datum
Klepněte na , a poté nastavte čas
Nastavení uložíte klepnutím na o
Stavové ikony
Použité ikony
Ikony možností dotykové
Použití dotykové obrazovky
Dotknutí
Ťukání
Tažení
Použití dotykové obrazovky
Výběr možnosti
Nastavení zvuku
Nastavení dotykové obrazovky a zvuku
Nastavení typu displeje pro dotykovou obrazovku
Použití domácí obrazovky
Otevření domácí obrazovky
Ikony domácí obrazovky
Super širokoúhlý snímek Pořízení širokoúhlého snímku. str
Přeskupení ikon
Použití domácí obrazovky
Klepněte na ikonu a podržte ji
Přetáhněte ji na nové místo
Použití režimu Nápověda
Zobrazování popisu aplikace
Zobrazení Průvodce ovládáním
Prstem, abyste vybrali volbu
Stisknutím Spoušť fotografujte
Pořizování snímků
Nastavte objekt do rámečku Namáčknutím Spoušť zaostřete
Digitální transfokátor
Transfokace
Pořizování snímků
Optický rozsah Rozlišení fotografie při
Režimu Snímání klepněte na m
Transfokace Intelli
Omezení otřesů fotoaparátu OIS
Správné držení fotoaparátu
Namáčknutí spouště
Rámeček ostření
Omezení otřesů fotoaparátu
Jak zabránit rozostření objektu snímku
Používání aretace ostření
Rozšířené funkce
Použití režimů snímání
Používání režimu Snadný snímek
Stiskem Spoušť fotografujte
Nastavte objekt do rámečku
Dostupné scény v režimu video
Použití režimů snímání
Dostupné scény v režimu foto
Používání režimu Snímání jedním dotykem
Používání režimu Snímání samospouští
Zaostřete
Používání režimu Snímek zblízka
Stiskem Spoušť spusťte časovač
Vysoký úhel Nízký úhel
Používání režimu Super širokoúhlý snímek
Stiskem Spoušť pořiďte snímek
Použití režimu Noční snímek
Používání Režimu P
Přetáhněte volič na obrazovce ve směru šipky
Přehled možností naleznete na straně
Používání režimu Záznam HD videa
Přerušení záznamu
Jako jeden video soubor
Videa jako soubory MP4 H.264
Používání režimu Záznam SD videa
Dalším stiskem Spoušť nebo klepnutím na záznam zastavíte
Použití režimů efektu
Použití režimu Snímek s retuší
Používání režimu Snímek se zvýrazněním objektu
Zobrazena na obrazovce
Použití režimů efektu
Namáčknutím Spoušt zaostřete
Vyberte požadovanou kompozici Stiskem Spoušť fotografujte
Jakmile může fotoaparát použít efekt zvýraznění objektu
Používání režimu Snímek s inteligentním filtrem
Klepněte na požadovaný filtr
Dostupné filtry v režimu foto
Dostupné filtry v režimu video
Použití režimu Záznam paletového efektu
Zastavíte
Záznam hlasových poznámek
Záznam hlasových poznámek
Klepněte na m ““Zvuk ““Záznam ““o
Obnovíte
Režimu P lze přidávat hlasové poznámky k pořízeným snímkům
Přidání hlasové poznámky ke snímku
Záznam hlasových poznámek
Snímání při špatném osvětlení ………………
Změna zaostření fotoaparátu …………………
Použití rozpoznání tváře ………………………
Nastavení jasu a barev ………………………
Volba rozlišení a kvality
Volba rozlišení
Zde se naučíte nastavovat rozlišení a kvalitu obrazu
Nastavení rozlišení snímků
Volba obrazové kvality
Nastavení kvality snímků
Volba rozlišení a kvality
Nastavení kvality videa
Snímání při špatném osvětlení
Potlačení červených očí
Použití blesku
Vypnuto
Snímání při špatném osvětlení
Červené oči
Vyrovnávací
Pomalá synchronizace
Nastavení citlivosti ISO
Změna zaostření fotoaparátu
Použití makra
Makro Ruční ostření na objekt, který je vzdálen
Cm při použití transfokátoru
Oblasti
Použití inteligentního dotykového ostření
Změna zaostření fotoaparátu
Vyberte možnost, poté klepněte na o
Nastavení oblasti ostření
Režimu Snímání klepněte na m “ Oblast ostření
Použití rozpoznání tváře
Rozpoznání tváří
Použití rozpoznání tváře
Pořízení autoportrétu
Pořízení snímku úsměvu
Detekce zavřených očí mrknutí
Použití funkce Inteligentní rozpoznání tváře
Režimu Snímání klepněte na m “ Rozpozn. tváře
Označuje obličeje, které fotoaparát registruje automaticky
Registrace tváří jako oblíbených Moje hvězda
Vyberte Moje hvězda, poté klepněte na o
Spoušť registrujte tvář
Nastavte tvář objektu do oválného vodítka a stisknem
Zobrazení oblíbených tváří
Klepněte na po zobrazení seznamu tváří
Vaše oblíbené tváře jsou v seznamu označeny pomocí
Nastavení jasu a barev
Ruční nastavení expozice EV
Režimu Snímání klepněte na m “ EV
Vyberte požadovanou hodnotu, poté klepněte na o
Kompenzace protisvětla ACB
Změna možností měření
Nastavení jasu a barev
Vysoká rychlost nebo AEB
Volba světelného zdroje vyvážení bílé
Vícebodové
Bodové
Středově vyváž
Vlastní nastavení vyvážení bílé
Sekvenční
Použití režimů série
Jednorázové Pořízení jediného snímku
Použití efektů/Úprava snímků
Použití efektů Inteligentního filtru
Režimu Snímání klepněte na m “ Inteligentní filtr
Dostupné filtry u Režim P
Použití efektů/Úprava snímků
Dostupné filtry v režimu Záznam SD videa
Retro Uplatní efekt hnědých tónů
Negativní Uplatní efekt negativu filmu
Pro uložení změn klepněte na o
Definice vlastního RGB tónu
Nastavení fotografie
Snímků v počítači
Nastavení zvuku transfokátoru
Dostupné možnosti snímání v režimu Snímání
Hlasová poznámka
Dostupné možnosti snímání v režimu Snímání
Přehrávání/Úpravy
Prohlížení snímků a videí v režimu Přehrávání
Spuštění režimu přehrávání
Prohlížení snímků a videí v režimu Přehrávání
Zobrazení souborů s využitím rozpoznání pohybu
Režimu Přehrávání klepněte na m “ Seznam tváří
Zobrazení v režimu přehrávání
Řazení oblíbených tváří
Seznam tváří
Zobrazení souborů v podobě náhledu v režimu Smart album
Klepněte na schéma
Přesunuli na předešlou nebo další stránku
Zobrazení souborů s efektem stránkování
Zobrazení souborů podle náhledu
Chraňte své soubory před náhodným smazáním
Poklepáním na
Ochrana souborů
Vyberte soubory ke smazání, poté klepněte na
Domácí obrazovce klepněte na “ “ Ano
Režimu Přehrávání klepněte na m
Mazání souborů
Zobrazení snímků
Zvětšete části snímků nebo spusťte snímky v prezentaci
Zvětšení snímku
Smazání souboru
Přehrávání prezentace
Zahrnout do prezentace
Klepnutím na spustíte prezentaci
Ořezání videa
Přehrávání videa
Aby začalo ořezání
Poslechněte si hlasovou poznámku
Přehrávání hlasových poznámek
Pořídit snímek
Přehrávání zvukové poznámky u snímku
Přerušení a pokračování přehrávání
Úprava snímků
Změna rozlišení snímků
Otočení snímku
Klepněte na Otočit, poté vyberte volbu otočení
Úprava snímků
Klepněte na “ snímek
Vyberte filtr
Pro uložení změn klepněte na
Klepněte na “ snímek Klepněte na m “ Retuš tváře
Fotografie a upravte odstín pleti
Úprava tmavých objektů ACB
Retuš tváří
Vytvoření tiskové objednávky Dpof
Odstranění červených očí
Zobrazení souborů na TV nebo Hdtv
Str
Vypněte fotoaparát a TV
Připojte fotoaparát k televizoru kabelem A/V
Zobrazení souborů na TV nebo Hdtv
Vyberte rozlišení HDMI. str
Vypněte fotoaparát a Hdtv
Soubory prohlížejte pomocí dálkového ovladače
Přenos souborů do počítače s operačním systémem Windows
Požadavky
Vyberte na počítači cílovou složku, poté vyberte Ano
Přenos souborů přes Intelli-studio
Přenos souborů do počítače s operačním systémem Windows
Použití Intelli-studio
Přenos souborů po připojení fotoaparátu jako vnějšího disku
Nastavení vypněte Software pro PC
Vypněte fotoaparát
Připojte fotoaparát jako výměnný disk k počítači
Počítači vyberte Tento počítač “ Vyměnitelný disk “
Přestane
Obrazovky počítače
Přenos souborů do počítače s operačním systémem Mac
Připojte fotoaparát k počítači Macintosh kabelem USB
Tisk snímků s tiskárnou PictBridge
Fotoaparát k tiskárně
Stisknutím zahajte tisk
Vyberte soubor určený k tisknutí
Konfiguraci nastavení tisku provedete stisknutím m
Tisk snímků s tiskárnou PictBridge
Nastavení možností tisku
Nastavení
Nabídka Nastavení
Otevření nabídky nastavení
Klepněte na položku Na domácí obrazovce klepněte na
Klepněte na nabídku
Nabídka Nastavení
Zvuk
Displej
Režimu. Vypnuto*, Zapnuto
Konektivita
Vypnuto, 0,5 s*, 1 s , 3 s
Obecné
Určete způsob, jímž se pojmenovávají soubory
Minuta, 3 minuty*, 5 minut, 10 minut
Formát
Resetováno. Ano, Ne
Resetovat
Přílohy
Chybová hlášení
Údržba fotoaparátu
Čistění fotoaparátu
Objektiv a dotyková obrazovka
Tělo fotoaparátu
Použití a ukládání fotoaparátu
Údržba fotoaparátu
Podporované paměťové karty
Paměťové karty
Další upozornění
Kapacita karty
Upozornění při používání paměťových karet
Výdrž baterie
Akumulátor
Údaje o akumulátoru
Hlášení slabé baterie
Poznámky k užívání baterie
Upozornění týkající se používání baterií
Chraňte baterie, nabíječky a paměťové karty před poškozením
Poznámky k nabíjení z připojeného PC
Správné zacházení a likvidace baterií a nabíječů
Poznámky k nabíjení akumulátoru
Zapnuté zařízení neponechávejte v uzavřeném prostoru
Pravidla pro likvidaci
Dříve, než se obrátíte na servis
Dříve, než se obrátíte na servis
“ Tento počítač “ Intelli-studio “ iStudio.exe
Technické údaje fotoaparátu
Technické údaje fotoaparátu
Omezení otřesů
Efekty
Snímání
Ukládání
Přehrávání
Záznam zvuku
Napájecí zdroj
Rozměry Š X V X H
Hmotnost
Provozní teplota
Slovníček
Slovníček
Citlivost ISO
Jpeg Joint Photographic Experts Group
LCD Displej z tekutých krystalů
Makro
Vyvážení bílé vyvážení barev
Expoziční doba
Vinětace
Správná likvidace baterií v tomto výrobku
Správná likvidace výrobku Elektrický & elektronický odpad
Rejstřík
Rejstřík
Režim foto 45 režim video
Ořezání 86 pořizování
Přehrávání 86 snímání