haust to the same conductor used to circulate hot air or for evacuating fumes from other appliances generated by other than an electrical source.

Before proceeding with the assembly operations, remove the anti-grease filter(s) (Fig.7) so that the unit is easier to handle.In the case of assembly of the appliance in the suction version prepare the hole for evacuation of the air.

We recommend the use of an air exhaust tube which has the same diameter as the air exhaust outlet hole. If a pipe with a smaller diameter is used, the efficiency of the product may be reduced and its operation may become noisier.

Fixing to the wall

Drill the holes A respecting the distances indicated (Fig.2). Fix the appliance to the wall and align it in horizontal position to the wall units. When the appliance has been adjusted, definitely fix the hood using the screws A (Fig.5). For the vari- ous installations use screws and screw anchors suited to the type of wall (e.g. reinforced concrete, plasterboard, etc.). If the screws and screw anchors are provided with the product, check that they are suitable for the type of wall on which the hood is to be fixed.

• Fixing the decorative telescopic flue

Take care not to scratch the duct; wear gloves when removing the protective film. (Fig. 3).

warning! Caution! If your appliance model features the lower connector with a tab, before fixing it in place bend the tab inwards using a pair of pliers, as illustrated in figure 5, step1.

Arrange the electrical power supply within the dimensions of the decorative flue. If your appliance is to be installed in the ducting version or in the version with external motor, prepare the air exhaust opening. Adjust the width of the support bracket of the upper flue (Fig.4). Then fix it to the ceiling using the screws A (Fig.4) in such a way that it is in line with your hood and respecting the distance from the ceiling indicated in Fig.2. Connect the flange C to the air exhaust hole using a connection pipe (Fig.5 - Stage 2).

Insert the upper flue into the lower flue. Fix the lower flue to the hood using the screws B provided (Fig.5 - Stage 2), extract the upper flue up to the bracket and fix it with the screws B (Fig.4).

To transform the hood from a ducting version into a filtering version, ask your dealer for the charcoal filters and follow the installation instructions.

• Filtering version

Install the hood and the two flues as described in the paragraph for installation of the hood in ducting version. To assemble the filtering flue refer to the instructions contained in the kit. If the kit is not provided, order it from your dealer as accessory. The filters must be applied to the suction unit positioned inside the hood. They must be centred by turning them 90 degrees until the stop catch is tripped (Fig.8).

USE AND MAINTENANCE

We recommend that the cooker hood is switched on before any food is cooked. We also recommend that the appliance is left running for 15 minutes after the food is cooked, in order to thoroughly eliminate all contaminated air.

The effective performance of the cooker hood depends on

constant maintenance; the anti-grease filter and the active carbon filter both require special attention.

The anti-grease filter is used to trap any grease particles suspended in the air, therefore is subject to saturation (the time it takes for the filter to become saturated depends on the way in which the appliance is used).

- To prevent potential fire hazards, the anti-grease filters should be washed a minimum of every 2 months (it is possible to use the dishwasher for this task).

- After a few washes, the colour of the filters may change. This does not mean they have to be replaced.

If the replacement and washing instructions are not followed, the anti-grease filters may present a fire hazard.

The active carbon filters are used to purify the air which is released back into the room. The filters are not washable or re-usable and must be replaced at least once every four months. The active carbon filter saturation level depends on the frequency with which the appliance is used, the type of cooking performed and the regularity with which the anti- grease filters are cleaned.

Clean the cooker hood frequently, both inside and outside, using a cloth which has been dampened with denatured alcohol or neutral, non-abrasive liquid detergents.

The light on the cooker hood is designed for use during cooking and not for general room illumination. Extended use of the light reduces the average duration of the bulb.

Replacing halogen light bulbs (Fig. 6).

To replace the halogen light bulbs B, remove the glass pane C using a lever action on the relevant cracks.

Replace the bulbs with new ones of the same type. Caution: do not touch the light bulb with bare hands.

•Commands: (fig.9) mechanical the key symbols are explained below:

A = LIGHT

B = OFF

C = SPEED I

D = SPEED II

E = SPEED III

THE MANUFACTURER DECLINES ALL RESPONSIBILITY FOR EVENTUAL DAMAGES CAUSED BY BREACHING THE ABOVE WARNINGS.

- 7 -

Page 7
Image 7
Samsung HDC6255BG/SLI USE and Maintenance, Fixing to the wall, Fixing the decorative telescopic flue, Filtering version

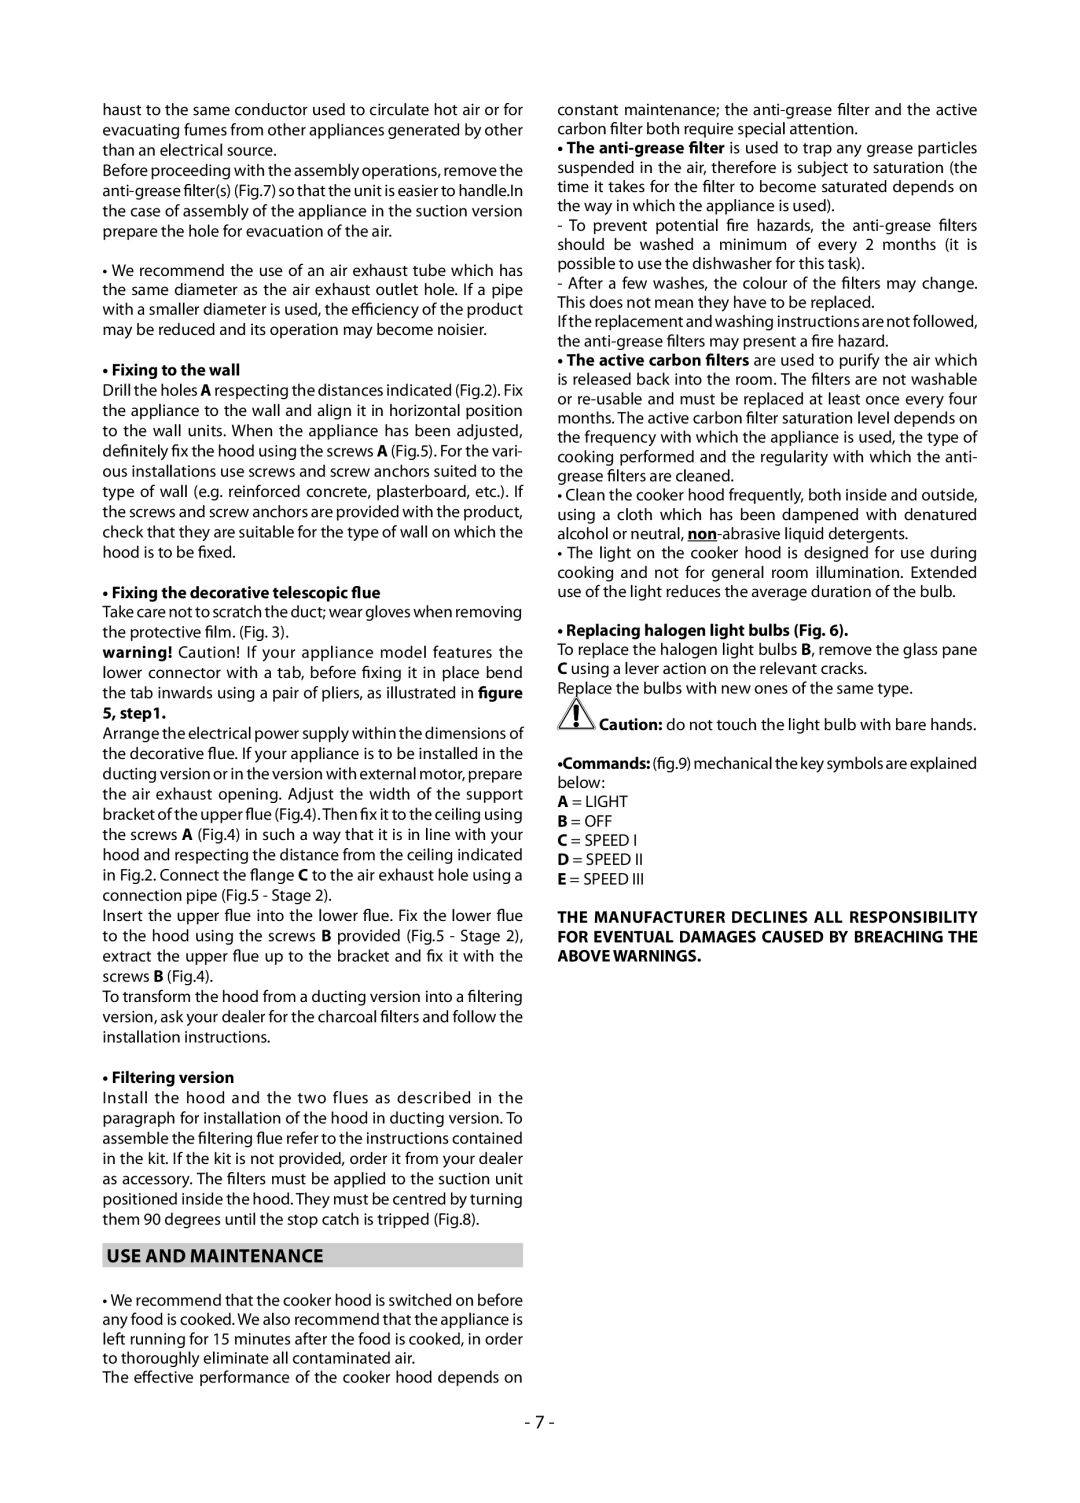
HDC6255BG/SLI, HDC6255BG/BOL, HDC6255BG/XEH specifications

The Samsung HDC6255BG series, including the HDC6255BG/XEH, HDC6255BG/BOL, and HDC6255BG/SLI, represents a significant advancement in the realm of home appliance technology. These models are designed with the modern consumer in mind, prioritizing energy efficiency, performance, and user convenience.

One of the main features of the HDC6255BG series is its energy-efficient operation. With advanced technologies aimed at reducing power consumption, these models help users save on utility bills without sacrificing performance. This is particularly important for households looking to minimize their environmental footprint while maintaining a comfortable living space.

In terms of performance, the HDC6255BG series boasts a powerful motor capable of delivering optimal results in various applications. Whether it’s cooking, cooling, or cleaning, users can count on these appliances to perform consistently and effectively. The precision engineering allows for quiet operation, which enhances the user experience, especially in residential settings.

Another notable characteristic of the HDC6255BG series is its user-friendly interface. The intuitive controls make it easy for users of all ages to operate the appliance with minimal hassle. Additionally, many of the models feature smart connectivity, allowing users to manage settings remotely via mobile apps. This level of convenience is ideal for those with busy lifestyles, enabling them to monitor and adjust their home appliances from anywhere.

Durability is a crucial aspect of the HDC6255BG lineup. Constructed with high-quality materials, these appliances are built to withstand the rigors of daily use. This ensures longevity and reliability, which are vital attributes that consumers look for when investing in home appliances.

Furthermore, the HDC6255BG series incorporates modern designs that seamlessly blend with contemporary interiors. Sleek lines, minimalist aesthetics, and various color options cater to diverse tastes and preferences, making these models not just functional but also stylish additions to any home.

In summary, the Samsung HDC6255BG series, featuring models like the HDC6255BG/XEH, HDC6255BG/BOL, and HDC6255BG/SLI, showcases a harmonious blend of energy efficiency, powerful performance, user convenience, durability, and style. These characteristics position the HDC6255BG series as a top choice for consumers looking for reliable and advanced home appliances that enhance their daily lives.