Getting Started
Description
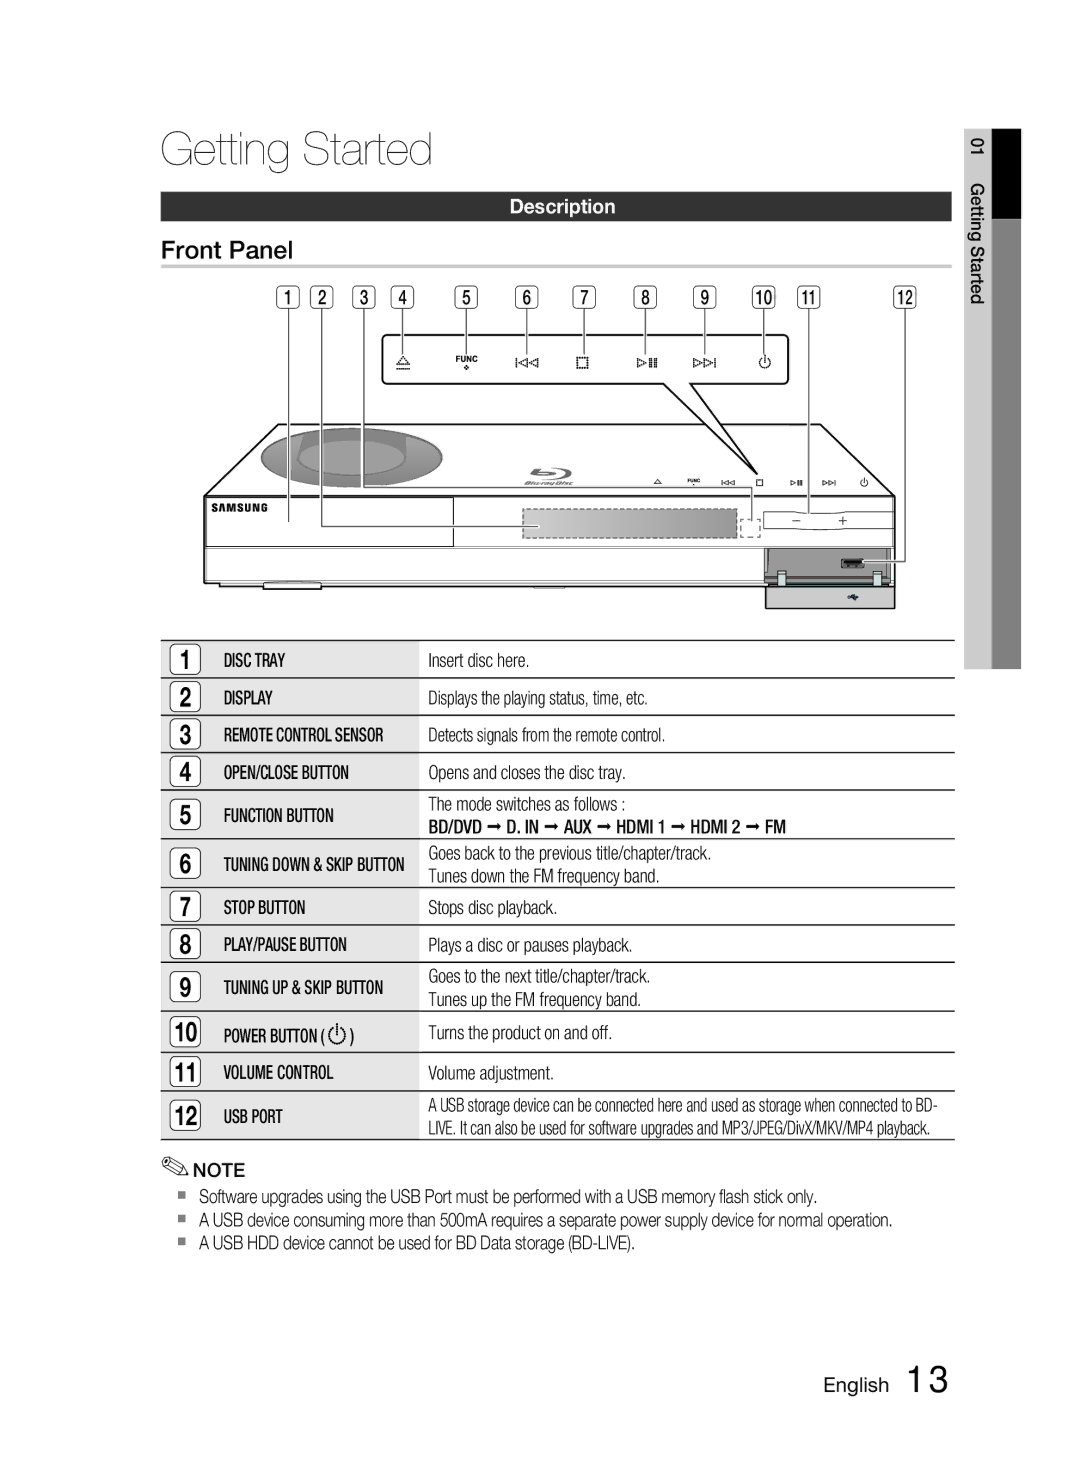
Front Panel
1 | 2 | 3 | 4 | 5 | 6 | 7 | 8 | 9 | 10 | 11 | 12 |
1 | DISC TRAY | Insert disc here. |
2 | DISPLAY | Displays the playing status, time, etc. |
3REMOTE CONTROL SENSOR Detects signals from the remote control.
4 | OPEN/CLOSE BUTTON | Opens and closes the disc tray. | |
5 | FUNCTION BUTTON | The mode switches as follows : | |
BD/DVD D. IN AUX HDMI 1 HDMI 2 FM | |||
|
| ||
6 | TUNING DOWN & SKIP BUTTON | Goes back to the previous title/chapter/track. | |
Tunes down the FM frequency band. | |||
|
| ||
7 | STOP BUTTON | Stops disc playback. | |
8 | PLAY/PAUSE BUTTON | Plays a disc or pauses playback. | |
9 | TUNING UP & SKIP BUTTON | Goes to the next title/chapter/track. | |
Tunes up the FM frequency band. | |||
|
| ||
10 | POWER BUTTON ( ) | Turns the product on and off. | |
|
|
| |
11 | VOLUME CONTROL | Volume adjustment. | |
12 | USB PORT | A USB storage device can be connected here and used as storage when connected to BD- | |
LIVE. It can also be used for software upgrades and MP3/JPEG/DivX/MKV/MP4 playback. | |||
|
|
✎NOTE
Software upgrades using the USB Port must be performed with a USB memory flash stick only.
A USB device consuming more than 500mA requires a separate power supply device for normal operation.
A USB HDD device cannot be used for BD Data storage
01 Getting Started