4.Use the number buttons on your remote to enter numbers.

5.When done with each field, use the ► button to move successively to the next field.

You can also use the other arrow buttons to move up, down, and back.

6.Enter the IP Address, Subnet Mask, and Gateway values.

7.Press the ▼ button to go to DNS.

8.Press the ▼ button to go to the first DNS entry field.

9.Press the RETURN button on your remote.

10.Run a Network Test to ensure the product has connected to your network (See page 39).

Wireless Network

You can setup the wireless network three ways:

Using PBC(WPS)

Using the Auto Network Search function.

Manually.

Each method is described below.

Setting Up the Wireless Network

Connection - PBC(WPS)

The easiest way to set up the wireless network connection is using the PBC(WPS) function.

If your wireless router has a PBC(WPS) button, follow these steps:

1.In the Network Settings menu, press the ▲▼ buttons to select Network Setting, and then press the ENTER button.

The Internet Protocol Setup screen appears.

2.Press the RED(A) button on the remote control.

3.Press the PBC(WPS) button on your router within two minutes. Your product displays the Network Selection Screen, and automatically acquires all the network setting values it needs and connects to your network. When it is done, it displays an OK button. Press the ENTER button on your remote.


03

4. After the network connection is set up,

Setup


press the RETURN button to exit the


Network Setting screen.


Setting Up the Wireless Network

Connection - Auto Network Search

Most wireless networks have an optional security system that requires devices that access the network to transmit an encrypted security code called an Access or Security Key. The Security Key is based on a Pass Phrase, typically a word or a series of letters and numbers of a specified length you were asked to enter when you set up security for your wireless network. If you use this method of setting up the network connection, and have

a Security Key for your wireless network, you will have to enter the Pass Phrase during the setup process.

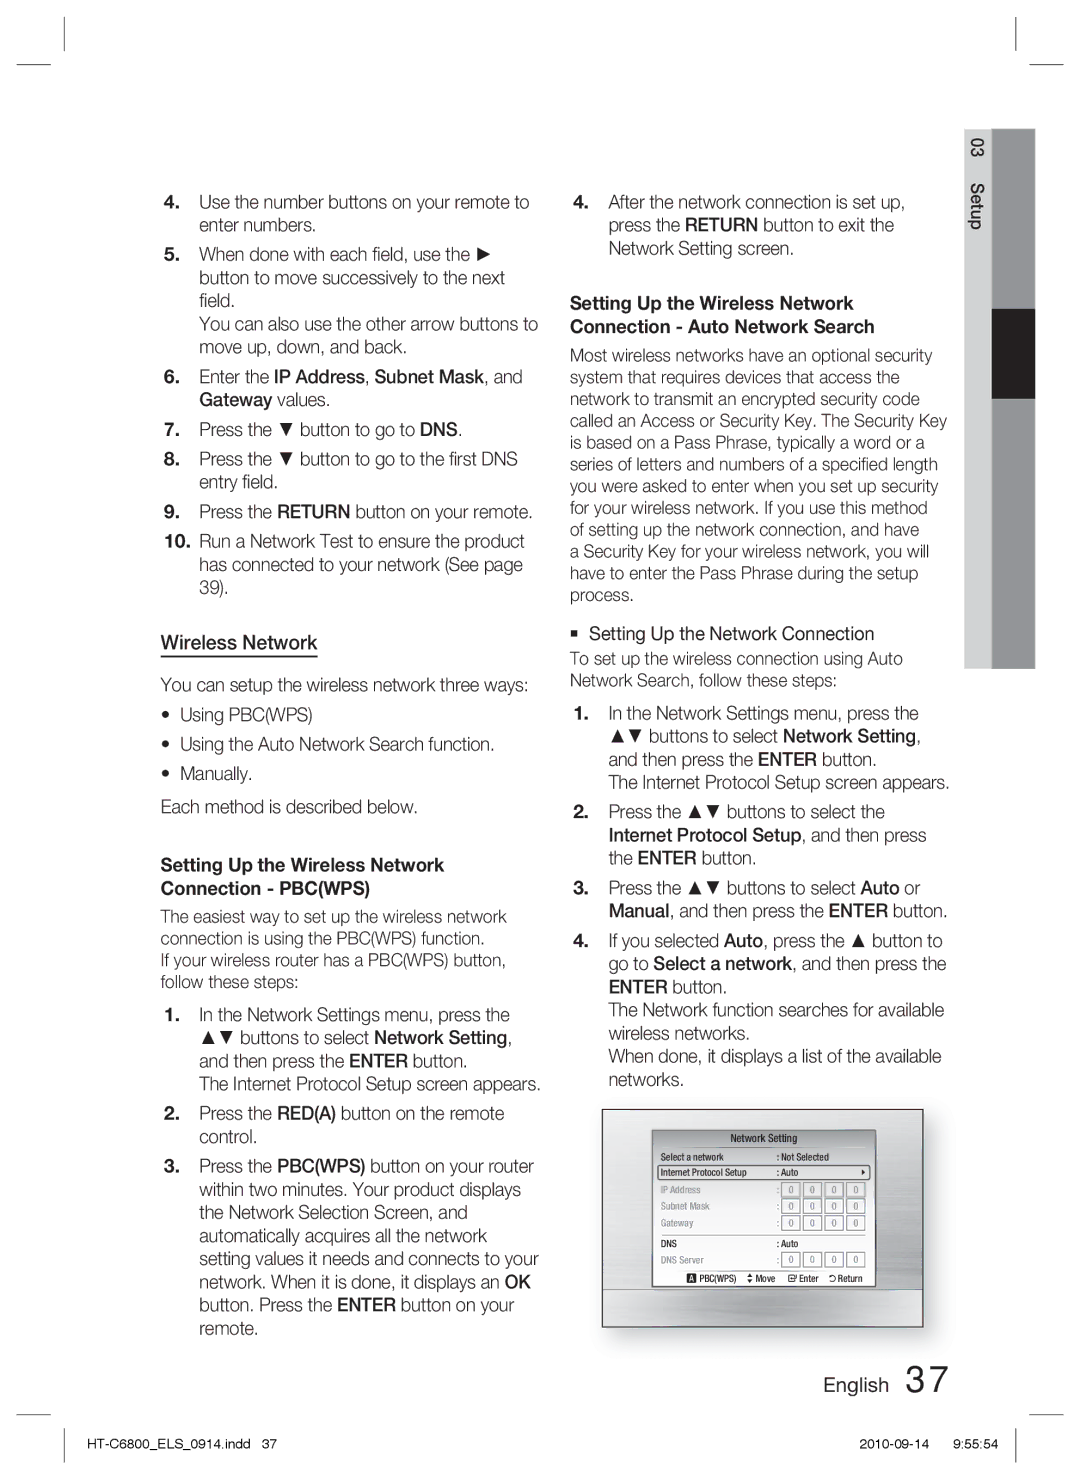
Setting Up the Network Connection To set up the wireless connection using Auto Network Search, follow these steps:

1.In the Network Settings menu, press the ▲▼ buttons to select Network Setting, and then press the ENTER button.

The Internet Protocol Setup screen appears.

2.Press the ▲▼ buttons to select the Internet Protocol Setup, and then press the ENTER button.

3.Press the ▲▼ buttons to select Auto or Manual, and then press the ENTER button.

4.If you selected Auto, press the ▲ button to go to Select a network, and then press the ENTER button.

The Network function searches for available wireless networks.

When done, it displays a list of the available networks.

Network Setting

Select a network

: Not Selected


Internet Protocol Setup

: Auto


IP Address

:

0

0


0

0

Subnet Mask

:

0

0


0

0


Gateway

:

0

0


0

0


DNS

: Auto


DNS Server

:

0

0


0

0


a PBC(WPS) > Move " Enter ' Return

English 37

HT-C6800_ELS_0914.indd 37

2010-09-14 ￿￿ 9:55:54

Page 37
Image 37
Samsung HT-C6800/XEN, HT-C6800/EDC, HT-C6800/XEF Wireless Network, Press the Return button to exit Network Setting screen

HT-C6800/EDC, HT-C6800/XEF, HT-C6800/XEN specifications

The Samsung HT-C6800 series is an impressive home theater system that offers a blend of superior audio quality and cutting-edge technology, making it an ideal choice for anyone looking to enhance their home entertainment experience. This system is available in various models, including the HT-C6800/XEN, HT-C6800/XEF, and HT-C6800/EDC, each boasting similar core features and capabilities.

One of the standout features of the HT-C6800 is its powerful 7.1-channel surround sound system. With 1330 watts of total power, it ensures immersive audio that fills the room, allowing users to experience movies and music as if they were in a theater. The system incorporates advanced sound technologies such as Dolby Digital, DTS, and Dolby Pro Logic II, providing clear dialogue and rich soundscapes that elevate the viewing experience.

The HT-C6800 series also supports Full HD 1080p video output, enhancing the visual quality of content played through the system. With the built-in Blu-ray player, users can enjoy high-definition movies with exceptional clarity and detail. Additionally, the system is equipped with the ability to upscale standard definition content to near-HD quality, ensuring that all viewing experiences are enhanced, regardless of the source.

Connectivity options on the HT-C6800 series are plentiful, including HDMI inputs and outputs, USB ports, and auxiliary connections. These allow for seamless integration with various devices such as gaming consoles, smartphones, and tablets. The inclusion of Wi-Fi connectivity is another significant aspect, enabling users to access streamed content from popular services like Netflix and YouTube directly through the system.

Another notable technology featured in the HT-C6800 series is Samsung's Anynet+ system which allows for one-touch control of connected HDMI devices with a single remote. This creates a more user-friendly experience, eliminating the need for multiple remotes cluttering the entertainment space.

In terms of design, the HT-C6800 models showcase a sleek and modern aesthetic that complements any home decor. The compact design of the speakers allows for flexible placement options, whether mounted on walls or standing freely within a room.

Overall, the Samsung HT-C6800/XEN, HT-C6800/XEF, and HT-C6800/EDC home theater systems represent a powerful and versatile solution for those looking to immerse themselves in high-quality audio and visual content. With advanced features, stylish design, and robust connectivity, these systems undoubtedly enhance the overall entertainment experience.