
HT-P30 specifications
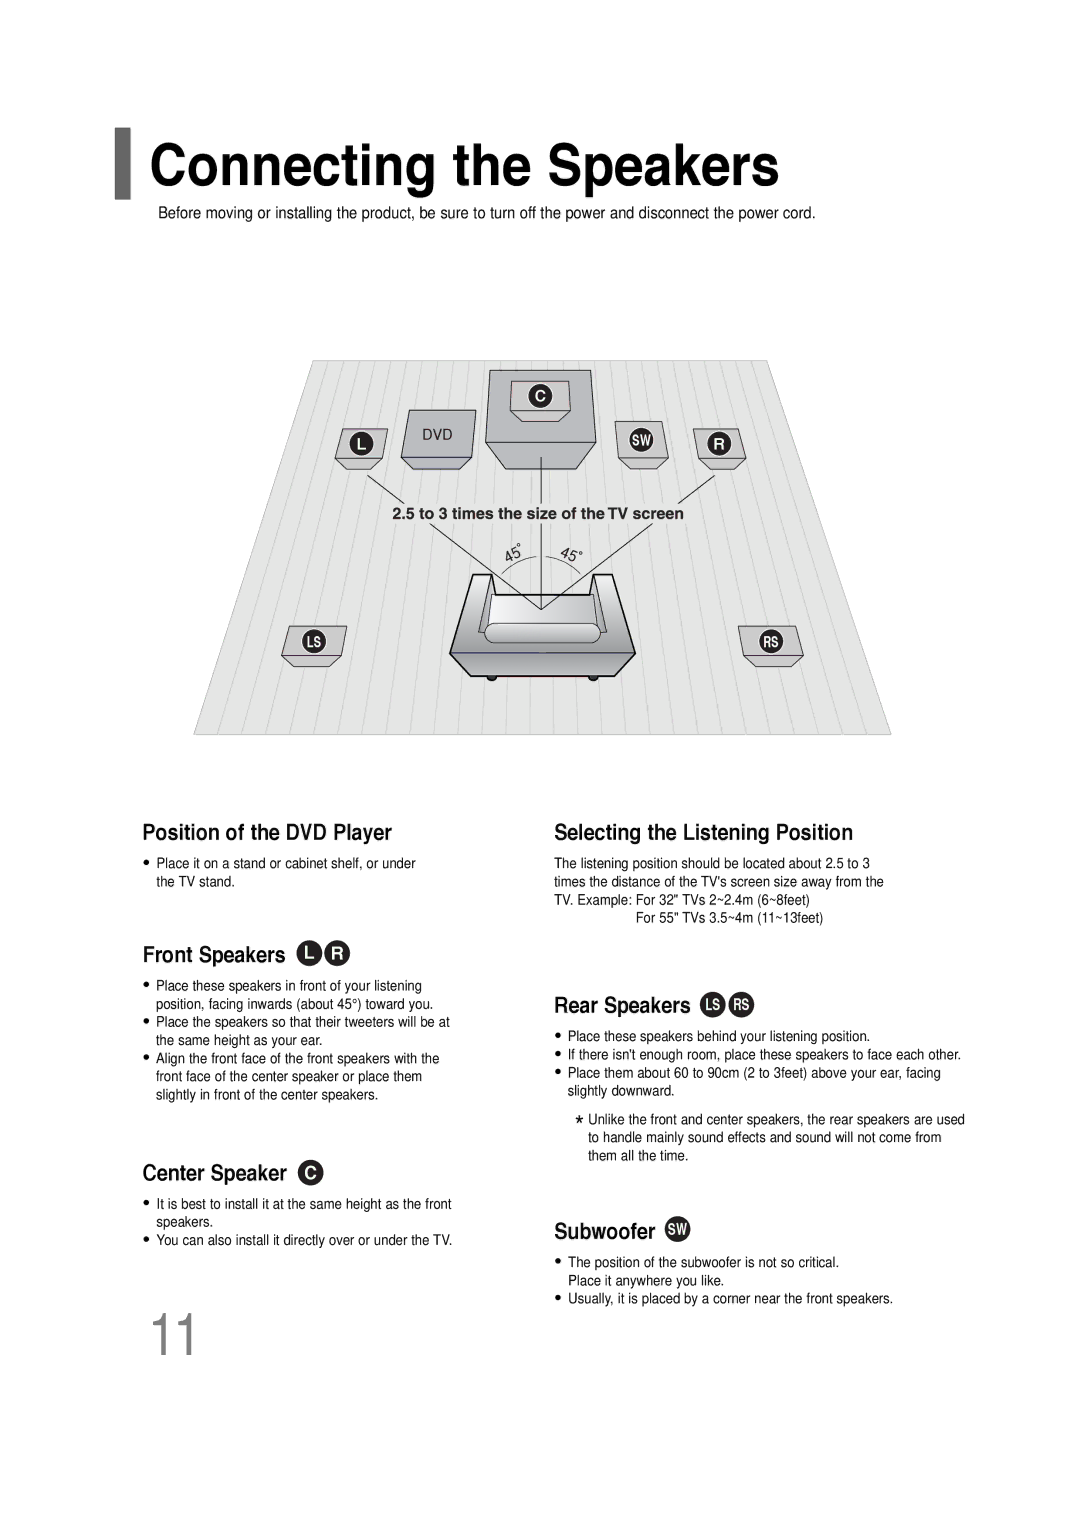
The Samsung HT-P30 is a home theater system that provides an immersive audio experience, designed to enhance the enjoyment of movies, music, and gaming. With its sleek design and advanced features, the HT-P30 combines functionality with style, making it an attractive addition to any entertainment setup.One of the standout features of the HT-P30 is its 5.1 channel surround sound, which consists of five satellite speakers and a powerful subwoofer. This configuration allows for an enveloping sound experience, where users can feel every explosion in an action film or the subtle nuances in a musical score. The subwoofer enhances the low frequencies, providing rich bass that adds depth to audio playback.
The system supports various audio formats, including Dolby Digital, which ensures high-quality sound reproduction. With the ability to decode various sound formats, users can enjoy an authentic cinematic experience right in their living room. The HT-P30 also offers various sound modes, allowing users to tailor the audio output according to their preferences and the content being played.
In terms of connectivity, the Samsung HT-P30 is equipped with multiple inputs. HDMI and optical digital inputs facilitate easy connection to modern devices, such as Blu-ray players, gaming consoles, and streaming devices. Additionally, it features USB connectivity, allowing users to play music directly from USB flash drives. This versatility makes it an excellent choice for those who use multiple devices for entertainment.
The HT-P30's built-in CD player provides another layer of convenience, allowing users to enjoy their favorite CDs without the need for additional equipment. Moreover, it supports MP3 playback, catering to digital music lovers who have collections stored on CDs or other media.
Another noteworthy characteristic of the Samsung HT-P30 is its user-friendly interface. The included remote control simplifies navigation between different audio and video sources, allowing users to easily switch from watching a movie to listening to their favorite music tracks.
Overall, the Samsung HT-P30 home theater system harmoniously blends cutting-edge audio technology with user-centric design. Whether for movie nights, music sessions, or gaming marathons, it delivers exceptional sound quality and performance, making it a worthy investment for any entertainment enthusiast.