6.Use the two Screws (M4 x L12) to attach both
●When assembling, make sure the hanger part of the
Rear Side of Soundbar
Right end of Soundbar
●The left and right mounts are different shapes. Make sure to position them correctly.
Wall Mount R | Wall Mount L |
7.Install the Soundbar with the attached Bracket- Wall Mounts by hanging the
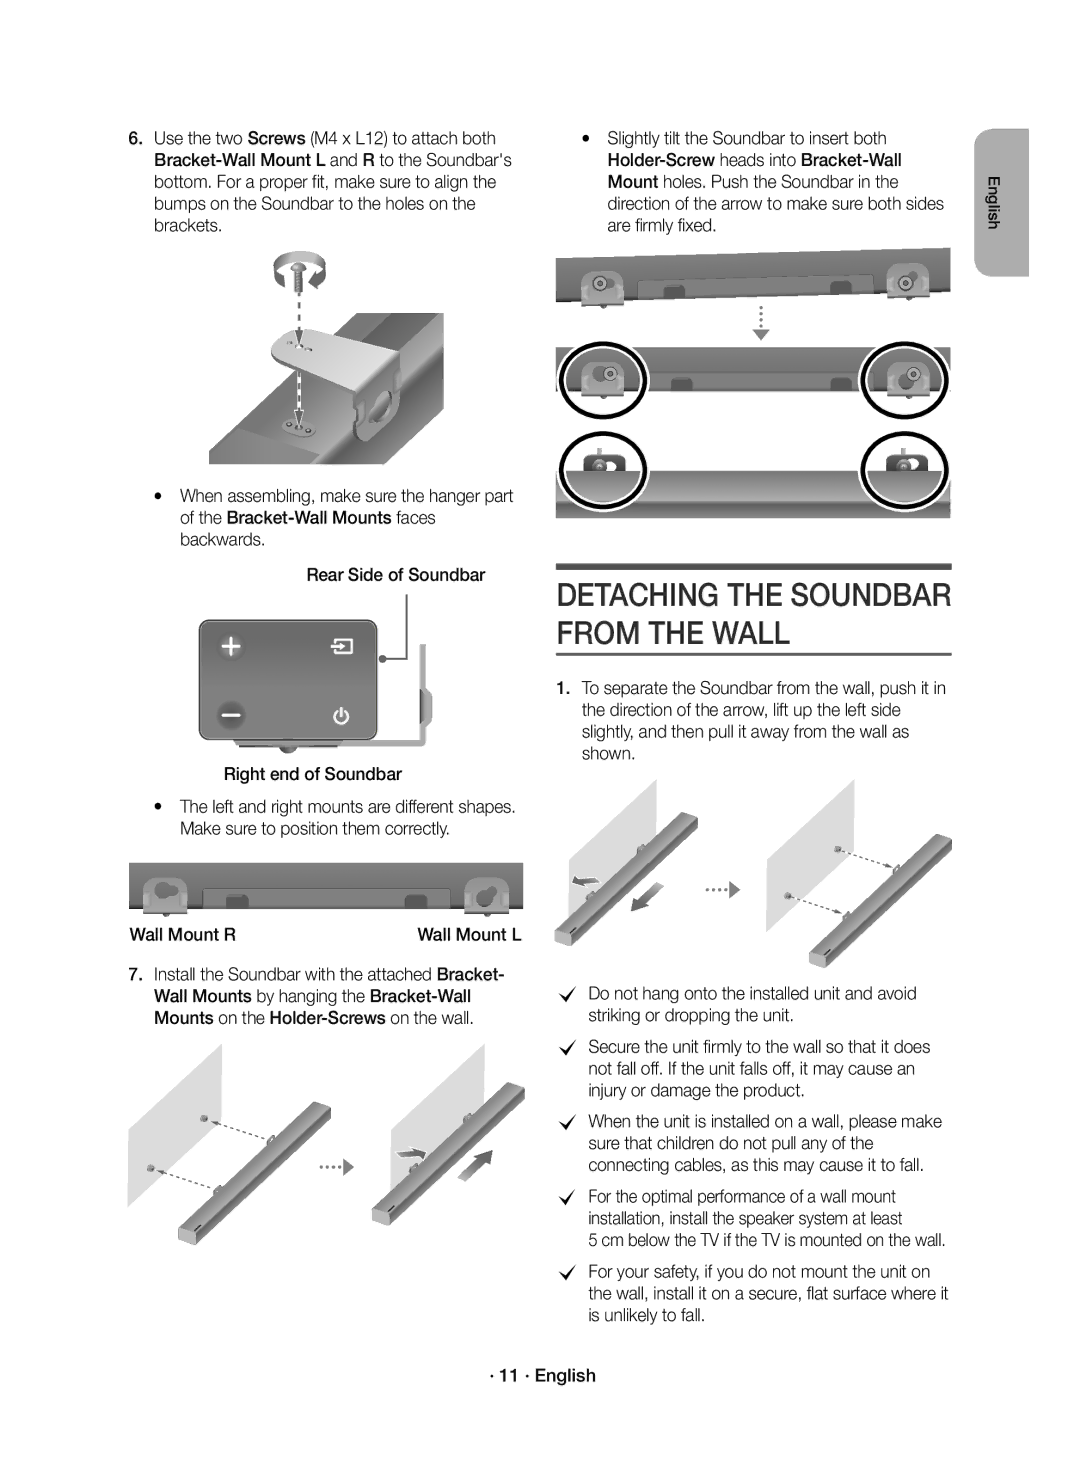
●Slightly tilt the Soundbar to insert both
DETACHING THE SOUNDBAR FROM THE WALL
1.To separate the Soundbar from the wall, push it in the direction of the arrow, lift up the left side slightly, and then pull it away from the wall as shown.
cDo not hang onto the installed unit and avoid striking or dropping the unit.
cSecure the unit firmly to the wall so that it does not fall off. If the unit falls off, it may cause an injury or damage the product.
cWhen the unit is installed on a wall, please make sure that children do not pull any of the connecting cables, as this may cause it to fall.
cFor the optimal performance of a wall mount installation, install the speaker system at least
5 cm below the TV if the TV is mounted on the wall.
cFor your safety, if you do not mount the unit on the wall, install it on a secure, flat surface where it is unlikely to fall.
English