Quick Setup Guide

Panduan Penataan Singkat

Hướng dẫn cài đặt nhanh

QM85D

English

The warranty will be void in the event of a breakdown due to exceeding the maximum recommended hours of use per day of 16 hours.

The colour and the appearance may differ depending on the product, and the specifications are subject to change without prior notice to improve the performance.

Bahasa Indonesia

Garansi akan hangus jika terjadi kerusakan akibat melampaui waktu maksimal yang disarankan untuk digunakan, yaitu, 16 jam setiap hari.

Warna dan tampilan mungkin berbeda, tergantung produk.

Spesifikasi dapat berubah tanpa pemberitahuan untuk meningkatkan performa.

Tiếng Việt

Bảo hành sẽ bị hủy trong trường hợp hư hỏng do vượt quá số giờ sử dụng tối đa hàng ngày được khuyến nghị (16 giờ).

Màu sắc và hình dáng có thể khác nhau tùy theo sản phẩm và để cải tiến hoạt động, các thông số kỹ thuật có thể sẽ được thay đổi mà không cần thông báo trước.

The terms HDMI and HDMI High-Definition Multimedia Interface, and the HDMI Logo are trademarks or registered trademarks of HDMI Licensing LLC in the United States and other countries.

BN68-06527G-00

Checking the Components

Memeriksa Komponen

Kiểm tra các thành phần

1 2 3


-

4

5


+

-

6


+

7

English

Bahasa Indonesia

Tiếng Việt

1

Quick setup guide

1

Panduan Penataan Singkat

1

Hướng dẫn cài đặt nhanh

2

Warranty card

2

Kartu Garansi

2

Thẻ bảo hành


(Not available in some


(Tidak tersedia di beberapa


(Không có ở một số khu vực)


locations)


lokasi)


3

Regulatory guide

3

Pedoman peraturan

3

Hướng dẫn điều chỉnh

4

Power cord

4

Kabel daya

4

Dây điện nguồn

5

Batteries

5

Baterai

5

Pin


(Not available in some


(Tidak tersedia di beberapa


(Không có ở một số khu vực)


locations)


lokasi)


6

Remote Control

6

Remote Control

6

Điều khiển từ xa

7

DP cable

7

Kabel DP

7

Cáp DP

Reverse Side

Sisi Belakang

Mặt sau

1


IR /AMBIENT


SENSOR IN


2


HDMI IN 3


HDMI IN 2


HDMI IN 1


3


DP IN 3


(UHD 30Hz)


DP IN 2


(UHD 60Hz)


4


DP IN 1


(UHD 60Hz)

7

8


5


DVI IN /

IR OUT

RS232C OUT RS232C IN


MAGICINFO IN


USB

RGB IN

AUDIO OUT


6


RGB / DVI /


RJ45


HDMI /


AUDIO IN


9

0

!

@

English

1Supplies power to the external sensor board or receives the light sensor signal.

2Connects to a source device using a HDMI cable or HDMI-DVI cable.

3Connects to a PC using a DP cable.

-Obtain sharp picture quality when viewing UHD content at 30Hz.

-The recommended resolution for the DP IN 3 (UHD 30Hz) port is 1920 x 1080 @ 60 Hz. The resolution can be changed to the optimal resolution of 3840 x 2160 @ 30 Hz, if required.

4Connects to a PC using a DP cable.

-Obtain sharp picture quality when viewing UHD content at 60Hz.

5DVI IN: Connects to a source device using a DVI cable or HDMI-DVI cable.

MAGICINFO IN: To use MagicInfo, make sure to connect the DP-DVI cable.

6Connects to MDC using a LAN cable.

7Receives the remote control signal via the external sensor board and outputs the signal via LOOP OUT.

8Connects to MDC using an RS232C adapter.

9Connects to a USB device when upgrading software.

0Connects to a source device using a D-SUB cable. ! Connects to the audio of a source device.

@Receives sound from a PC via an audio cable.

Bahasa Indonesia

1Mengalirkan arus ke papan sensor eksternal atau menerima sinyal sensor cahaya.

2Menyambung ke perangkat sumber menggunakan kabel HDMI atau kabel HDMI-DVI.

3Menghubungkan ke PC dengan kabel DP.

-Dapatkan gambar berkualitas tajam saat menonton tayangan UHD pada 30Hz.

-Resolusi yang direkomendasikan untuk port DP IN 3 (UHD 30Hz) adalah 1920 x 1080 @ 60 Hz. Resolusi ini dapat diubah ke resolusi optimal 3840 x 2160 @ 30 Hz, jika diperlukan.

4Menghubungkan ke PC dengan kabel DP.

-Dapatkan gambar berkualitas tajam saat menonton tayangan UHD pada 60Hz.

5DVI IN: Menyambung ke perangkat sumber menggunakan kabel DVI atau kabel HDMI-DVI.

MAGICINFO IN: Untuk menggunakan Magicinfo, jangan lupa sambungkan kabel DP-DVI.

6Terhubung ke MDC dengan kabel LAN.

7Menerima sinyal remote control via papan sensor eksternal dan memancarkan sinyal via LOOP OUT.

8Terhubung ke MDC dengan adaptor RS232C.

9Menghubungkan perangkat USB selama upgrade perangkat lunak.

0Terhubung ke perangkat sumber lewat kabel D-SUB. ! Menyambung ke audio perangkat sumber.

@Menerima suara dari PC via kabel audio.

Tiếng Việt

1Cắm nguồn vào bảng cảm biến bên ngoài hoặc nhận tín hiệu cảm biến ánh sáng.

2Kết nối với thiết bị nguồn tín hiệu bằng cách sử dụng cáp HDMI hoặc cáp HDMI-DVI.

3Kết nối với PC bằng cáp DP.

-Có được chất lượng hình ảnh sắc nét khi xem nội dung UHD ở 30Hz.

-Độ phân giải được khuyên dùng cho cổng DP IN 3 (UHD 30Hz) là 1920 x 1080 @ 60 Hz. Bạn có thể thay đổi sang độ phân giải tối ưu 3840 x 2160 @ 30 Hz nếu cần.

4Kết nối với PC bằng cáp DP.

-Có được chất lượng hình ảnh sắc nét khi xem nội dung UHD ở 60Hz.

5DVI IN: Kết nối với thiết bị nguồn tín hiệu bằng cách sử dụng cáp DVI hoặc cáp HDMI-DVI.

MAGICINFO IN: Để sử dụng MagicInfo, hãy đảm bảo kết nối cáp DP-DVI.

6Kết nối với MDC bằng cáp LAN.

7Nhận tín hiệu điều khiển từ xa qua bảng cảm biến bên ngoài và xuất tín hiệu qua LOOP OUT.

8Kết nối với MDC bằng cách sử dụng bộ điều hợp RS232C.

9Kết nối với thiết bị USB khi nâng cấp phần mềm.

0Kết nối với thiết bị nguồn bằng cáp D-SUB.

! Kết nối với âm thanh của thiết bị nguồn tín hiệu. @ Nhận âm thanh từ PC qua cáp âm thanh.

Troubleshooting Guide

Panduan Mengatasi Gangguan

Hướng dẫn xử lý sự cố

English

Issues

Solutions


The screen keeps switching on

Check the cable connection between the product

and off.

and PC, and ensure the connection is secure.


Check that the product is connected correctly with a

No Signal is displayed on the

cable.

screen.

Check that the device connected to the product is


powered on.


This message is displayed when a signal from the


graphics card exceeds the product’s maximum

Not Optimum Mode is

resolution and frequency.


displayed.

Refer to the Standard Signal Mode Table and set the


maximum resolution and frequency according to the


product specifications.


The images on the screen look

Check the cable connection to the product.

distorted.


Bahasa Indonesia

Masalah

Solusi


Layar hidup dan mati terus

Periksa sambungan kabel antara produk dan PC, serta

menerus.

pastikan kabel tersambung dengan kencang.


Pastikan produk telah tersambung dengan benar

No Signal ditampilkan pada

menggunakan kabel.

layar.

Pastikan perangkat yang tersambung ke produk telah


dihidupkan.


Pesan ini ditampilkan bila sinyal dari kartu grafis

Not Optimum Mode

melampaui resolusi dan frekuensi maksimum produk.


ditampilkan.

Lihat Tabel Mode Sinyal Standar dan tetapkan resolusi


serta frekuensi maksimum menurut spesifikasi


produk.


Gambar di layar tampak

Periksa sambungan kabel ke produk.

terdistorsi.


Tiếng Việt

Các vấn đê

Giải pháp


Màn hình liên tục bật và tắt.

Kiểm tra kết nối cáp giữa sản phẩm và PC, và

đảm bảo kết nối chắc chắn.


Kiểm tra xem sản phẩm có kết nối đúng với cáp

No Signal được hiển thị trên

chưa.

màn hình.

Kiểm tra xem thiết bị kết nối với với sản phẩm có


bật không.


Thông báo được hiển thị khi một tín hiệu từ card

Not Optimum Mode được

màn hình vượt quá độ phân giải và tần số tối đa.


hiển thị.

Tham khảo Bảng chế độ tín hiệu tiêu chuẩn và


cài đặt độ phân giải và tần số tối đa theo thông


số sản phẩm.

Hình ảnh trên màn hình bị

Kiểm tra kết nối cáp với sản phẩm

biến dạng.


Control Panel

Panel Kontrol

Pa-nen điều khiển

4

5

1 2 3

Control menu

Menu kontrol

Trình đơn điều khiển

3

2 1 5

4


Adjust Coarse and Fine.


The screen is not clear.


Remove any accessories (video extension cable, etc)


and try again.

The screen is blurry.


Set the resolution and frequency to the


recommended level.


The screen appears unstable


Check that the resolution and frequency of the PC

and shaky.


and graphics card are set within a range compatible


with the product. Then, change the screen settings

There are shadows or ghost


if required by referring to the Additional Information


on the product menu and the Standard Signal Mode

images left on the screen.


Table.


The screen is too bright.


Adjust Brightness and Contrast.

The screen is too dark.


White does not really look


Go to Picture and adjust the White Balance settings.

white.


Check the connection of the audio cable or adjust

There is no sound.


the volume.


Check the volume.


Adjust the volume.


The volume is too low.


If the volume is still low after turning it up to the


maximum level, adjust the volume on your PC sound


card or software programme.


Make sure that the batteries are correctly in place (+/-).


Check if the batteries are flat.


The remote control does not


Check for power failure.

work.


Make sure that the power cord is connected.


Check for any special lighting or neon signs switched


on in the vicinity.


Sesuaikan pengaturan Coarse dan Fine.


Lepaskan setiap aksesori (kabel ekstensi video, dsb.),

Layar tidak jelas. Layar buram.


lalu coba lagi.


Atur resolusi dan frekuensi ke tingkat yang


disarankan.


Layar tampak tidak stabil dan


Pastikan resolusi dan frekuensi PC serta kartu grafis

goyang.


ditetapkan dalam kisaran yang kompatibel dengan


produk. Setelah itu, ubah pengaturan layar jika perlu

Terdapat bayangan yang tersisa


dengan melihat Informasi Tambahan dalam menu

di layar.


produk dan Tabel Mode Sinyal Standar.


Layar terlalu cerah.


Sesuaikan pengaturan Brightness dan Contrast.

Layar terlalu gelap.


Warna putih tidak tampak putih.


Buka Picture dan sesuaikan pengaturan


White Balance.


Tidak ada suara.


Periksa koneksi kabel audio atau atur volume.


Periksa volume suara.


Mengatur volume suara.


Volume suara terlalu kecil.


Jika volume suara masih kecil setelah diperbesar ke


tingkat maksimum, atur volume suara di kartu suara


PC atau program perangkat lunak.


Pastikan baterai telah dimasukkan dengan benar (+/-).


Periksa apakah daya baterai habis.


Remote control tidak berfungsi.


Periksa kegagalan daya.


Pastikan kabel daya telah tersambung.


Periksa apakah ada cahaya khusus atau tanda neon


yang menyala di sekitarnya.


Điều chỉnh Coarse Fine.


Màn hình không rõ.


Gỡ bỏ bất kỳ thiết bị (cáp video nối dài v.v) và

Màn hình bị mờ.


thử lại.


Cài đặt độ phân giải và tần số tới mức khuyến cáo.


Màn hình không ổn định và


Kiểm tra xem độ phân giải và tần số của máy tính

rung.


và card đồ họa có được cài đặt ở mức tương


thích với sản phẩm hay không. Sau đó, thay đổi


Có bóng hoặc hình ảnh mờ


cài đặt màn hình nếu được yêu cầu bằng cách


tham khảo Thông tin bổ sung về trình đơn sản

còn lại trên màn hình.


phẩm và Bảng chế độ tín hiệu tiêu chuẩn.


Màn hình quá sáng.


Điều chỉnh Brightness Contrast.

Màn hình quá tối.


Màu trắng trông không hẳn


Đi tới Picture và điều chỉnh cài đặt

là trắng.


White Balance.


Kiểm tra kết nối của cáp âm thanh hoặc điều

Không có âm thanh.


chỉnh âm lượng.


Kiểm tra âm lượng.


Điều chỉnh âm lượng.


Âm lượng quá nhỏ.


Nếu âm lượng vẫn nhỏ sau khi bật âm lượng đến


mức tối đa, hãy điều chỉnh âm lượng trên card âm


thanh của máy tính hoặc chương trình phần mềm.


Đảm bảo rằng pin được đặt đúng chỗ (+/-).


Kiểm tra xem pin đã hết hay không.


Điều khiển từ xa không hoạt


Kiểm tra liệu không có điện.

động.


Đảm bảo rằng dây nguồn được kết nối.


Kiểm tra xem có bóng đèn đặc biệt hay ánh đèn


neon gần đó hay không.

English

1Power on the product.

If you press the button when the product is turned on, the control menu will be displayed.

2Move to the upper or lower menu.

You can also adjust the value of an option.

3Move to the left or right menu.

4Speaker

5Press a button on the remote control pointing at the sensor on the front of the product to perform the corresponding function.

Tiếng Việt

1Bật nguồn sản phẩm.

Nếu bạn nhấn nút khi sản phẩm đang bật, trình đơn điều khiển sẽ được hiển thị.

2Di chuyển tới trình đơn bên trên hoặc bên dưới. Bạn cũng có thể điều chỉnh giá trị của tùy chọn.

3Di chuyển tới trình đơn bên trái hoặc bên phải.

4Loa

5Nhấn nút trên điều khiển từ xa trỏ vào cảm biến trên mặt trước của sản phẩm để thực hiện chức năng tương ứng.

Bahasa Indonesia

1Menghidupkan produk.

Jika Anda menekan tombol saat produk menyala, menu kontrol akan ditampilkan.

2Menggerakkan menu ke atas atau ke bawah. Anda juga dapat menyesuaikan nilai suatu pilihan.

3Menggerakkan menu ke kiri atau ke kanan.

4Speaker

5Tekan tombol pada remote control yang menunjuk sensor pada bagian depan produk ini untuk melakukan fungsi terkait.

English

Bahasa Indonesia

1

Select the connected input source.

1

Pilih sumber input yang terhubung.

2

Display the OSD menu.

2

Menampilkan menu OSD.

3

Enter Go to Home mode.

3

Memasuki modus Go to Home.

4

Power off the product.

4

Mematikan produk.

5

Exit the control menu.

5

Keluar dari menu kontrol.

Tiếng Việt

1Chọn nguồn tín hiệu đầu vào được kết nối.

2Hiển thị trình đơn OSD.

3Chuyển sang chế độ Go to Home.

4Tắt nguồn sản phẩm.

5Thoát khỏi trình đơn điều khiển.

[QMD85 -ASIA-QSG]BN68-06527G-00.indd 1

2014-07-15 �� 3:40:50

Page 1
Image 1
Samsung LH85QMDPLGC/XY, LH85QMDPLGC/XV manual Reverse Side Sisi Belakang Mặt sau

LH85QMDPLGC/XY, LH85QMDPLGC/XV specifications

The Samsung LH85QMDPLGC/XV and LH85QMDPLGC/XY are high-performance display solutions that showcase Samsung’s commitment to innovation in video display technology. These models belong to Samsung's QLED signage series, designed specifically for commercial applications where reliability and outstanding image quality are paramount.

One of the remarkable features of these models is the Quantum Dot technology, which enhances color accuracy and brightness levels. This technology allows for vivid and lifelike images that captivate audiences, making it ideal for high-traffic areas like retail spaces, airports, and corporate environments. The displays support high dynamic range (HDR), which further improves contrast and detail in the visuals, ensuring that every image is sharp and clear, even in challenging lighting conditions.

The LH85QMDPLGC/XV and LH85QMDPLGC/XY models offer a resolution of 3840 x 2160 pixels, ensuring that every piece of content is displayed in stunning 4K clarity. This high resolution provides an immersive viewing experience that is crucial for advertising and presentations.

Additionally, both models come equipped with Samsung's MagicINFO software, which allows users to manage and schedule content effortlessly. This user-friendly functionality makes it easy to implement digital signage strategies that can be updated remotely, streamlining content management across multiple displays.

Durability is another significant characteristic of the LH85QMDPLGC series. Built for continuous operation, the displays boast a robust design, ensuring they can withstand the rigors of constant use in busy environments. They also feature an anti-glare coating, reducing reflections and enhancing visibility even in brightly lit spaces.

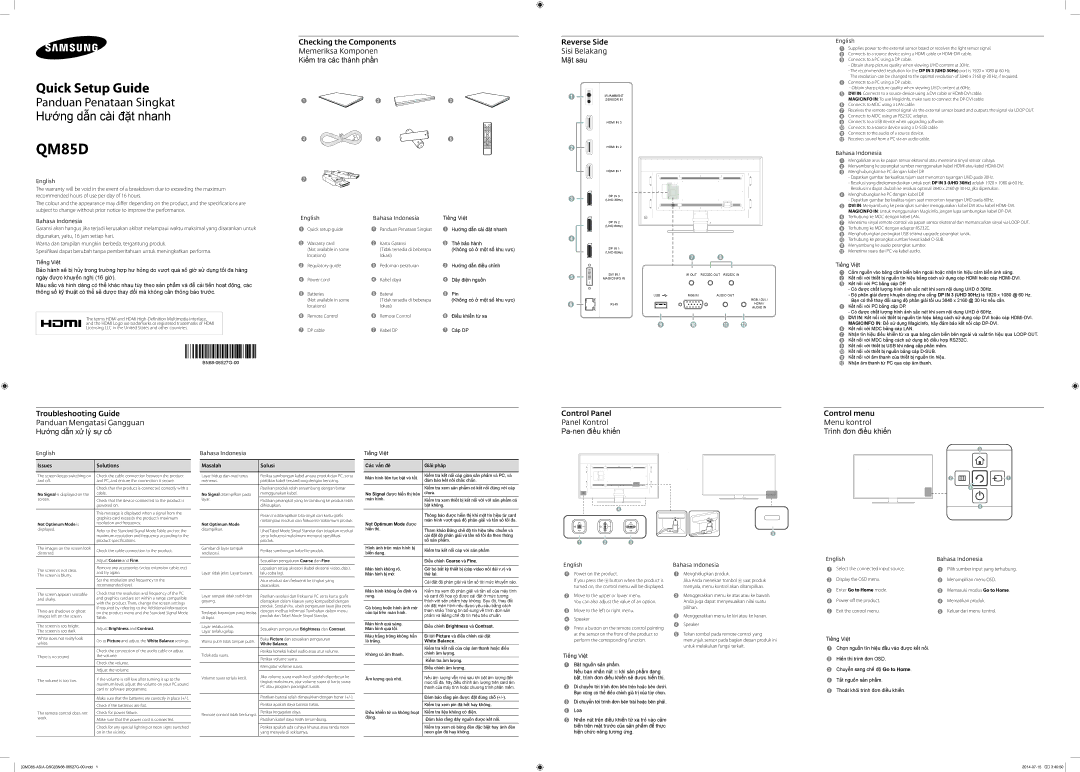
Compatibility is a noteworthy aspect of these models as well. They support various input formats, allowing for easy integration with different media sources. The displays can be connected to external devices like digital media players, computers, and other multimedia sources seamlessly.

In summary, the Samsung LH85QMDPLGC/XV and LH85QMDPLGC/XY displays are powerful commercial signage solutions that prioritize clarity, color accuracy, and durability. With their advanced technologies and user-friendly features, they are designed to meet the demands of any commercial setting, making them a perfect choice for businesses looking to enhance their visual communications.