DEMO/DIMMER function |
| Setting the Clock |
|
|
|
To replay the CD/MP3-CD
GB
All functions available on the system can be viewed on the display and the display's brightness can be switched between "on" and "off".
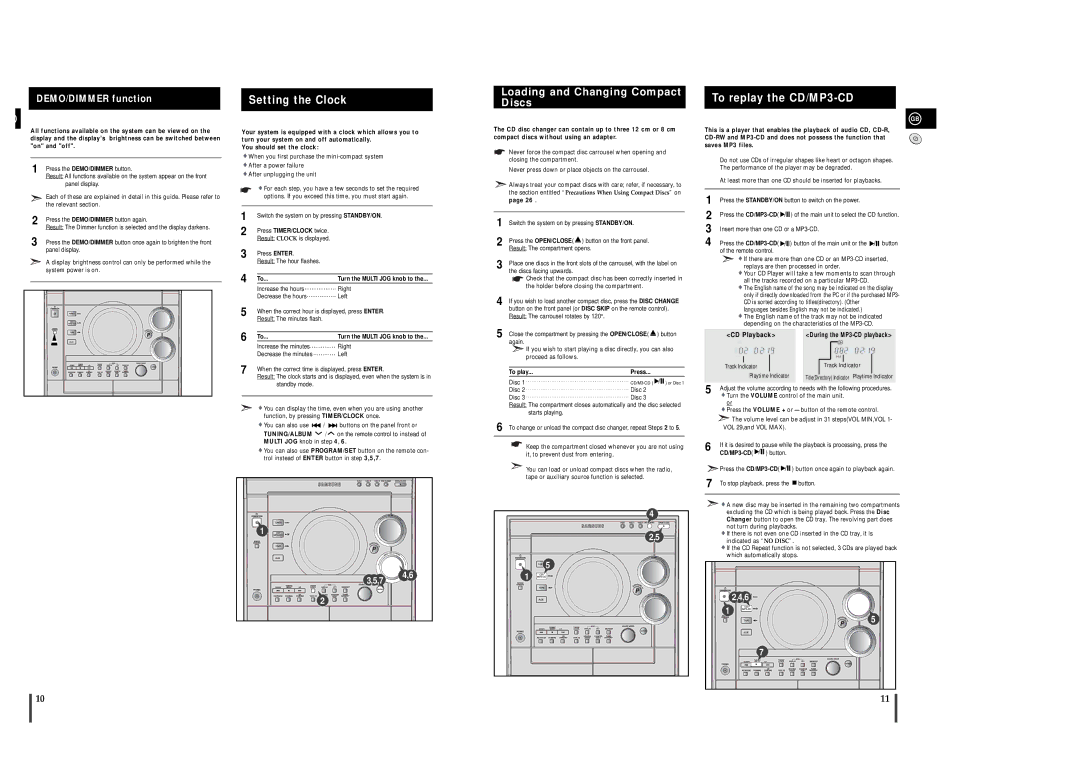
1 | Press the DEMO/DIMMER button. |
| Result: All functions available on the system appear on the front |
| panel display. |
| Each of these are explained in detail in this guide. Please refer to |
| the relevant section. |
2 | Press the DEMO/DIMMER button again. |
| Result: The Dimmer function is selected and the display darkens. |
3 | Press the DEMO/DIMMER button once again to brighten the front |
| panel display. |
A display brightness control can only be performed while the system power is on.
10
Your system is equipped with a clock which allows you to turn your system on and off automatically.
You should set the clock:
![]() When you first purchase the
When you first purchase the
![]() After a power failure
After a power failure
![]() After unplugging the unit
After unplugging the unit
![]() For each step, you have a few seconds to set the required options. If you exceed this time, you must start again.
For each step, you have a few seconds to set the required options. If you exceed this time, you must start again.
1 | Switch the system on by pressing STANDBY/ON. | |
2 | Press TIMER/CLOCK twice. |
|
| Result: CLOCK is displayed. |
|
3 | Press ENTER. |
|
| Result: The hour flashes. |
|
4 |
|
|
To... | Turn the MULTI JOG knob to the... | |
| Increase the hours | Right |
| Decrease the hours | Left |
5 | When the correct hour is displayed, press ENTER. | |
| Result: The minutes flash. |
|
6 |
|
|
To... | Turn the MULTI JOG knob to the... | |
| Increase the minutes | Right |
| Decrease the minutes | Left |
7 | When the correct time is displayed, press ENTER. | |
| Result: The clock starts and is displayed, even when the system is in | |
standby mode.
![]() You can display the time, even when you are using another function, by pressing TIMER/CLOCK once.
You can display the time, even when you are using another function, by pressing TIMER/CLOCK once.
![]() You can also use
You can also use ![]() /
/ ![]()
![]() buttons on the panel front or
buttons on the panel front or
TUNING/ALBUM ![]() /
/ ![]() on the remote control to instead of
on the remote control to instead of
MULTI JOG knob in step 4, 6.
![]() You can also use PROGRAM/SET button on the remote con- trol instead of ENTER button in step 3,5,7.
You can also use PROGRAM/SET button on the remote con- trol instead of ENTER button in step 3,5,7.
1 |
|
3,5,7 | 4,6 |
| |
2 |
|
To play... | Press... |
|
|
Disc 1 |
| ) or Disc 1 | |
| |||
| |||
Disc 2 | Disc 2 |
|
|
Disc 3 | Disc 3 |
|
|
Result: The compartment closes automatically and the disc selected starts playing.
To change or unload the compact disc changer, repeat Steps 2 to 5.
Keep the compartment closed whenever you are not using it, to prevent dust from entering.
You can load or unload compact discs when the radio, tape or auxiliary source function is selected.
4 |
2,5 |
5 |
1 |
This is a player that enables the playback of audio CD,
Do not use CDs of irregular shapes like heart or octagon shapes. The performance of the player may be degraded.
At least more than one CD should be inserted for playbacks.
1 | Press the STANDBY/ON button to switch on the power. |
|
|
|
| |||||
2 | Press the |
|
|
|
| ) of the main unit to select the CD function. | ||||
|
|
|
| |||||||
|
|
|
| |||||||
3 | Insert more than one CD or a |
|
|
|
| |||||
4 | Press the |
|
|
|
| ) button of the main unit or the |
|
|
| button |
|
|
|
| |||||||
| of the remote control. |
|
|
|
|
|
|
|
|
|
![]() If there are more than one CD or an
If there are more than one CD or an
![]() Your CD Player will take a few moments to scan through all the tracks recorded on a particular
Your CD Player will take a few moments to scan through all the tracks recorded on a particular
![]() The English name of the song may be indicated on the display only if directly downloaded from the PC or if the purchased MP3- CD is sorted according to titles(directory). (Other
The English name of the song may be indicated on the display only if directly downloaded from the PC or if the purchased MP3- CD is sorted according to titles(directory). (Other
languages besides English may not be indicated.)
![]() The English name of the track may not be indicated depending on the characteristics of the
The English name of the track may not be indicated depending on the characteristics of the
| <CD Playback> |
| <During the | |||||||
|
|
|
|
|
|
|
|
|
|
|
|
|
|
|
|
|
|
|
|
|
|
|
|
|
|
|
| Track | Indicator |
| ||
| Track Indicator |
|
| |||||||
|
| Playtime Indicator |
|
|
|
|
|
|
| |
|
|
| Title(Directory) Indicator Playtime Indicator | |||||||
5 | Adjust the volume according to needs with the following procedures. | |||||||||
| Turn the VOLUME control of the main unit. | |||||||||
or
![]() Press the VOLUME + or – button of the remote control.
Press the VOLUME + or – button of the remote control.
![]() The volume level can be adjust in 31 steps(VOL MIN,VOL 1- VOL 29,and VOL MAX).
The volume level can be adjust in 31 steps(VOL MIN,VOL 1- VOL 29,and VOL MAX).
6 | If it is desired to pause while the playback is processing, press the | ||
|
| ) button. | |
|
| ||
![]() Press the CD/MP3-CD(
Press the CD/MP3-CD( ![]()
![]()
![]() ) button once again to playback again.
) button once again to playback again.
7 To stop playback, press the | button. |
![]() A new disc may be inserted in the remaining two compartments excluding the CD which is being played back. Press the Disc Changer button to open the CD tray. The revolving part does not turn during playbacks.
A new disc may be inserted in the remaining two compartments excluding the CD which is being played back. Press the Disc Changer button to open the CD tray. The revolving part does not turn during playbacks.
![]() If there is not even one CD inserted in the CD tray, it is indicated as “NO DISC”.
If there is not even one CD inserted in the CD tray, it is indicated as “NO DISC”.
![]() If the CD Repeat function is not selected, 3 CDs are played back which automatically stops.
If the CD Repeat function is not selected, 3 CDs are played back which automatically stops.
2,4,6 |
1 |
5 |
7 |
11