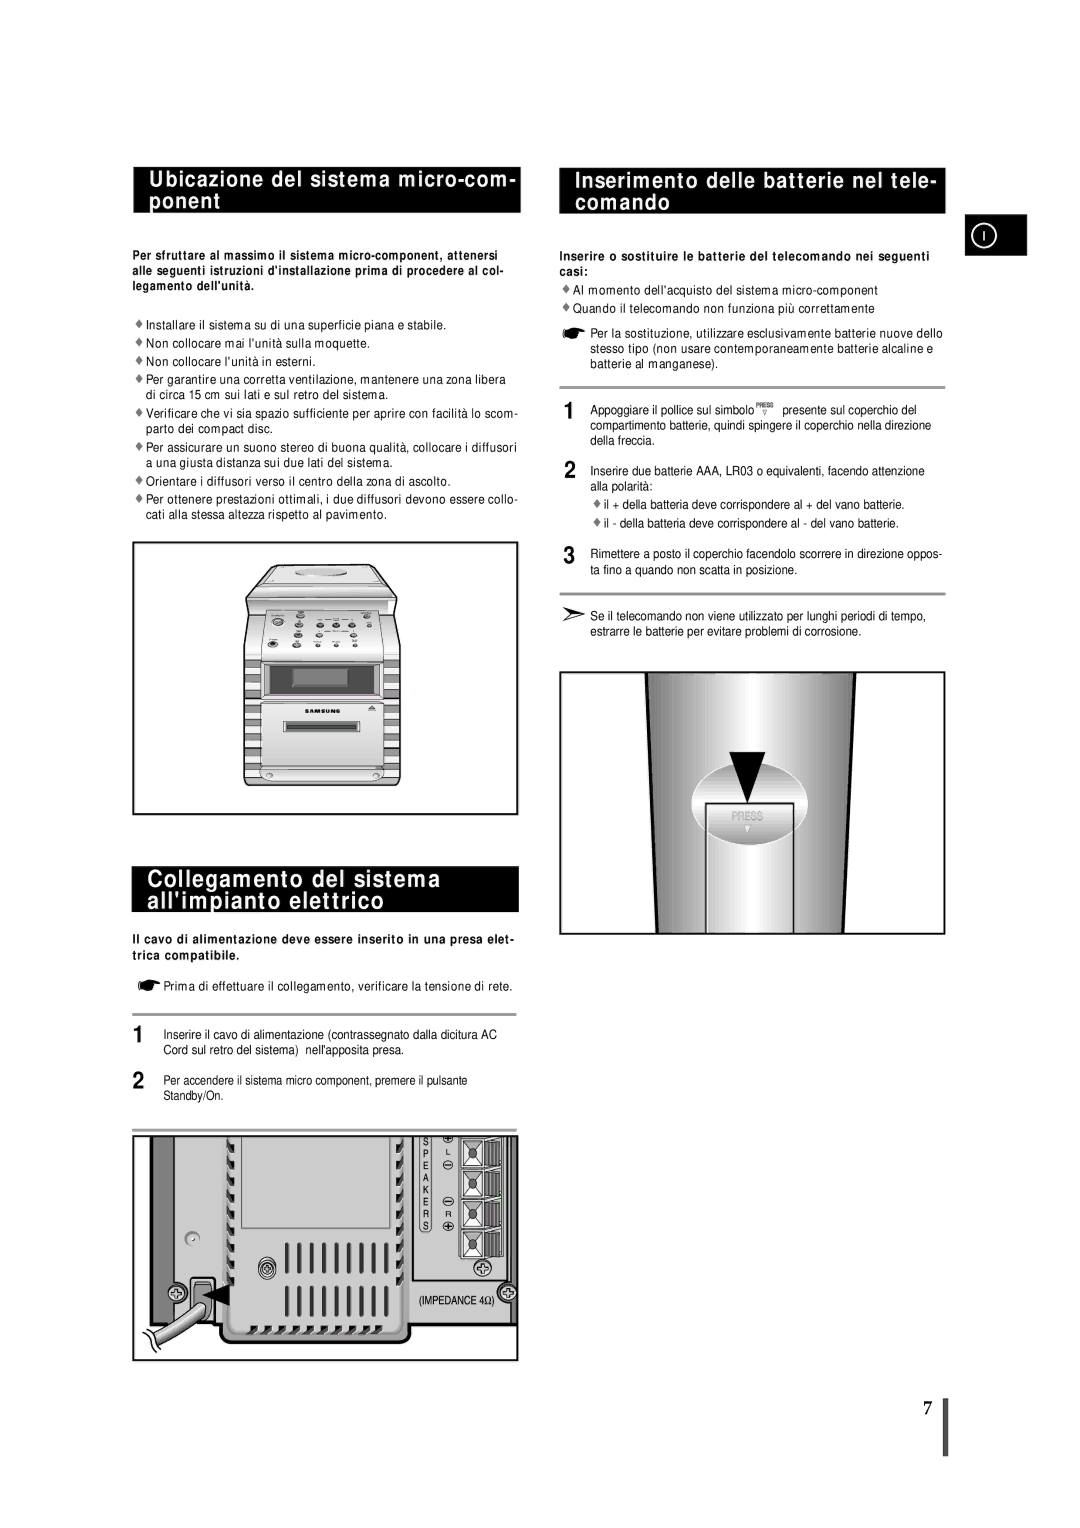
Ubicazione del sistema micro-com- ponent

Per sfruttare al massimo il sistema micro-component, attenersi alle seguenti istruzioni d'installazione prima di procedere al col- legamento dell'unità.

Installare il sistema su di una superficie piana e stabile.

Non collocare mai l'unità sulla moquette.

Non collocare l'unità in esterni.

Per garantire una corretta ventilazione, mantenere una zona libera di circa 15 cm sui lati e sul retro del sistema.

Verificare che vi sia spazio sufficiente per aprire con facilità lo scom- parto dei compact disc.

Per assicurare un suono stereo di buona qualità, collocare i diffusori a una giusta distanza sui due lati del sistema.

Orientare i diffusori verso il centro della zona di ascolto.

Per ottenere prestazioni ottimali, i due diffusori devono essere collo- cati alla stessa altezza rispetto al pavimento.


TUNER

Open/Close

Standby/On


CD


TAPE


Phones

AUX


Full Auto Remote Control Operation

Collegamento del sistema all'impianto elettrico

Il cavo di alimentazione deve essere inserito in una presa elet- trica compatibile.

Prima di effettuare il collegamento, verificare la tensione di rete.

1

Inserire il cavo di alimentazione (contrassegnato dalla dicitura AC


Cord sul retro del sistema) nell'apposita presa.

2

Per accendere il sistema micro component, premere il pulsante


Standby/On.


Inserimento delle batterie nel tele- comando

I

Inserire o sostituire le batterie del telecomando nei seguenti casi:

Al momento dell'acquisto del sistema micro-component

Quando il telecomando non funziona più correttamente

Per la sostituzione, utilizzare esclusivamente batterie nuove dello stesso tipo (non usare contemporaneamente batterie alcaline e batterie al manganese).

1

Appoggiare il pollice sul simbolo

presente sul coperchio del


compartimento batterie, quindi spingere il coperchio nella direzione


della freccia.


2

Inserire due batterie AAA, LR03 o equivalenti, facendo attenzione


alla polarità:


il + della batteria deve corrispondere al + del vano batterie. il - della batteria deve corrispondere al - del vano batterie.

3 Rimettere a posto il coperchio facendolo scorrere in direzione oppos- ta fino a quando non scatta in posizione.

Se il telecomando non viene utilizzato per lunghi periodi di tempo, estrarre le batterie per evitare problemi di corrosione.

7

Page 7
Image 7
Samsung MMB7RH/ELS manual Collegamento del sistema allimpianto elettrico, Ubicazione del sistema micro-com- ponent

MMB7RH/ELS specifications

The Samsung MM-B7, specifically the MMB7RH/ELS model, is a powerful and versatile microwave oven that brings convenience and efficiency to modern kitchens. This countertop microwave is designed with a focus on user-friendliness and advanced cooking technologies, making it a valuable addition to any household.

One of the standout features of the Samsung MM-B7 is its sleek and contemporary design. The appliance is available in a stylish finish that seamlessly blends with various kitchen aesthetics. This microwave is not just about looks; it offers a generous capacity of 23 liters, making it ideal for preparing meals for families or entertaining guests.

Functionality is at the heart of the MM-B7. It comes equipped with Samsung's innovative Smart Sensor technology, which automatically adjusts cooking time and power levels for optimal results. This feature ensures that your food is cooked evenly and to perfection, taking the guesswork out of microwave cooking. Additionally, the ceramic enamel interior is designed for easy cleaning and durability, resisting scratches and bacteria growth.

The MM-B7 also boasts multiple cooking modes, including reheat, defrost, and various auto-cook presets that cater to a wide array of dishes, from popcorn to pizza. This versatility allows users to explore and experiment in their cooking endeavors while saving time and energy.

Another notable characteristic of this microwave is its user-friendly control panel. The intuitive layout, featuring easy-to-read buttons and a digital display, ensures that programming the microwave is a hassle-free experience. The child lock feature adds an extra layer of safety, making it a great option for families with young children.

Moreover, the Samsung MM-B7 is designed with energy efficiency in mind, allowing users to save on electricity bills while still enjoying the benefits of a high-performance microwave. With its combination of sleek design, advanced cooking technology, and user-friendly features, the Samsung MM-B7, MMB7RH/ELS, stands out as a reliable appliance that enhances the cooking experience in today’s fast-paced world.