
RL34EC, RL34SG, RL34EG specifications
Samsung has established a strong reputation in the home appliance market, and its range of refrigerators, particularly the RL34EG, RL34SG, and RL34EC models, exemplifies innovation and practicality. These models have gained popularity for their robust features, sleek designs, and energy efficiency.Starting with the Samsung RL34EG, this refrigerator boasts a spacious interior with a smart layout that maximizes storage efficiency. It features Samsung's All-Around Cooling technology, ensuring even temperatures throughout the fridge. This prevents hotspots and maintains the freshness of food items stored in various compartments. The model also includes a Digital Inverter Compressor, which intelligently adjusts its speed based on cooling demand, leading to reduced energy consumption and quieter operation.
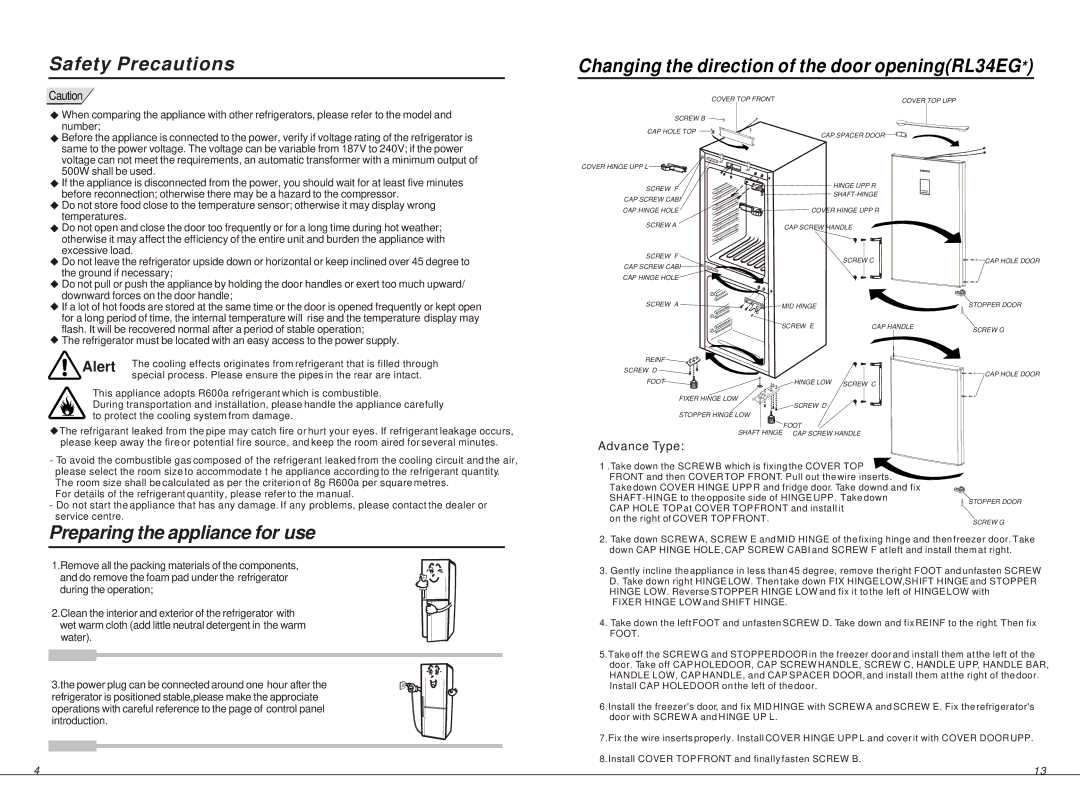
Next, the Samsung RL34SG presents a stylish stainless-steel finish that enhances any kitchen aesthetic. Besides its visual appeal, the RL34SG incorporates an ice maker, providing a steady supply of ice for drinks and parties. The refrigerator features a Multi-Flow cooling system, distributing cool air evenly across all shelves, and preventing temperature fluctuations that can affect food quality. With a user-friendly digital display, users can easily monitor and adjust settings, ensuring optimal performance.
The RL34EC model takes the characteristics of its predecessors up a notch by incorporating advanced Cooling Technology. It features a Twin Cooling System that independently cools both the refrigerator and freezer sections. This technology helps to maintain humidity levels in the fridge, which prevents food from drying out while also keeping odors from the freezer compartment at bay. The RL34EC is also designed with energy efficiency in mind, earning high energy ratings that contribute to lower utility bills.
Across the board, all three models prioritize user convenience with features like adjustable shelving, a bright LED lighting system for better visibility, and a sleek design that maximizes space efficiency. Moreover, the eco-friendly materials and components used in their construction reflect Samsung's commitment to sustainability.
In summary, the Samsung RL34EG, RL34SG, and RL34EC refrigerators offer an impressive blend of technology, functionality, and style. Whether it’s the efficient cooling systems, user-friendly features, or energy-saving capabilities, these models are well-suited for modern households looking for reliable refrigeration solutions.