Installation
Installing camera
Before installation
Before installing your camera, you have to read the following cautions:
You have to check whether the location (ceiling or wall) can bear five times the weight of your camera.
Don’t let the cable to be caught in improper place or the electric line cover to be damaged. Otherwise it may cause a breakdown or fire. You can use wall mount adaptor
When installing your camera, don’t allow any person to approach the installation site. If you have any valuable things under the place, move them away.
I
Be ar
To
1.
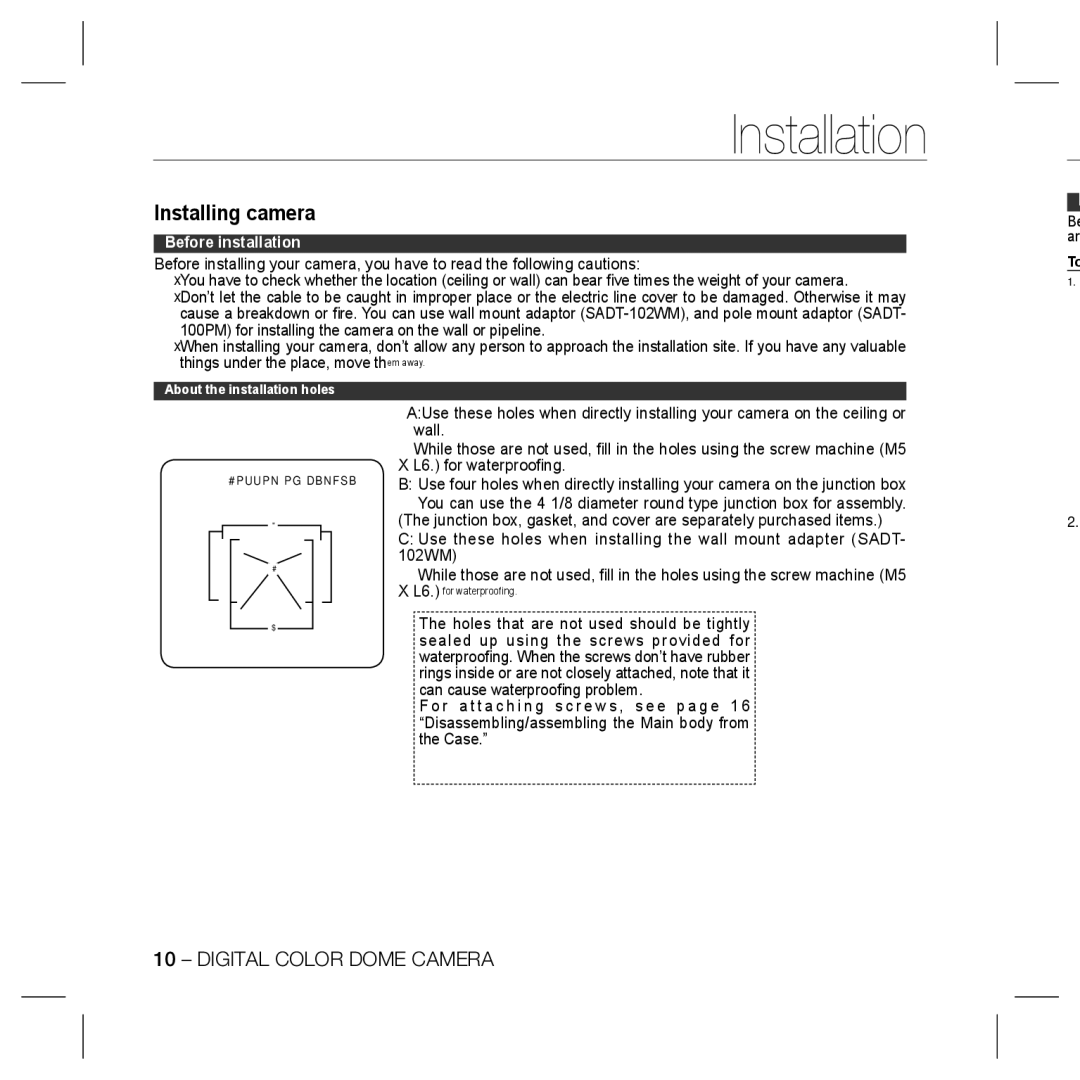
About the installation holes
Bottom of camera
A
B
C
A:Use these holes when directly installing your camera on the ceiling or wall.
While those are not used, fill in the holes using the screw machine (M5 X L6.) for waterproofing.
B: Use four holes when directly installing your camera on the junction box You can use the 4 1/8 diameter round type junction box for assembly.
(The junction box, gasket, and cover are separately purchased items.)
C:Use these holes when installing the wall mount adapter (SADT- 102WM)
While those are not used, fill in the holes using the screw machine (M5
X L6.) for waterproofing.
The holes that are not used should be tightly sealed up using the screws provided for waterproofing. When the screws don’t have rubber rings inside or are not closely attached, note that it can cause waterproofing problem.
F o r a t t a c h i n g s c r e w s , s e e p a g e 1 6 “Disassembling/assembling the Main body from the Case.”
2.
10 – DIGITAL COLOR DOME CAMERA