
SCC-B5395N, SCC-B5395P, SCC-B5394P specifications
The Samsung SCC-B5394P, SCC-B5395P, and SCC-B5395N are part of Samsung's robust line of surveillance cameras, designed for high-performance video monitoring in various environments. These models boast a range of advanced features and technologies that enhance their effectiveness in capturing clear and detailed images.One of the standout features of the SCC-B5394P and its counterparts is the high-resolution image quality they provide. The cameras are equipped with a 1/3-inch CCD sensor, which allows for exceptional clarity, ensuring that every detail is captured even in challenging lighting conditions. This resolution is crucial for security applications where identifying individuals or objects is necessary.
A key technology that sets the SCC-B5394P and its siblings apart is the Digital Signal Processing (DSP) capability. This technology optimizes video quality in real-time by adjusting settings based on the current scene, which results in improved contrast, color accuracy, and overall image quality. This ensures consistent performance in varying light conditions, whether it's bright daylight or dimly lit environments.
The cameras also feature an advanced integrated auto iris function, which allows for automatic adjustments to the lens aperture based on the lighting conditions, further enhancing the video capture's adaptability. This function is particularly useful in fluctuating light environments, maintaining optimal exposure at all times.
The SCC-B5395P and SCC-B5395N models include a built-in motion detection feature, which triggers alerts when movement is detected within the camera's field of view. This capability is vital for automated surveillance systems, as it minimizes the need for continuous monitoring while ensuring that important incidents are recorded.
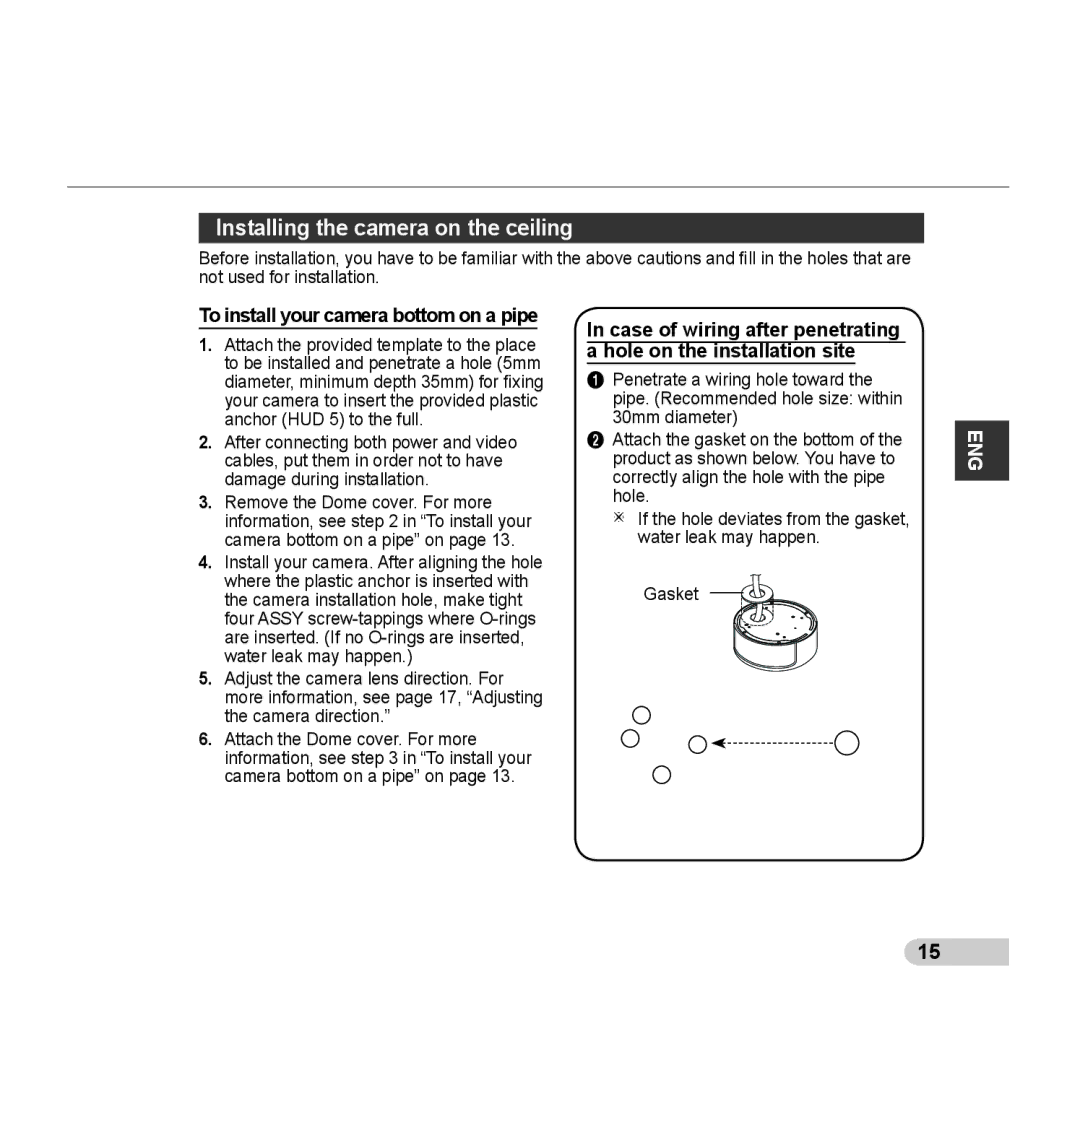
Additionally, the build quality of these cameras is robust, making them suitable for both indoor and outdoor installations. They are designed to withstand various environmental conditions, ensuring durability and longevity.
The versatility of the SCC-B5394P, SCC-B5395P, and SCC-B5395N makes them suitable for various applications, including retail environments, office buildings, and public spaces. Their combination of high-resolution imaging, advanced processing technologies, and reliable performance makes them an excellent choice for comprehensive security solutions.