UA46EH5000MXSQ, UA40EH5000MXSQ, UA32EH5000MXSQ specifications
The Samsung UA32EH4003MXSQ, UA32EH5000MXSQ, UA40EH5000MXSQ, UA46EH5000MXSQ, and UA32EH4000MXSQ are part of Samsung's lineup of LED TVs that offer impressive performance and advanced features, catering to various viewing preferences.One of the most notable features of these models is their LED display technology, which delivers vibrant colors and excellent brightness levels. The wide color gamut ensures that viewers experience more realistic and immersive visuals, while the enhanced contrast ratio enhances the depth of images, making everything from sports to movies captivating.
Samsung's HyperReal Engine is another critical technology integrated into these models. This powerful image processing technology optimizes picture quality and performs real-time adjustments to deliver sharp images with impressive detail. As a result, viewers can enjoy a more lifelike viewing experience, regardless of the source of the content.
These TV models also feature a Samsung Wide Color Enhancer, which enhances the color quality across all types of content. This feature ensures that even older movies and shows look more vibrant and true to life. The Motion Rate technology implemented within these televisions helps to reduce blurring during fast-moving scenes, providing smoother motion, especially advantageous for watching action-packed movies and sports events.
For those who appreciate audio, these models come equipped with Dolby Digital Plus technology, ensuring a rich and immersive sound experience that complements the stunning visuals. The TV's stereo speakers produce clear audio, making it enjoyable to watch anything from music concerts to thrilling dramas.
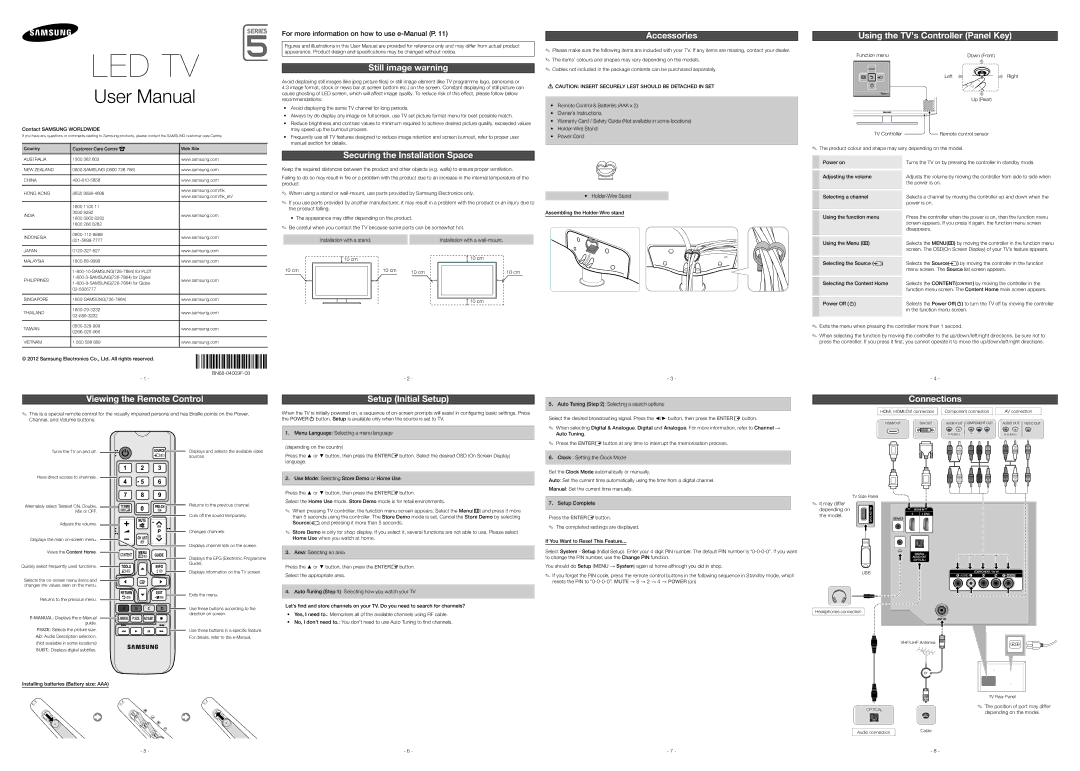
In terms of connectivity, the UA32EH4003MXSQ, UA32EH5000MXSQ, UA40EH5000MXSQ, and UA46EH5000MXSQ provide multiple HDMI and USB ports, facilitating seamless connections with external devices such as gaming consoles, set-top boxes, and media players. With the Anynet+ feature, users can conveniently control all connected HDMI devices with a single remote.
The variety of screen sizes, ranging from 32 to 46 inches, makes these models suitable for various spaces, from cozy bedrooms to larger living areas. Each model is designed with an attractive and sleek aesthetic, allowing them to blend seamlessly with modern home décor.
Overall, Samsung's UA32EH4003MXSQ, UA32EH5000MXSQ, UA40EH5000MXSQ, UA46EH5000MXSQ, and UA32EH4000MXSQ models reflect the brand's commitment to delivering quality, performance, and innovation in home entertainment. Their advanced features and technologies ensure that users have an exceptional viewing experience whether they are watching their favorite shows, movies, or playing video games.