Vacuum Cleaner Assembly
Checking Parts
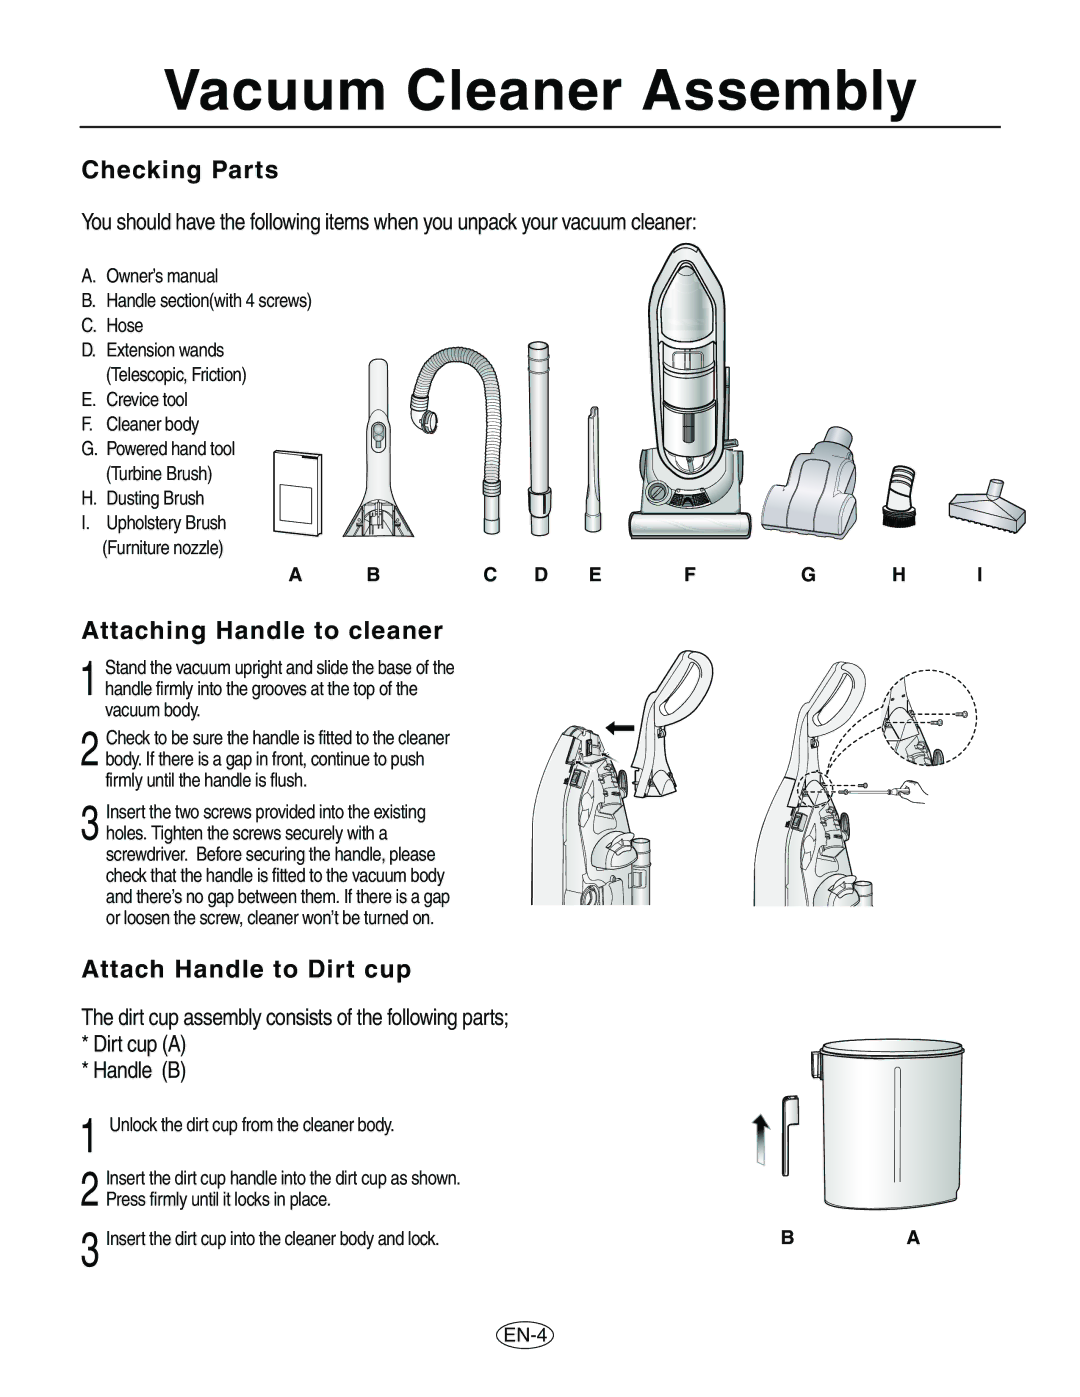
You should have the following items when you unpack your vacuum cleaner:
A. Owner’s manual
B.Handle section(with 4 screws)
C.Hose
D. Extension wands (Telescopic, Friction)
E. Crevice tool F. Cleaner body
G. Powered hand tool (Turbine Brush)
H. Dusting Brush
I. Upholstery Brush (Furniture nozzle)
A BC D E FG H I
Attaching Handle to cleaner
1 Stand the vacuum upright and slide the base of the handle firmly into the grooves at the top of the vacuum body.
2 Check to be sure the handle is fitted to the cleaner
body. If there is a gap in front, continue to push firmly until the handle is flush.
3 Insert the two screws provided into the existing holes. Tighten the screws securely with a screwdriver. Before securing the handle, please check that the handle is fitted to the vacuum body and there’s no gap between them. If there is a gap or loosen the screw, cleaner won’t be turned on.
Attach Handle to Dirt cup
The dirt cup assembly consists of the following parts; * Dirt cup (A)
* Handle (B)
1 Unlock the dirt cup from the cleaner body. |
|
|
Insert the dirt cup handle into the dirt cup as shown. |
|
|
2 Press firmly until it locks in place. |
|
|
3 Insert the dirt cup into the cleaner body and lock. | B | A |