LISTENING TO OTHER SOURCES

1. Press the FUNCTION button to select “LINE”.

2. Follow the instructions supplied with the video/auxiliary equipment.

TIMER OPERATION

Using the timer (Main unit only)

Set the on and off times, and function to be used. Operation will start with the selected function at the on time. The sound will be gradually increased from a no-sound level to the current volume setting (fade-in).

The power will be switched off at the off time.

The timer will function every day unless it is released.

Preparation

Note:

Make absolutely sure that the clock is set to the correct time and the main unit is in power on mode before setting the timer.

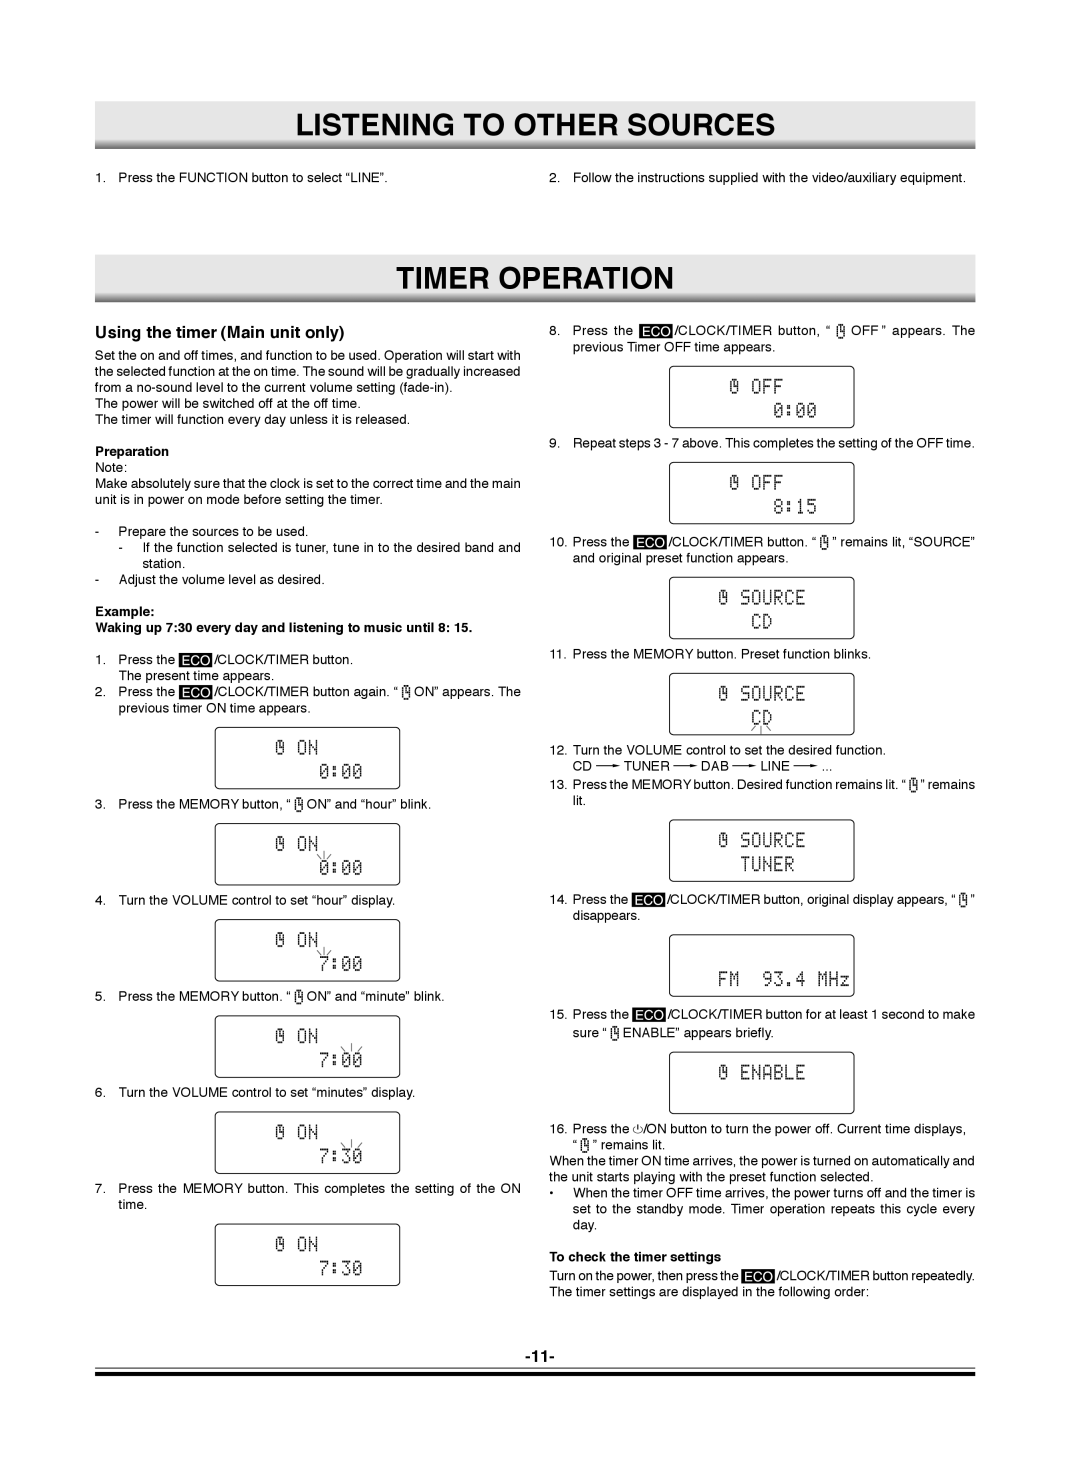
8.Press the /CLOCK/TIMER button, “ OFF ” appears. The previous Timer OFF time appears.

9.Repeat steps 3 - 7 above. This completes the setting of the OFF time.

-Prepare the sources to be used.

-If the function selected is tuner, tune in to the desired band and station.

-Adjust the volume level as desired.

Example:

Waking up 7:30 every day and listening to music until 8: 15.

1.Press the /CLOCK/TIMER button. The present time appears.

2.Press the /CLOCK/TIMER button again. “ ON” appears. The previous timer ON time appears.

3.Press the MEMORY button, “ ON” and “hour” blink.

4.Turn the VOLUME control to set “hour” display.

5.Press the MEMORY button. “ ON” and “minute” blink.

6.Turn the VOLUME control to set “minutes” display.

7.Press the MEMORY button. This completes the setting of the ON time.

10.Press the /CLOCK/TIMER button. “ ” remains lit, “SOURCE” and original preset function appears.

11.Press the MEMORY button. Preset function blinks.

12.Turn the VOLUME control to set the desired function. CD v TUNER v DAB v LINE v ...

13.Press the MEMORY button. Desired function remains lit. “ ” remains lit.

14.Press the /CLOCK/TIMER button, original display appears, “ ” disappears.

15.Press the /CLOCK/TIMER button for at least 1 second to make sure “ ENABLE” appears briefly.

16.Press the z/ON button to turn the power off. Current time displays, “ ” remains lit.

When the timer ON time arrives, the power is turned on automatically and the unit starts playing with the preset function selected.

When the timer OFF time arrives, the power turns off and the timer is set to the standby mode. Timer operation repeats this cycle every day.

To check the timer settings

Turn on the power, then press the /CLOCK/TIMER button repeatedly. The timer settings are displayed in the following order:

-11-

Page 13
Image 13
Sanyo DC-DAB03 instruction manual Listening to Other Sources, Timer Operation, Using the timer Main unit only, Preparation

DC-DAB03 specifications

The Sanyo DC-DAB03 is a compact digital radio that has gained popularity for its blend of versatility and functionality. This model is designed for users seeking a reliable source for digital radio broadcasting, delivering high-quality audio and a range of features that enhance the user experience.

One of the standout features of the Sanyo DC-DAB03 is its ability to receive DAB (Digital Audio Broadcasting) and DAB+ signals. This provides users with access to a wider variety of stations and improved sound quality compared to traditional analog radios. The DAB+ technology also allows for more efficient transmission of audio, ensuring listeners can enjoy clearer reception with minimal interference.

With an easy-to-read LCD display, the Sanyo DC-DAB03 offers clear visibility of station information, track titles, and settings, making navigation intuitive for all users. The display often includes additional features such as signal strength, which helps in finding the best stations available in a given area. This adds a layer of convenience as users can effortlessly scroll through various available channels.

In terms of design, the Sanyo DC-DAB03 is sleek and portable, making it an ideal companion for both indoor and outdoor use. Its lightweight construction and battery-operated functionality allow users to take their favorite radio shows on the go, whether it's during a picnic, at the beach, or while traveling. The device often includes an AC adapter for easy charging and use at home.

The Sanyo DC-DAB03 also boasts a built-in speaker, which delivers robust sound quality for an immersive listening experience. Additionally, it often features a headphone jack, allowing private listening when desired. The radio's interface is typically user-friendly, with straightforward controls for tuning, volume adjustment, and station presets, ensuring that users can quickly find and listen to their desired channels.

Incorporating modern technology, the Sanyo DC-DAB03 often supports additional functions such as alarm and timer features, making it a practical choice for those who enjoy waking up to their favorite radio station. With its combination of impressive features, sound quality, and portability, the Sanyo DC-DAB03 stands out as a strong contender in the digital radio market. It is suitable for anyone looking for reliability, versatility, and an enhanced audio experience.