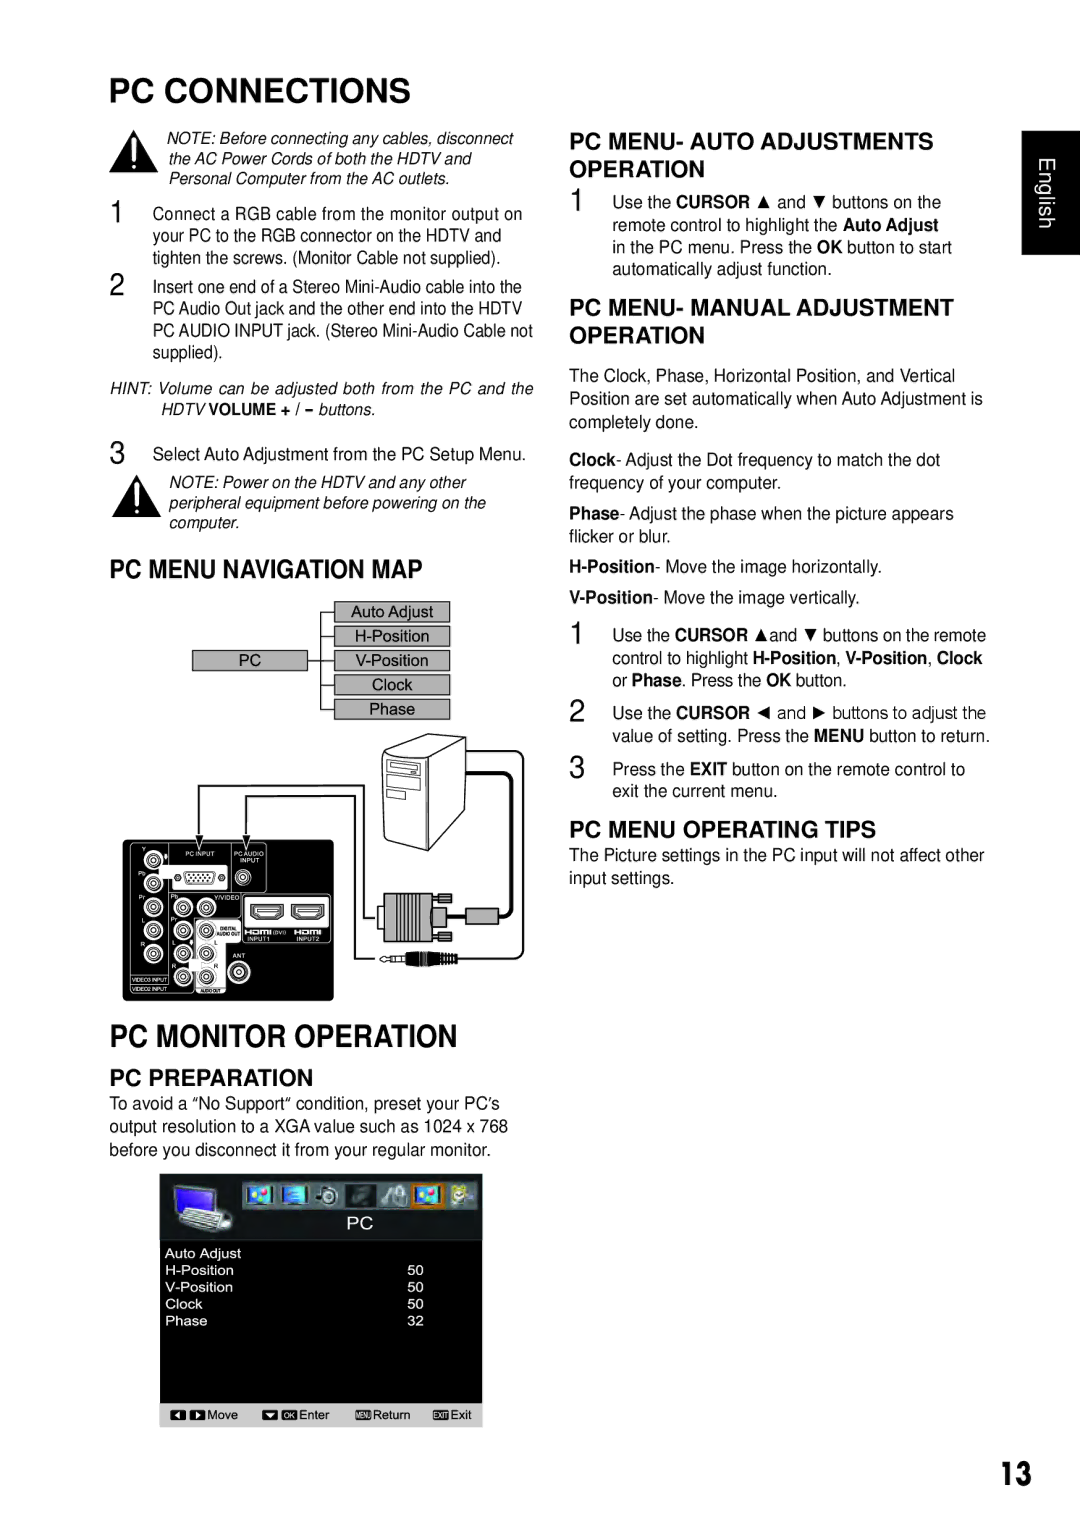
PC CONNECTIONS
NOTE: Before connecting any cables, disconnect the AC Power Cords of both the HDTV and Personal Computer from the AC outlets.
1 Connect a RGB cable from the monitor output on your PC to the RGB connector on the HDTV and tighten the screws. (Monitor Cable not supplied).
2 Insert one end of a Stereo
HINT: Volume can be adjusted both from the PC and the HDTV VOLUME + / - buttons.
3 Select Auto Adjustment from the PC Setup Menu.
NOTE: Power on the HDTV and any other peripheral equipment before powering on the computer.
PC MENU NAVIGATION MAP
PC MONITOR OPERATION
PC PREPARATION
To avoid a “No Support“ condition, preset your PC’s output resolution to a XGA value such as 1024 x 768 before you disconnect it from your regular monitor.
PC MENU- AUTO ADJUSTMENTS OPERATION
1 Use the CURSOR ▲ and ▼ buttons on the remote control to highlight the Auto Adjust in the PC menu. Press the OK button to start automatically adjust function.
PC MENU- MANUAL ADJUSTMENT OPERATION
The Clock, Phase, Horizontal Position, and Vertical Position are set automatically when Auto Adjustment is completely done.
Clock- Adjust the Dot frequency to match the dot frequency of your computer.
Phase- Adjust the phase when the picture appears flicker or blur.
1 Use the CURSOR ▲and ▼ buttons on the remote control to highlight
2 Use the CURSOR ◄ and ► buttons to adjust the
value of setting. Press the MENU button to return.
3 Press the EXIT button on the remote control to exit the current menu.
PC MENU OPERATING TIPS
The Picture settings in the PC input will not affect other input settings.
English
13