(STEREO) POSITION: The left channel sound (L) is heard from the left speaker and the right channel sound (R) is heard from the right speaker.
(LEFT) POSITION: The left channel sound (L) is heard from both speakers.
(RIGHT) POSITION: The right channel sound (R) is heard from both speakers.
3 Press MENU when finished.
4 Insert a cassette and press PLAY. Adjust the volume on your stereo system.
MTS (Multi-Channel TV Sound)
This VCR will decode MTS stereo and bilingual (SAP) off-the-air broadcast sound signals. It also decodes stereo TV sound from local cable companies, as long as they operate on assigned cable frequencies and use the EIA- recommended MTS stereo/bilingual TV sound system.
Set the AUDIO OUTPUT item to STEREO position.
2
Set AUDIO MODE to HI-FI on the SETUP menu .
1
VHS Hi-Fi STEREO SYSTEM/ MTS BROADCAST
This VCR is equipped with the VHS Hi-Fi audio sound system for recording and playback. The information below gives a brief description of Hi-Fi audio and how to record and play a tape in the Hi-Fi audio mode.
To enjoy the Hi-Fi stereo system, you connect your VCR’s AUDIO(R/L)/VIDEO OUT jacks to the AUDIO (R/L)/VIDEO INPUT jacks on the back of your TV (or another A/V system) using the A/V cable.
PLAYBACK WITH Hi-Fi STEREO AUDIO SOUND
A stereo TV with AUDIO/VIDEO input jacks or a stereo audio system is required for true stereo playback. To experience the full, rich stereo sound available with Hi-Fi recorded tapes, we recommend the connection of this unit to a home stereo audio system.
CHECKING THE RECORDING TIME
Press REC once to check the recording time. The recalled setting will automatically appear on the TV screen after 6 seconds.
TO EXTEND THE RECORDING TIME
The recording time can be extended at anytime by press- ing REC.
Subsequent presses result in advancing the recording time by 30-minute increments.
NOTES
•If you press PAUSE during instant timer recording, the VCR will enter the recording pause mode. Instant timer recording is canceled.
•If the VCR is set to “0H00M”, the VCR goes to normal record- ing mode.
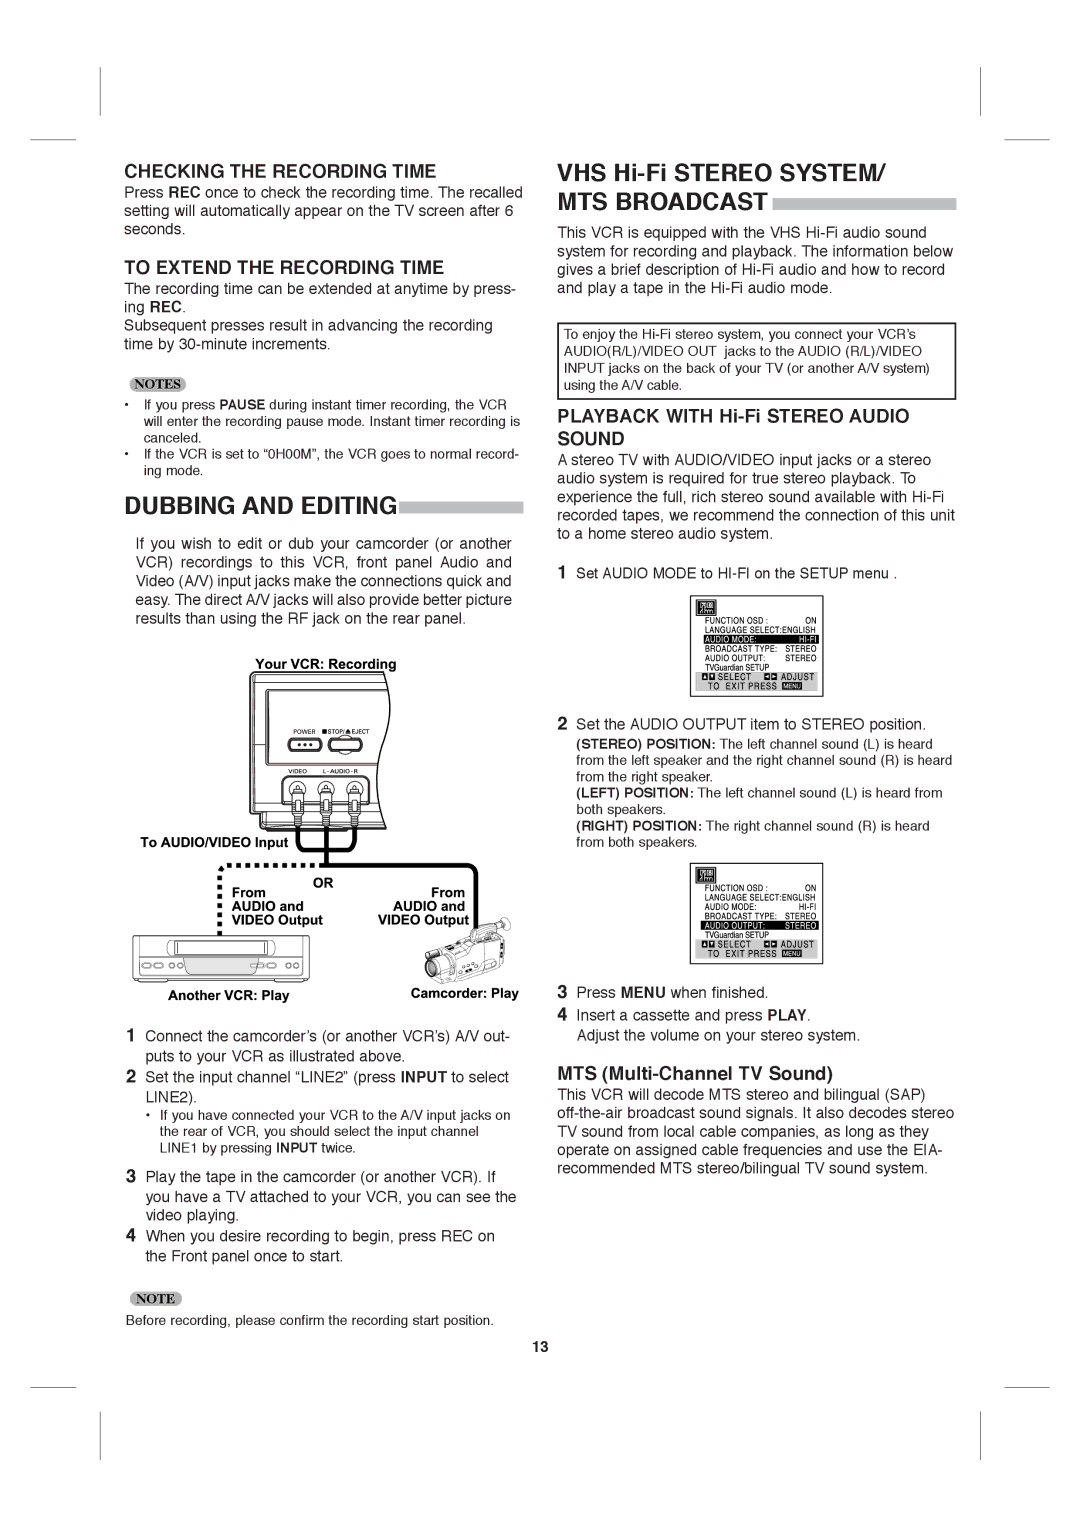
DUBBING AND EDITING
If you wish to edit or dub your camcorder (or another VCR) recordings to this VCR, front panel Audio and Video (A/V) input jacks make the connections quick and easy. The direct A/V jacks will also provide better picture results than using the RF jack on the rear panel.
1Connect the camcorder’s (or another VCR’s) A/V out- puts to your VCR as illustrated above.
2Set the input channel “LINE2” (press INPUT to select LINE2).
•If you have connected your VCR to the A/V input jacks on the rear of VCR, you should select the input channel LINE1 by pressing INPUT twice.
3Play the tape in the camcorder (or another VCR). If you have a TV attached to your VCR, you can see the video playing.
4When you desire recording to begin, press REC on the Front panel once to start.
NOTE
Before recording, please confirm the recording start position.