SERVICE/ADJUSTMENTS
LINE REPLACEMENT
SAFETY RULES
1.Shut down the trimmer to make certain the head cannot turn while working with the head.
2.Check mounting of cutting head on trimmer and tighten if it is loose
3.Inspect head for wear, chips or cracks. Replace parts or entire head if needed.
4.Always use line that is the correct diameter and type for this unit. Do not use metal reinforced or metal line.
5.Make sure the two retaining pawls spread out to the periphery of the cover windows.
6.Check the head for deflection or abnormal noise by rotating the head by hand. Deflection or abnormal noise may cause vibrations, which will cause the cutting line to weld together. It is also potentially dangerous.
REFILLING TRIMMING LINE
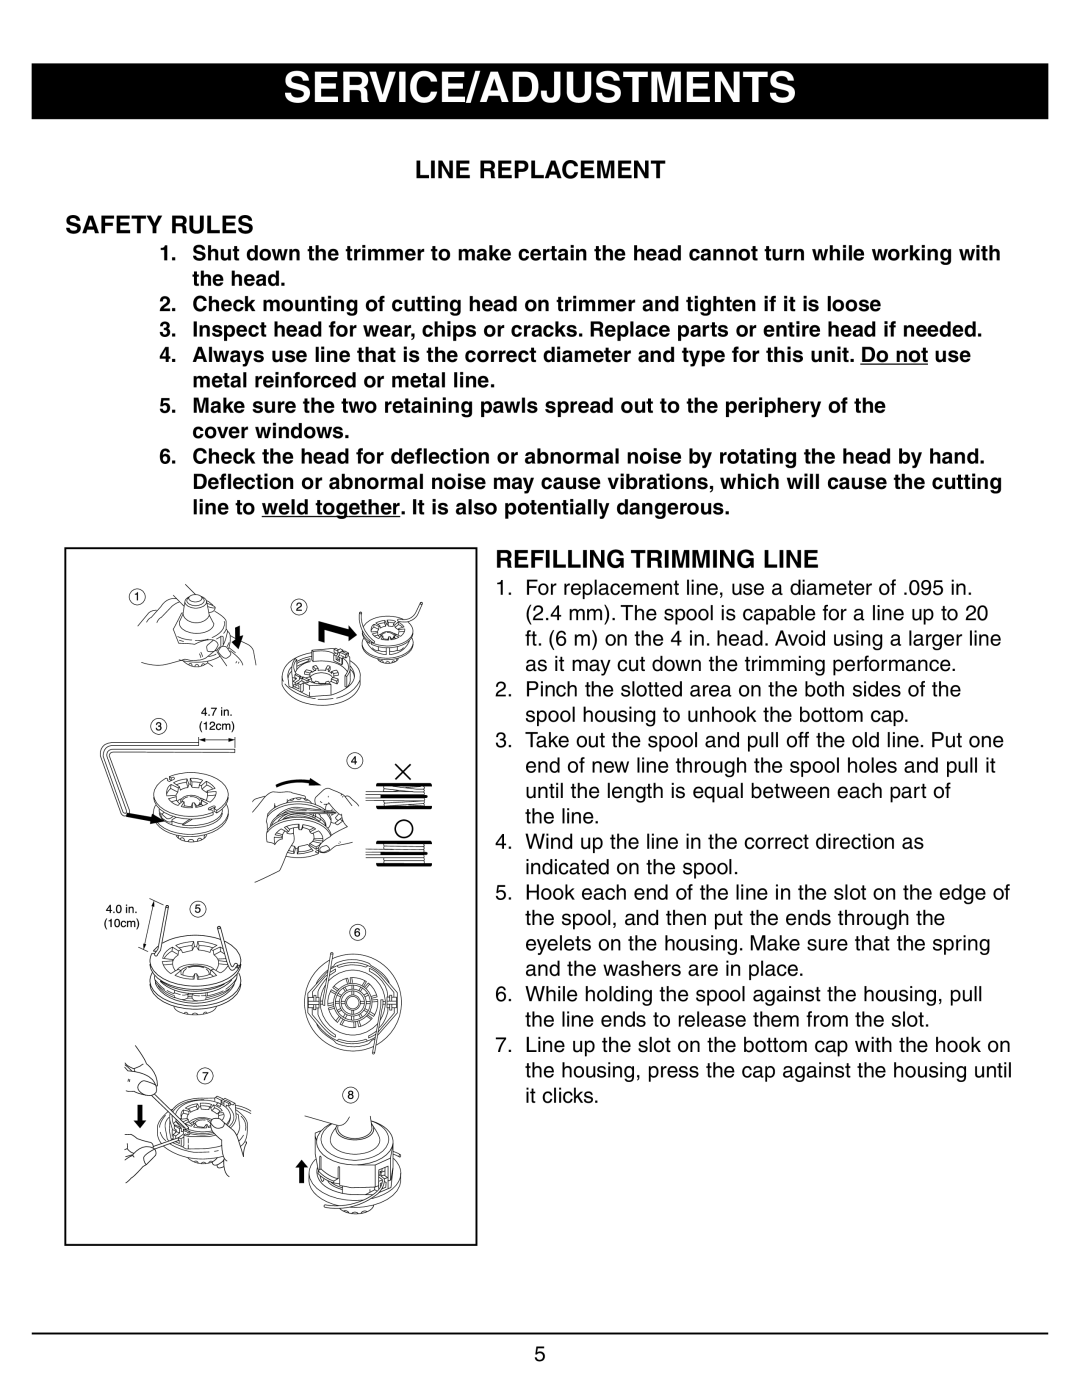
1. For replacement line, use a diameter of .095 in. (2.4 mm). The spool is capable for a line up to 20 ft. (6 m) on the 4 in. head. Avoid using a larger line as it may cut down the trimming performance.
2. Pinch the slotted area on the both sides of the spool housing to unhook the bottom cap.
3. Take out the spool and pull off the old line. Put one end of new line through the spool holes and pull it until the length is equal between each part of
the line.
4. Wind up the line in the correct direction as indicated on the spool.
5. Hook each end of the line in the slot on the edge of the spool, and then put the ends through the eyelets on the housing. Make sure that the spring and the washers are in place.
6. While holding the spool against the housing, pull the line ends to release them from the slot.
7. Line up the slot on the bottom cap with the hook on the housing, press the cap against the housing until it clicks.
5
