ASSEMBLY INSTRUCTIONS
3
2
1
■TOOL LIST
•Screwdriver (Phillips or Standard)
•Allen wrench 4mm
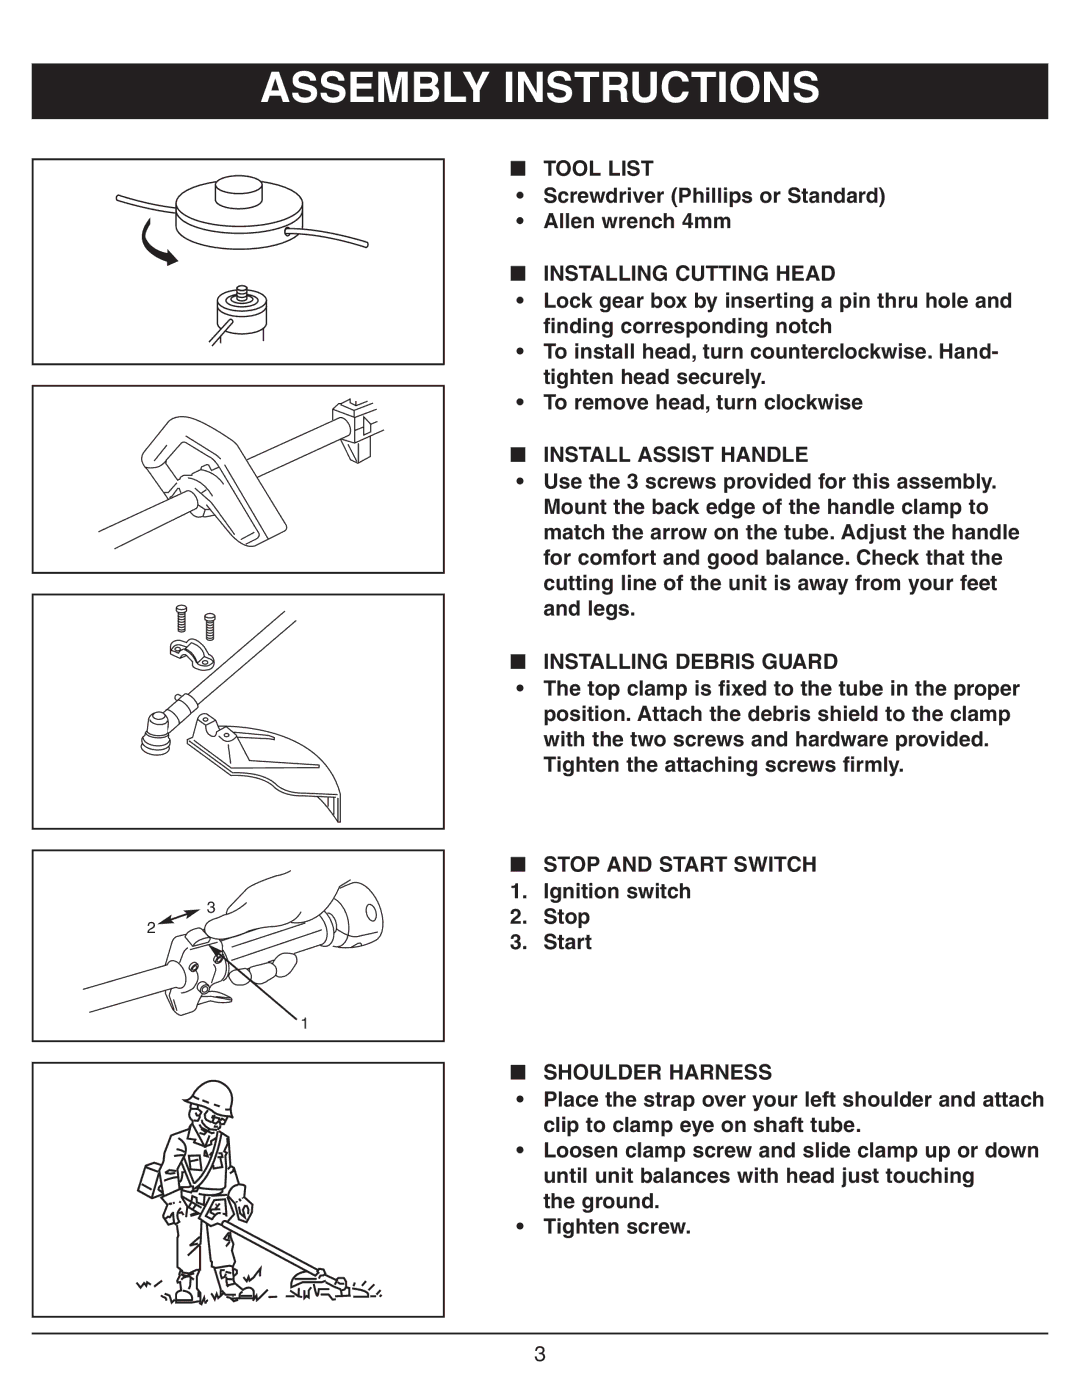
■INSTALLING CUTTING HEAD
•Lock gear box by inserting a pin thru hole and finding corresponding notch
•To install head, turn counterclockwise. Hand- tighten head securely.
•To remove head, turn clockwise
■INSTALL ASSIST HANDLE
•Use the 3 screws provided for this assembly. Mount the back edge of the handle clamp to match the arrow on the tube. Adjust the handle for comfort and good balance. Check that the cutting line of the unit is away from your feet and legs.
■INSTALLING DEBRIS GUARD
•The top clamp is fixed to the tube in the proper position. Attach the debris shield to the clamp with the two screws and hardware provided.
Tighten the attaching screws firmly.
■STOP AND START SWITCH
1. Ignition switch
2. Stop
3. Start
■SHOULDER HARNESS
•Place the strap over your left shoulder and attach clip to clamp eye on shaft tube.
•Loosen clamp screw and slide clamp up or down until unit balances with head just touching
the ground.
•Tighten screw.
3
