BATTERY CHARGER CONTROLS
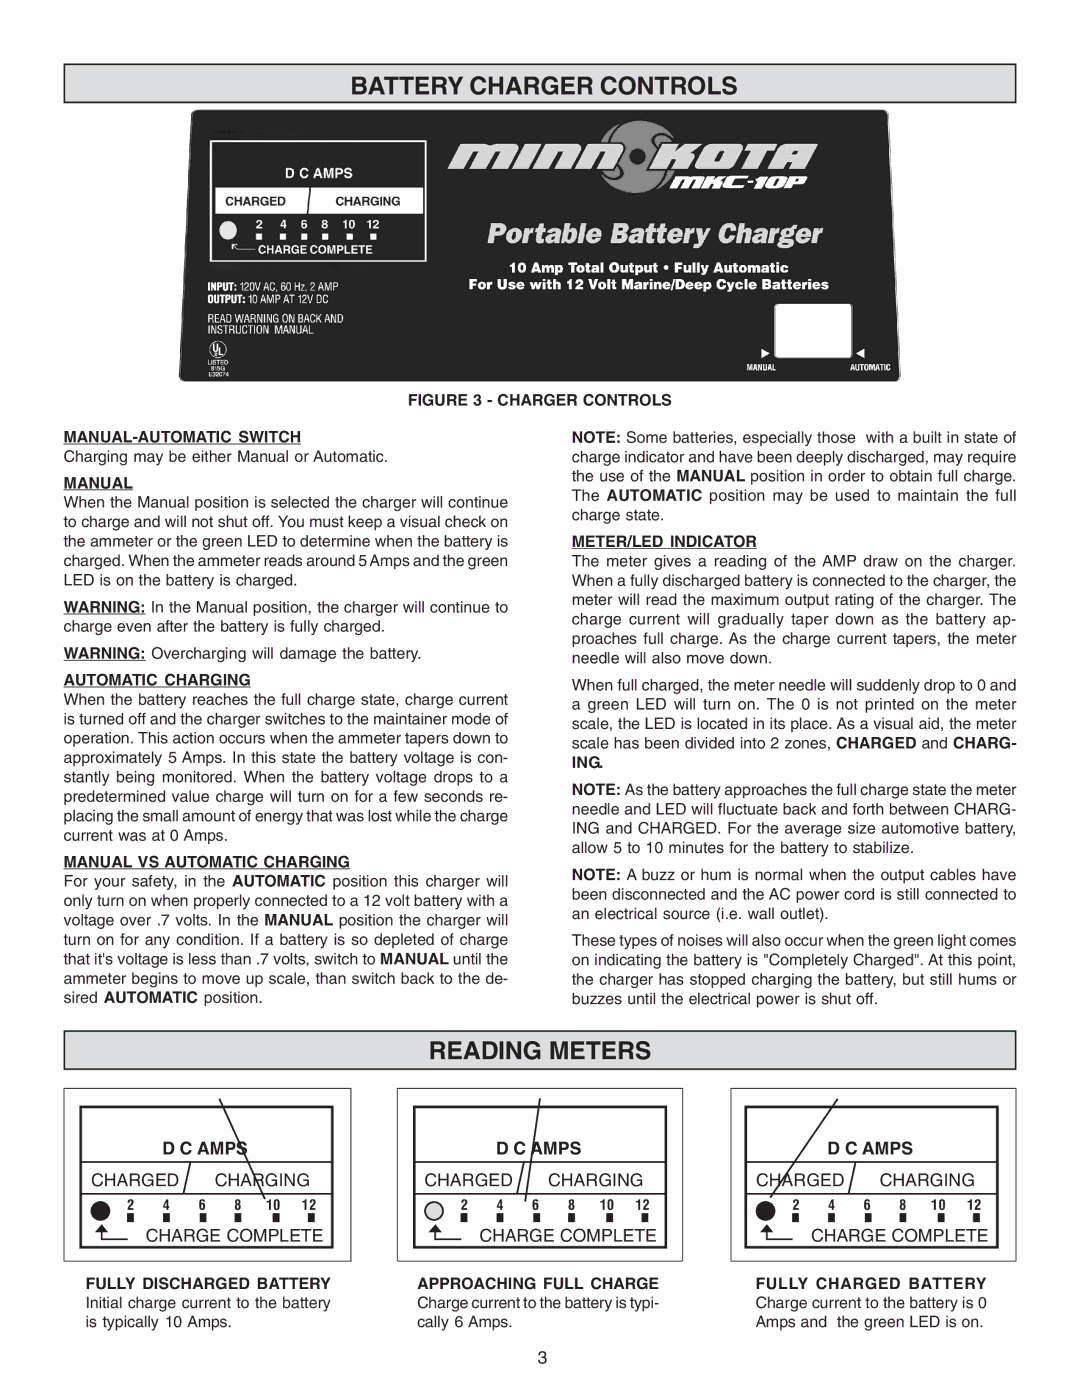
FIGURE 3 - CHARGER CONTROLS
MANUAL-AUTOMATIC SWITCH
Charging may be either Manual or Automatic.
MANUAL
When the Manual position is selected the charger will continue to charge and will not shut off. You must keep a visual check on the ammeter or the green LED to determine when the battery is charged. When the ammeter reads around 5 Amps and the green LED is on the battery is charged.
WARNING: In the Manual position, the charger will continue to charge even after the battery is fully charged.
WARNING: Overcharging will damage the battery.
AUTOMATIC CHARGING
When the battery reaches the full charge state, charge current is turned off and the charger switches to the maintainer mode of operation. This action occurs when the ammeter tapers down to approximately 5 Amps. In this state the battery voltage is con- stantly being monitored. When the battery voltage drops to a predetermined value charge will turn on for a few seconds re- placing the small amount of energy that was lost while the charge current was at 0 Amps.
MANUAL VS AUTOMATIC CHARGING
For your safety, in the AUTOMATIC position this charger will only turn on when properly connected to a 12 volt battery with a voltage over .7 volts. In the MANUAL position the charger will turn on for any condition. If a battery is so depleted of charge that it's voltage is less than .7 volts, switch to MANUAL until the ammeter begins to move up scale, than switch back to the de- sired AUTOMATIC position.
NOTE: Some batteries, especially those with a built in state of charge indicator and have been deeply discharged, may require the use of the MANUAL position in order to obtain full charge. The AUTOMATIC position may be used to maintain the full charge state.
METER/LED INDICATOR
The meter gives a reading of the AMP draw on the charger. When a fully discharged battery is connected to the charger, the meter will read the maximum output rating of the charger. The charge current will gradually taper down as the battery ap- proaches full charge. As the charge current tapers, the meter needle will also move down.
When full charged, the meter needle will suddenly drop to 0 and a green LED will turn on. The 0 is not printed on the meter scale, the LED is located in its place. As a visual aid, the meter scale has been divided into 2 zones, CHARGED and CHARG-
ING.
NOTE: As the battery approaches the full charge state the meter needle and LED will fluctuate back and forth between CHARG- ING and CHARGED. For the average size automotive battery, allow 5 to 10 minutes for the battery to stabilize.
NOTE: A buzz or hum is normal when the output cables have been disconnected and the AC power cord is still connected to an electrical source (i.e. wall outlet).
These types of noises will also occur when the green light comes on indicating the battery is "Completely Charged". At this point, the charger has stopped charging the battery, but still hums or buzzes until the electrical power is shut off.
READING METERS
| D C AMPS |
|
| ||
CHARGED |
| CHARGING | |||
2 | 4 | 6 | 8 | 10 | 12 |
| CHARGE COMPLETE | ||||
| D C AMPS |
|
| ||
CHARGED |
| CHARGING | |||
2 | 4 | 6 | 8 | 10 | 12 |
| CHARGE COMPLETE | ||||
| D C AMPS |
|
| ||
CHARGED |
| CHARGING | |||
2 | 4 | 6 | 8 | 10 | 12 |
| CHARGE COMPLETE | ||||
FULLY DISCHARGED BATTERY Initial charge current to the battery is typically 10 Amps.
APPROACHING FULL CHARGE Charge current to the battery is typi- cally 6 Amps.
FULLY CHARGED BATTERY Charge current to the battery is 0 Amps and the green LED is on.
3
