10. FEATURES/CONTROL PANEL
1
2
4 ![]()
5 ![]()
3 ![]()
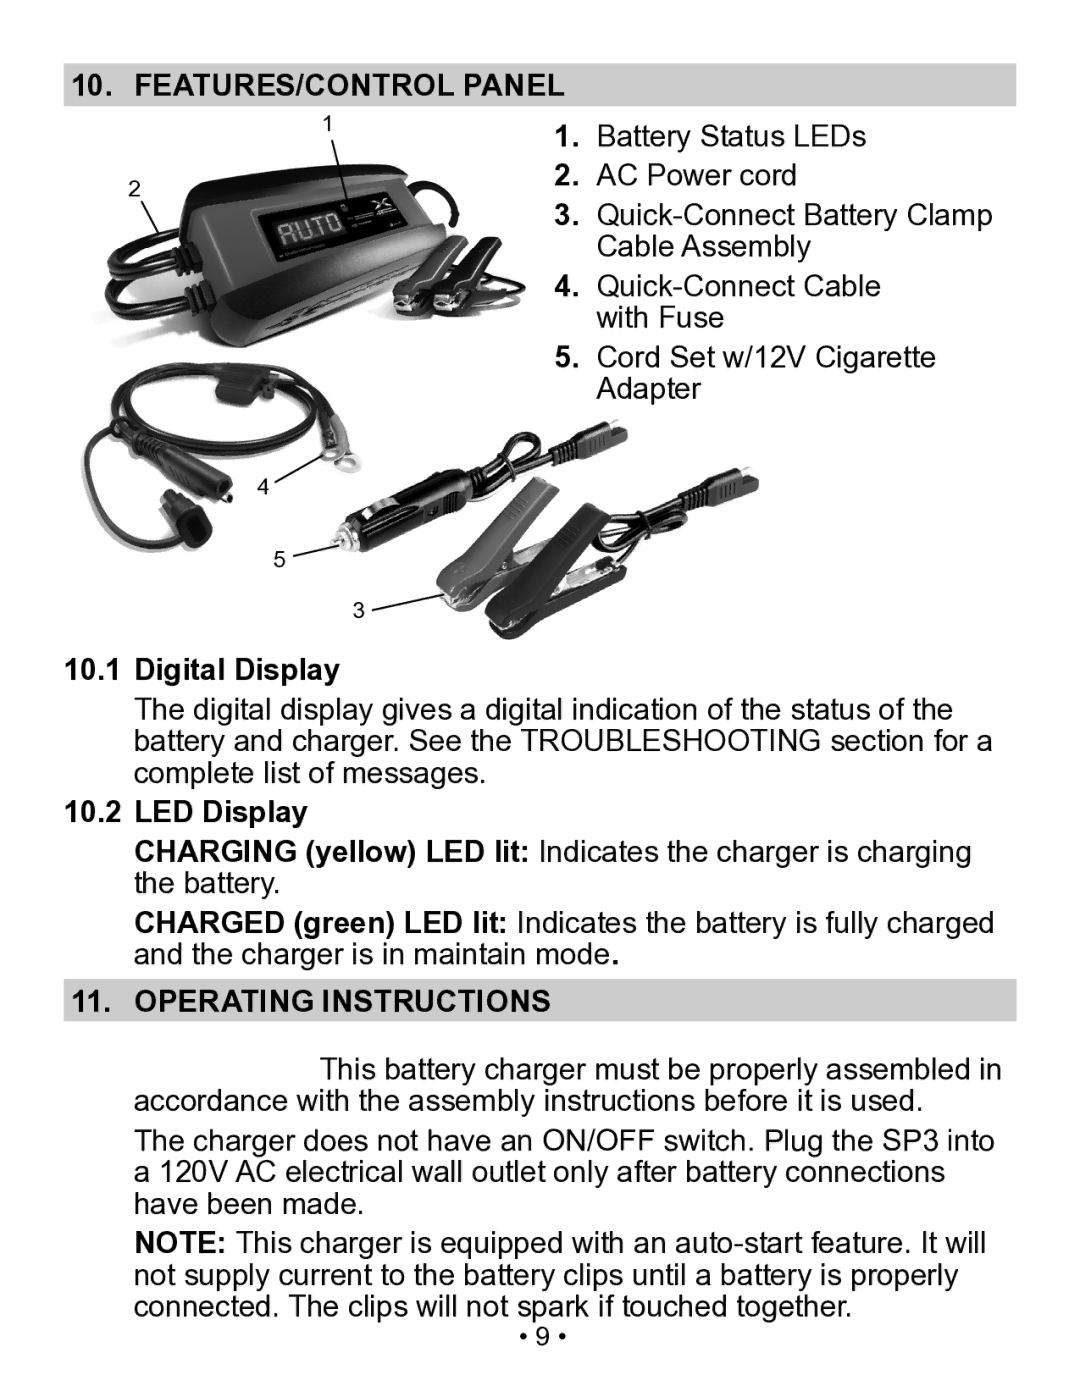
1.Battery Status LEDs
2.AC Power cord
3.
4.
5.Cord Set w/12V Cigarette Adapter
10.1Digital Display
The digital display gives a digital indication of the status of the battery and charger. See the TROUBLESHOOTING section for a complete list of messages.
10.2LED Display
CHARGING (yellow) LED lit: Indicates the charger is charging the battery.
CHARGED (green) LED lit: Indicates the battery is fully charged and the charger is in maintain mode.
11.OPERATING INSTRUCTIONS
![]() This battery charger must be properly assembled in accordance with the assembly instructions before it is used.
This battery charger must be properly assembled in accordance with the assembly instructions before it is used.
The charger does not have an ON/OFF switch. Plug the SP3 into a 120V AC electrical wall outlet only after battery connections have been made.
NOTE: This charger is equipped with an
• 9 •
