Manuals
/
Seagate
/
Computer Equipment
/
Computer Drive
Seagate
CFS270A INSTALLATION Steps, Jumper Tables, Master/Slave C/D Jumper Table, Cable Select CS
Models:
CFS270A
1
2
2
Download
2 pages
52.25 Kb
1
2
Install
Page 2
Image 2
Page 1
Page 2
Page 2
Image 2
Page 1
Page 2
Contents
STATEMENT WARRANTY LIMITED
QUICK INSTALLATION GUIDE
Technical support services
it install
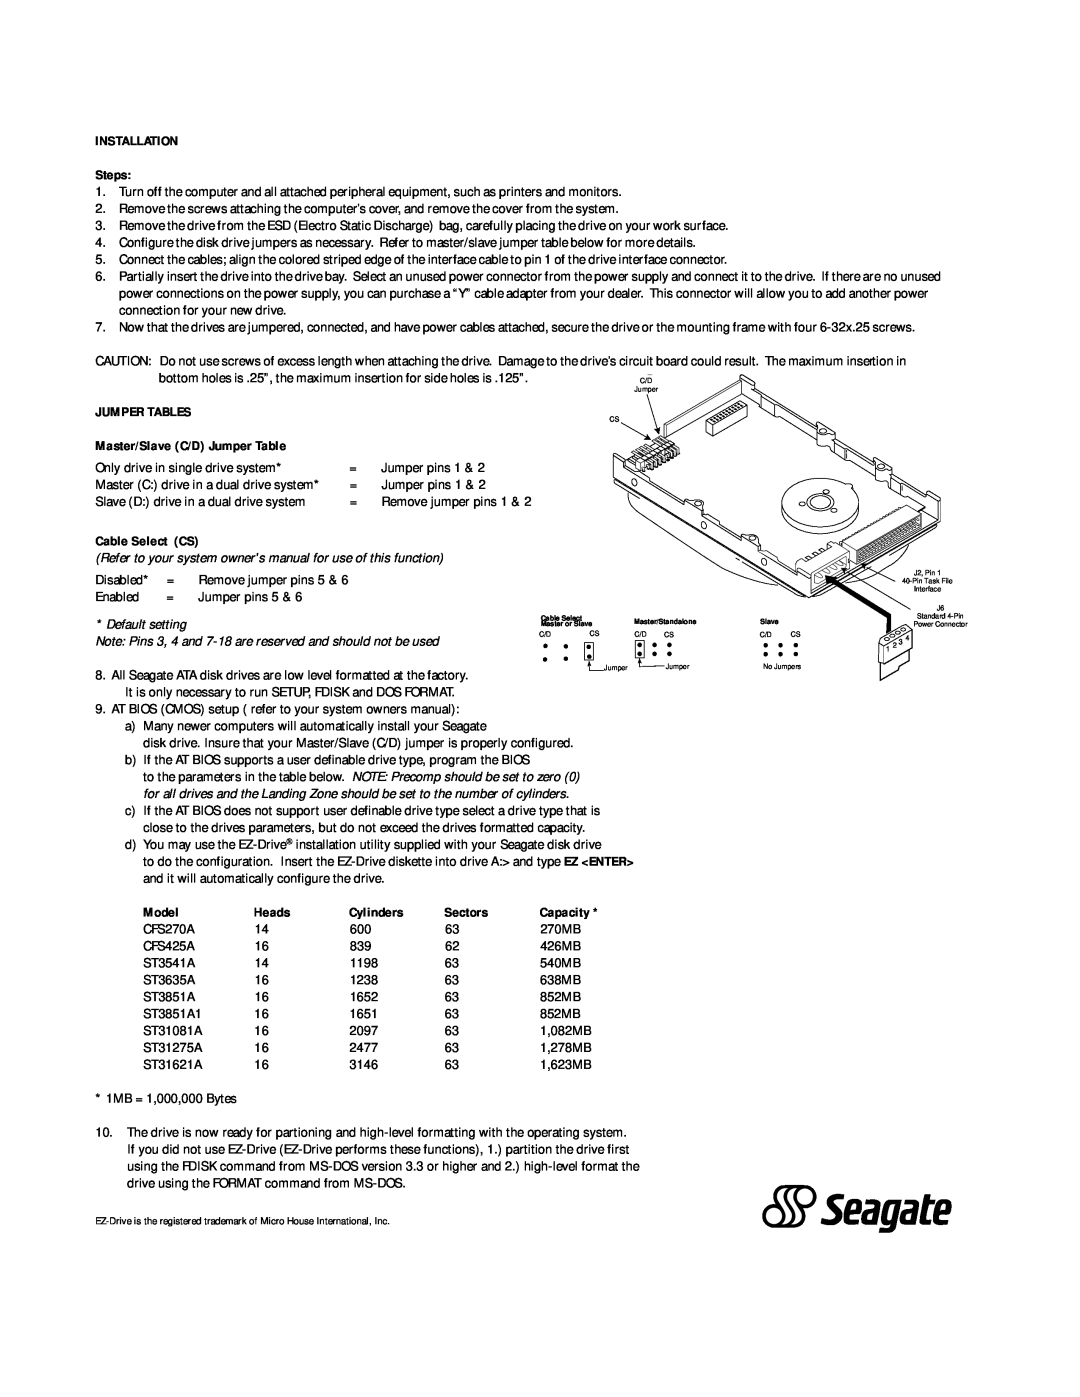
Master/Slave C/D Jumper Table
INSTALLATION Steps
JUMPER TABLES
Cable Select CS
Top
Page
Image
Contents