Manuals
/
Sears
/
Power Tools
/
Battery Charger
Sears
200.71219
owner manual
Before Using Your Battery Charger
Models:
200.71219
1
5
12
12
Download
12 pages
50.02 Kb
1
2
3
4
5
6
7
8
Maintenance
Personal Safety Precautions
Safety
Plug the power cord into an AC
Using Your Battery Charger
Page 5
Image 5
Page 4
Page 6
Page 5
Image 5
Page 4
Page 6
Contents
Before Every Use of this Product Save these instructions
Read and follow all Safety Rules and Operating Instructions
Sears, Roebuck and Co., Hoffman Estates, IL 60179 U.S.A
Battery Charger/Maintainer 2 Amp, 12 Volt 4 Amp, 6 Volt
THREE-YEAR FULL warranty
TABLE OF CONTENTS
WARRANTY
Remember
Important Safety Instructions
WARNING - RISK OF EXPLOSIVE GASES
Personal Safety Precautions
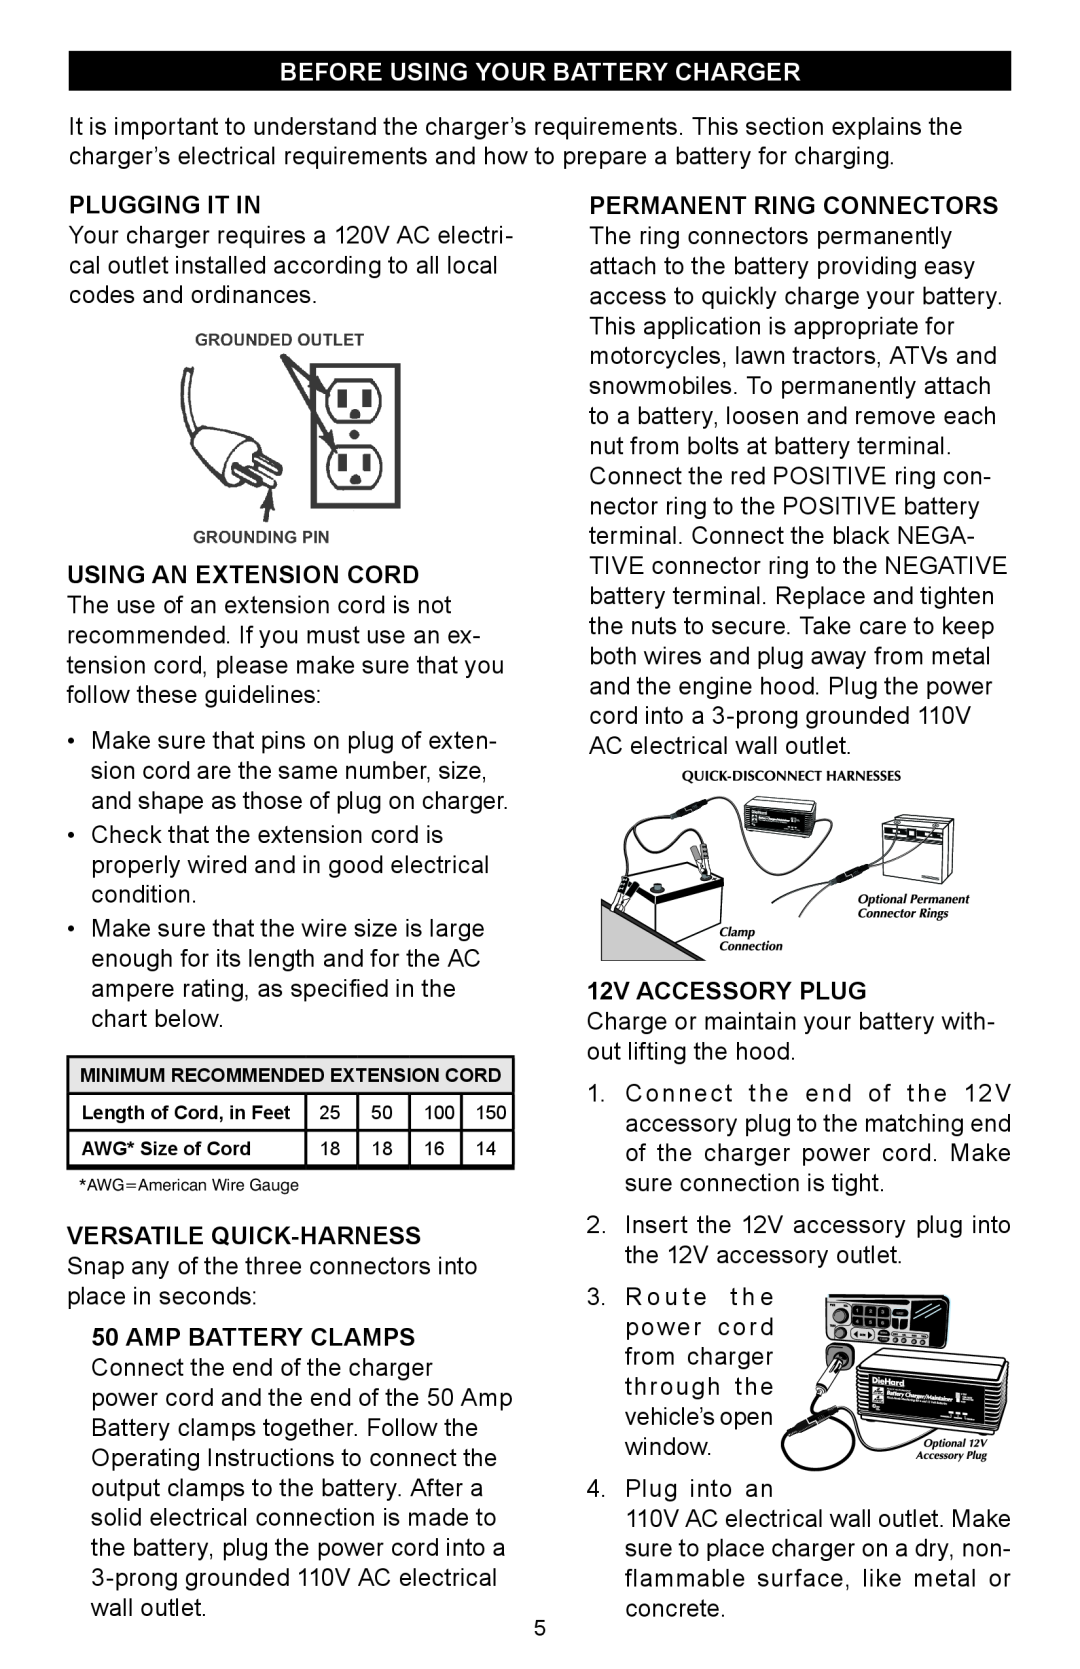
BEFORE USING YOUR BATTERY CHARGER
AMP/VOLT SELECTOR SWITCH 2A, 12V AMP/VOLT SELECTOR 4A LED Indicators
Using Your Battery Charger
Preparing your battery to be charged
NEGATIVE GROUNDED SYSTEM
operating instructions
Charging Battery In The Vehicle
Plug the power cord into an AC
Charging Battery Removed From The Vehicle
output clamp to the free end of the
Press the appropriate control buttons
MAINTENANCE AND CARE
battery percent and charge time
Battery Condition
2 Amp, 12 Volt Battery
Page
Top
Page
Image
Contents