SET-UP
Visually.inspect the HEPA Air Cleaner upon
removing the unit from its box. Remove and
discard any packaging material. Return the
unit if it shows any signs of damage or
mishandling.This unit was thoroughly
inspected and
o
ELECTRICAL HOOK=UP
Plug the air cleaner into a polarized 120 Volt AC. wall outlet.
'6/AR N ! N G
To avoid fire or shock hazard, the
HEPA air cleaner should "o_ly be
plugged into a polarized 120 Volt AC. outlet.
CAUTI 0 N Never operate the, _.
HEPA air cleaner without the HEPA
filterproperly installed, permanent motor
damage could result.
FILTER CARTRIDGE REPLACEMENT
Step 1
Tumthe HEPA Air Cleaner OFF and unplug the unit from the power outlet.
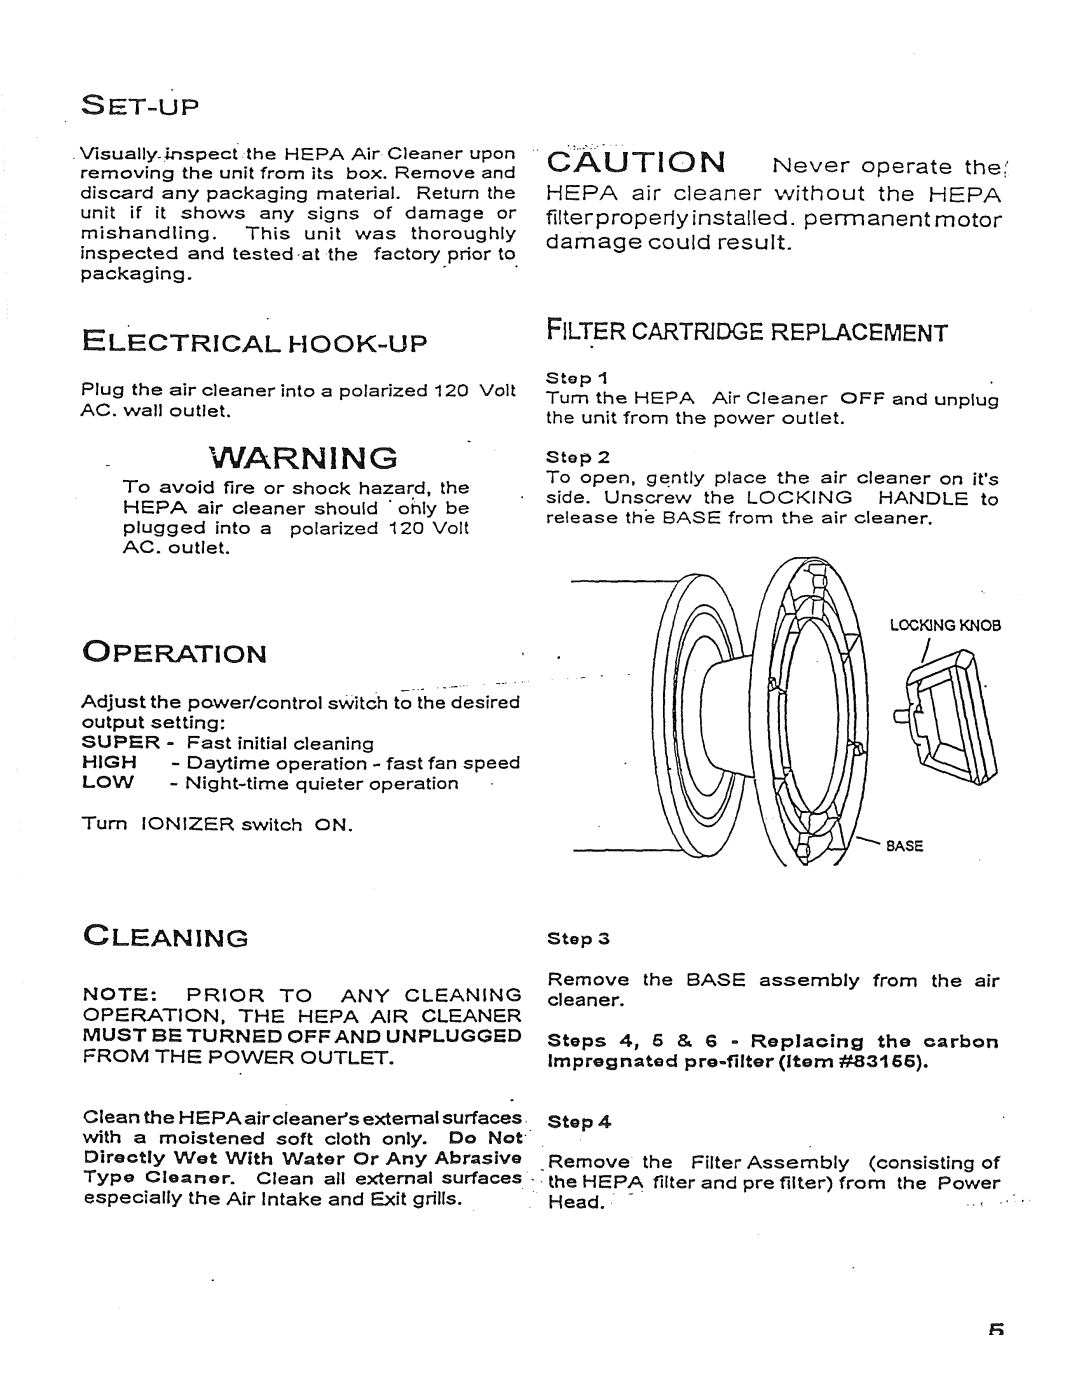
Step 2
To open, gently place the air cleaner on it's
side. Unscrew the LOCKING HANDLE to release the BASE from the air cleaner,
LOCKINGKNOB
OPERATION
Adjust | the | power/control | switch to | the | desired | 1 | |||
output | setting" |
|
|
|
|
|
| ||
=SUPER ,. | Fast | initial |
| cleaning |
|
|
| ||
HIGH | - | Daytime | fast | fan | speed | ||||
LOW | - |
| quieter | operation |
|
| |||
Turn | IONIZER | switch | ON. |
|
|
|
| ||
|
|
|
|
|
|
|
|
| BASE |
CLEANING |
|
|
|
|
|
| Step | 3 |
|
|
|
|
|
|
|
| ||
NOTE: |
| PRIOR | TO | ANY | CLEANING | Remove | the | BASE | assembly | from | the | air |
| |||||
| cleaner. |
|
|
|
|
|
|
|
| |||||||||
OPERATION, | THE | HEPA | AIR |
| CLEANER |
|
|
|
|
|
|
|
| |||||
|
|
|
|
|
|
|
|
|
|
| ||||||||
MUST | BE | TURNED | OFF | AND | UNPLUGGED | Steps | 4, | 6 & 6 - Replacing | the | carbon |
| |||||||
FROM | THE POWER | OUTLET. |
|
|
|
| ||||||||||||
|
|
| Impregnated |
| (item | #433166). |
|
|
| |||||||||
|
|
|
|
|
|
|
|
|
|
|
|
| ||||||
Clean | the | HEPA | air | cleaner's external | surfaces | Step | 4 |
|
|
|
|
|
|
|
| |||
with a | moistened | soft | cloth | only. | Do Not" |
|
|
|
|
|
|
|
|
|
| |||
Directly |
| Wet | With | Water | Or | Any | Abrasive | .Remove | the | Filter | Assembly | (consisting | of |
| ||||
Type | Cleaner. | Clean | all external | surfaces, | the HEPA | filter | and | pre | filter) | from the | Power |
| ||||||
especially | the | Air Intake | and | Exit | grills. | Head. | - |
|
|
|
|
|
| ,.: | . , , | |||
