TECHNICAL GUIDE | Cal. 9T82A |
I.REMARKS ON DISASSEMBLING AND REASSEMBLING
For conventional type
1Case back
·To fix the case back to the case, the case back itself is screwed into the case, or the case back screws are used, depending on models.
·For the models using the case back screws, use the adhesive “LOCTITE 241” to prevent them from loosening.
Note: Never use an adhesive other than “LOCTITE 241” for fixing the case back screws.
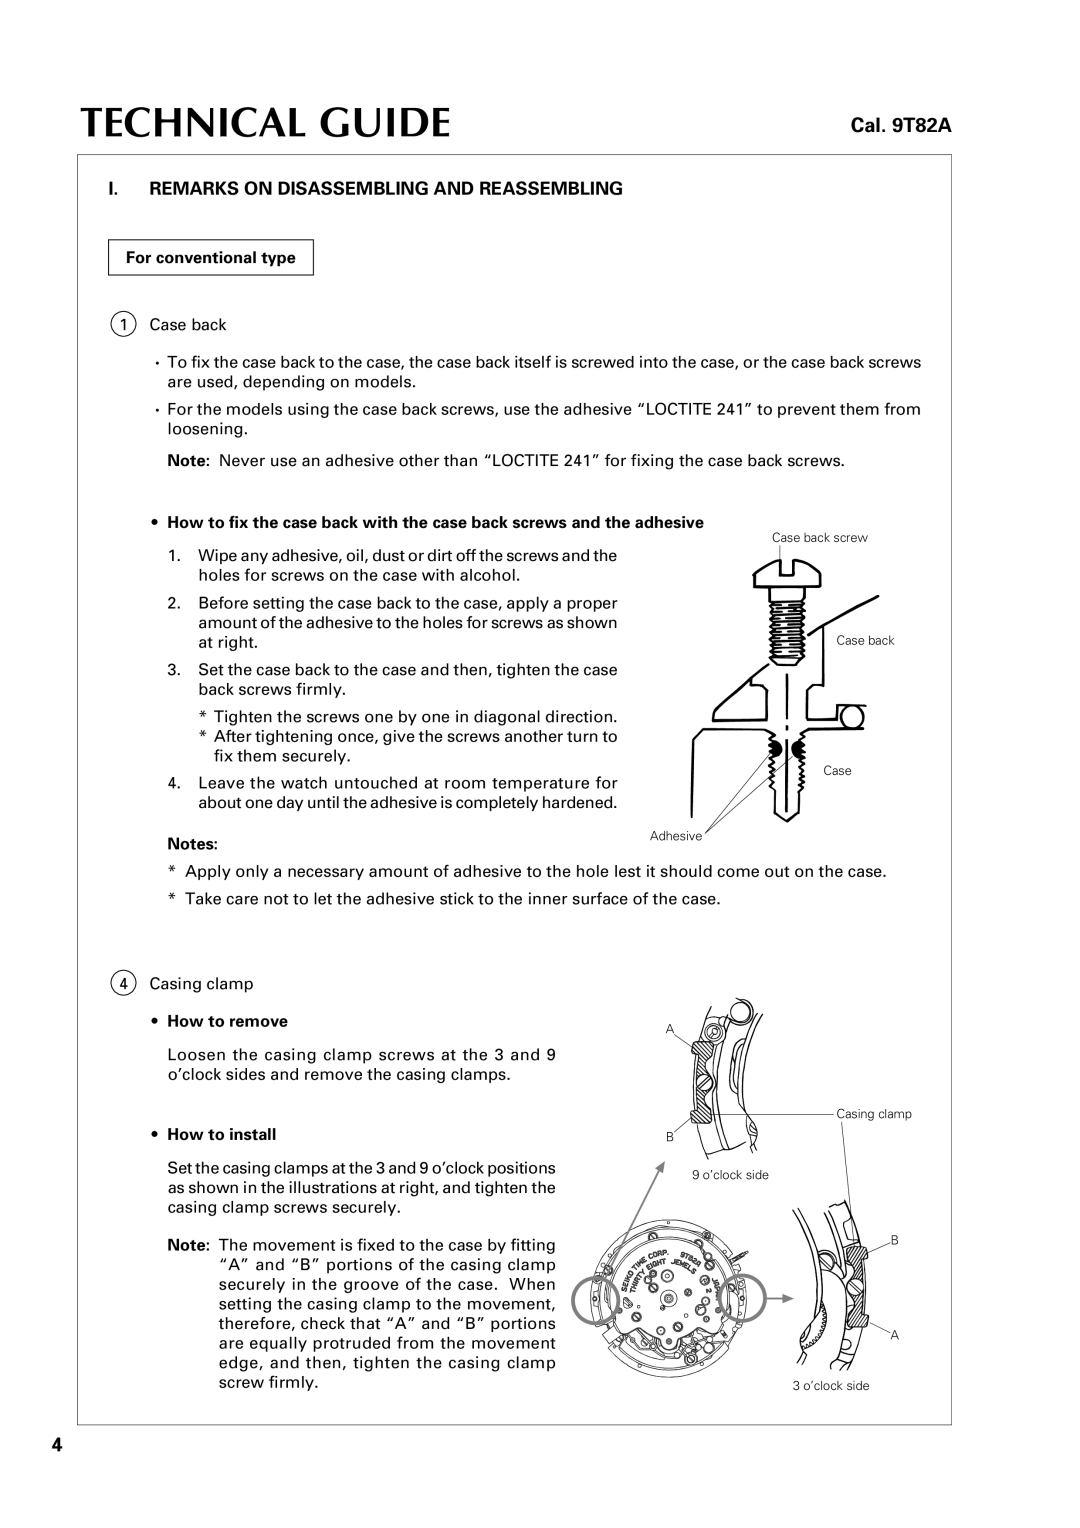
•How to fix the case back with the case back screws and the adhesive
Case back screw
1.Wipe any adhesive, oil, dust or dirt off the screws and the
holes for screws on the case with alcohol.
2. Before setting the case back to the case, apply a proper |
|
amount of the adhesive to the holes for screws as shown |
|
at right. | Case back |
3.Set the case back to the case and then, tighten the case back screws firmly.
* Tighten the screws one by one in diagonal direction.
*After tightening once, give the screws another turn to fix them securely.
Case
4.Leave the watch untouched at room temperature for about one day until the adhesive is completely hardened.
Notes:
Adhesive
*Apply only a necessary amount of adhesive to the hole lest it should come out on the case.
*Take care not to let the adhesive stick to the inner surface of the case.
4Casing clamp
•How to remove
Loosen the casing clamp screws at the 3 and 9 o’clock sides and remove the casing clamps.
•How to install
Set the casing clamps at the 3 and 9 o’clock positions as shown in the illustrations at right, and tighten the casing clamp screws securely.
Note: The movement is fixed to the case by fitting “A” and “B” portions of the casing clamp securely in the groove of the case. When setting the casing clamp to the movement, therefore, check that “A” and “B” portions are equally protruded from the movement edge, and then, tighten the casing clamp screw firmly.
A
Casing clamp
B![]()
9 o’clock side
B
▼
A
3 o’clock side
4