TECHNICAL GUIDE | Cal. 9T82A |
3Bezel gasket
Never apply the silicone oil to the bezel gasket. Otherwise, the silicone oil may spread to the dial or other parts, causing malfunctions.
4Winding stem with crown
•How to remove
Push the lever for unlocking stem between the dial and the case vertically down with tweezers, and remove the winding stem with crown.
For both types
7Buttons
•Lubricating
Apply SEIKO Watch Oil
8Hour, minute and second hands
•How to install the hour hand
The watch is provided with the instant date change mechanism. In order for the date to change at the exact time, install the hands following the procedure below.
1.Slowly turn the crown counterclockwise. Stop turning the crown when the date has changed.
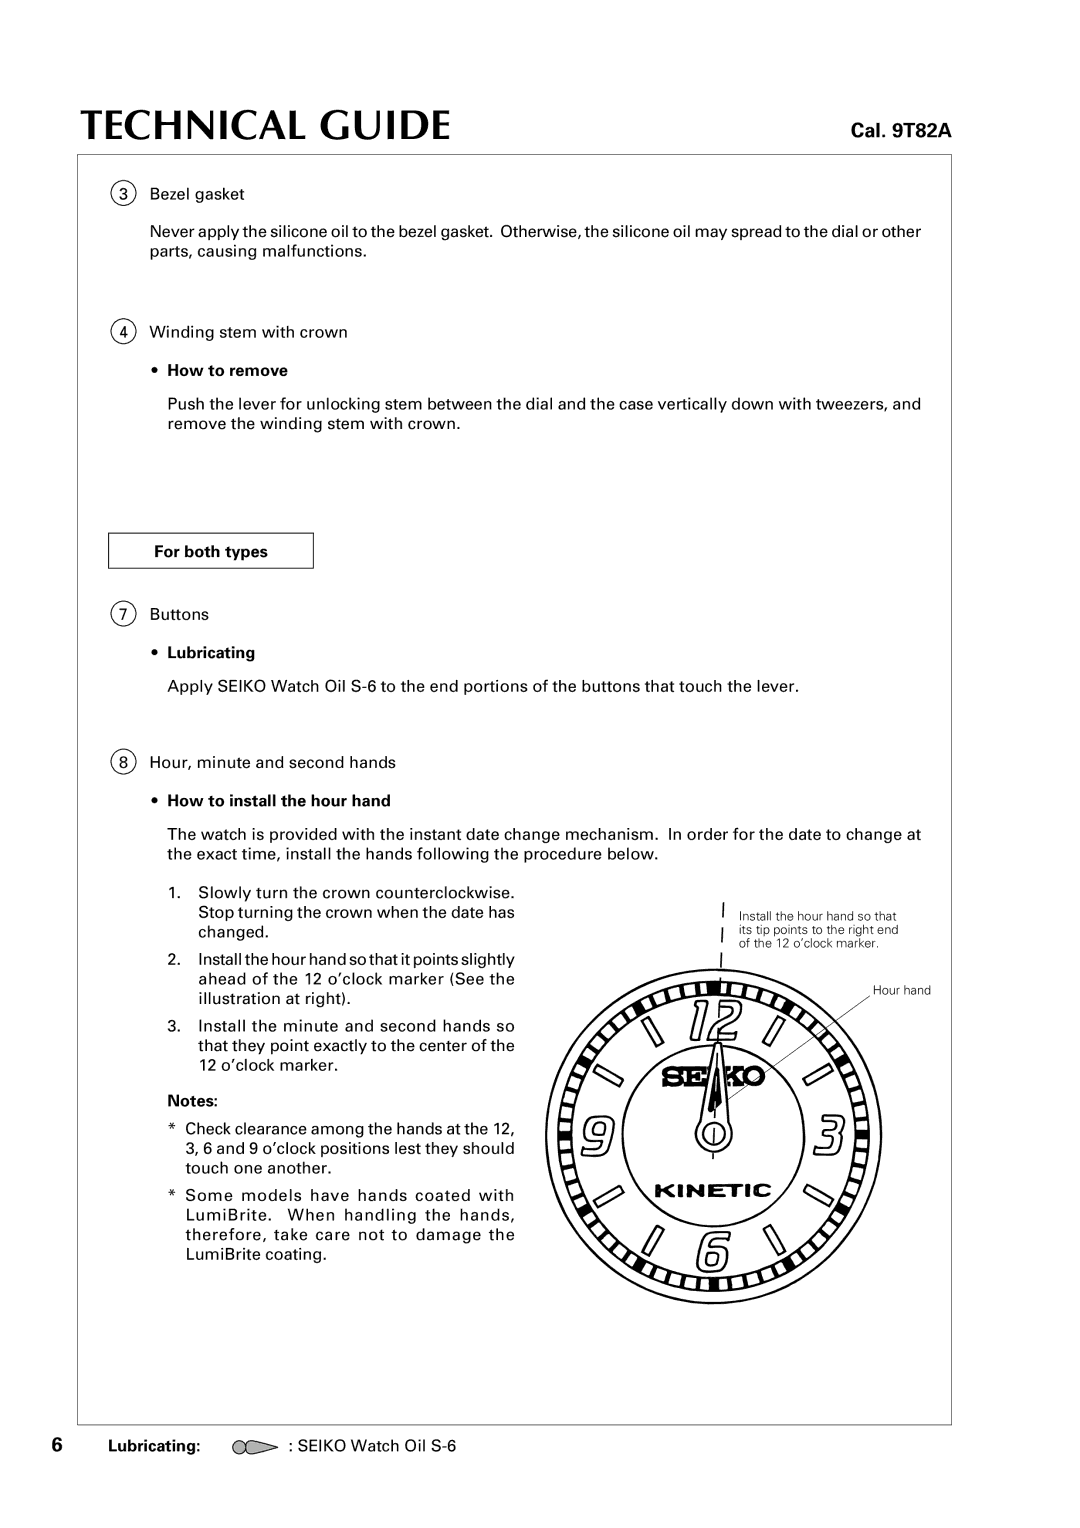
2.Install the hour hand so that it points slightly ahead of the 12 o’clock marker (See the illustration at right).
3.Install the minute and second hands so that they point exactly to the center of the 12 o’clock marker.
Notes:
*Check clearance among the hands at the 12, 3, 6 and 9 o’clock positions lest they should touch one another.
*Some models have hands coated with LumiBrite. When handling the hands, therefore, take care not to damage the LumiBrite coating.
Install the hour hand so that its tip points to the right end of the 12 o’clock marker.
Hour hand
6 | Lubricating: | : SEIKO Watch Oil |