
UV219CS specifications
The Shark UV219CS is an innovative and versatile vacuum cleaner designed specifically to meet the needs of modern homes. One of the standout features is its lightweight design, making it easy to maneuver around furniture and tight spaces. Weighing in at just under 10 pounds, users can effortlessly carry it from room to room or even up and down stairs, alleviating the strain typically associated with traditional upright vacuums.Equipped with a powerful motor, the Shark UV219CS provides strong suction capable of deep cleaning carpets, upholstery, and hard floors. The vacuum boasts a unique DuoClean technology, which features dual brush rolls that work in tandem to effectively pick up both large debris and fine dust. This technology ensures that while one brush roll lifts larger particles, the other captures small dust and pet hair, leaving surfaces cleaner than ever.
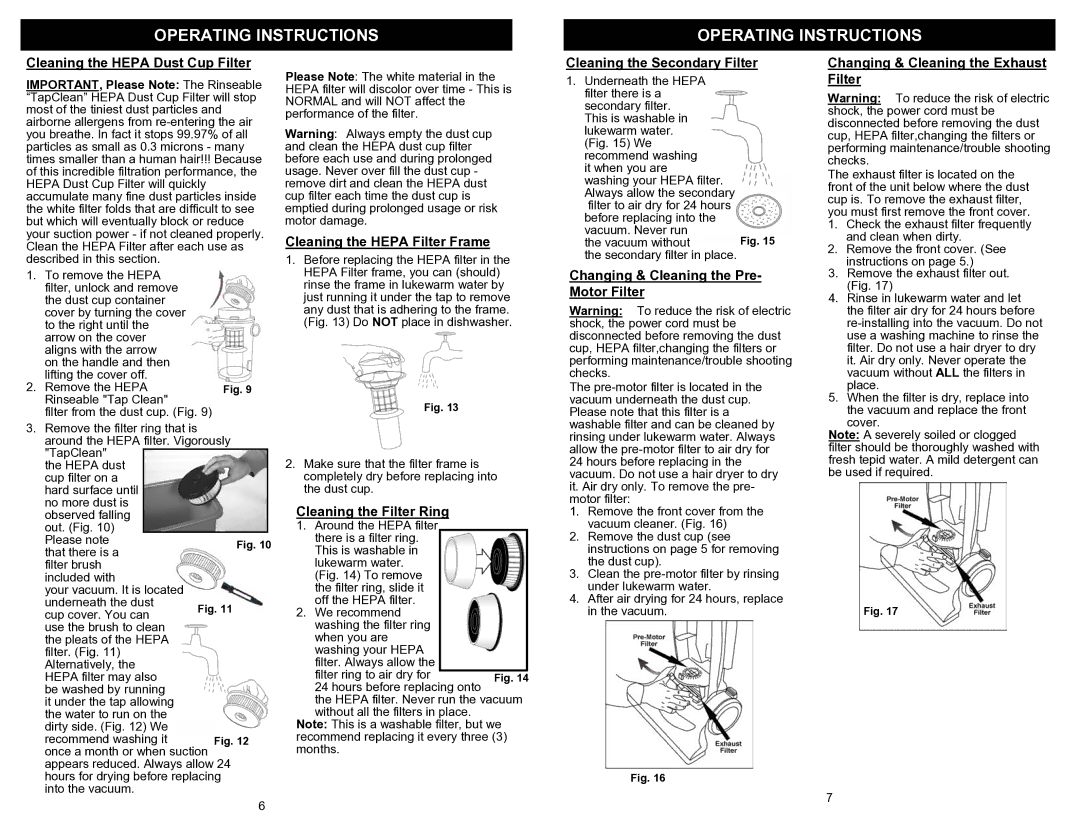
One of the noteworthy characteristics of the Shark UV219CS is its anti-allergen complete seal technology. This system helps to trap 99.9% of dust and allergens within the vacuum, making it an excellent choice for allergy sufferers. Paired with a HEPA filter, the vacuum ensures that the air released back into your home is clean and free from irritants, promoting a healthier living environment.
The UV219CS also features a washable foam and felt filter, making maintenance easier and more economical. Regular cleaning of these filters helps to maintain optimal performance and extends the life of the vacuum.
Additional conveniences include a range of attachments, such as a dusting brush, crevice tool, and pet power brush. These accessories allow users to tackle various cleaning tasks, from high corners and cobwebs to pet hair removal from furniture. The vacuum also has a generous cord length, providing ample reach without the need to constantly switch outlets, which enhances efficiency during cleaning.
Another impressive aspect is its versatility; the Shark UV219CS operates well on different surfaces, seamlessly transitioning from carpets to hardwood without the need for manual adjustments. With an easy-to-empty dust cup that holds more dirt, users can enjoy longer cleaning sessions without frequent interruptions.
In summary, the Shark UV219CS is a powerful, user-friendly vacuum cleaner equipped with advanced technologies that ensure an efficient and thorough cleaning experience. With features that cater to the needs of modern households, it stands out as a prominent choice in the vacuum market.