Using the Video and Audio Input Terminals (Continued)
Notes:
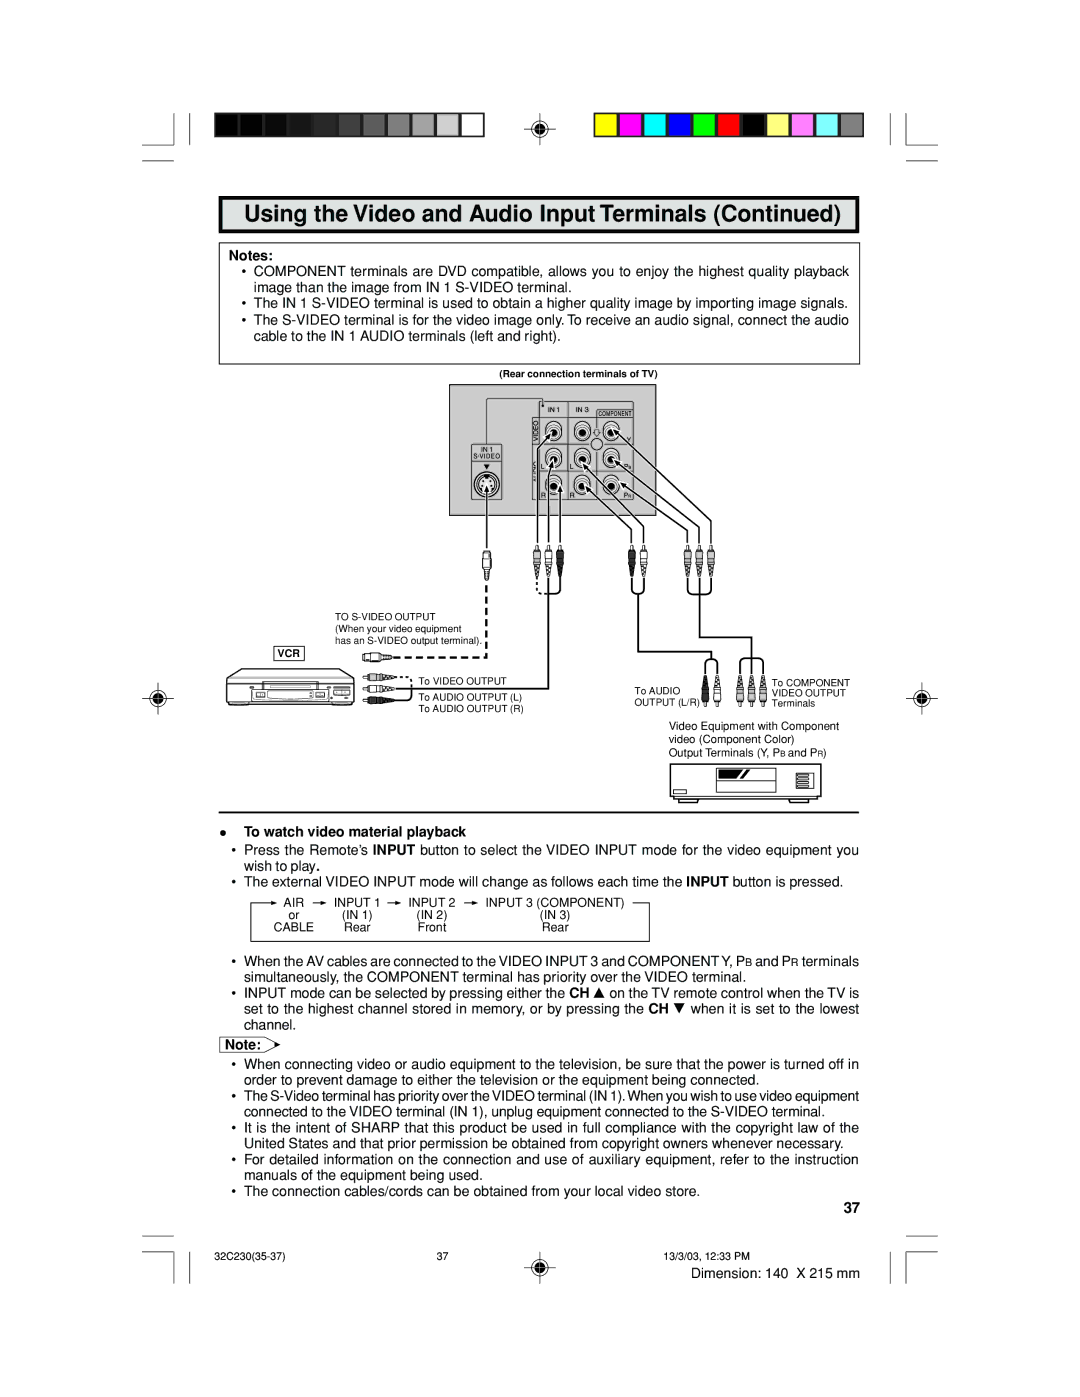
•COMPONENT terminals are DVD compatible, allows you to enjoy the highest quality playback image than the image from IN 1
•The IN 1
•The
(Rear connection terminals of TV)
TO
VCR
![]() To VIDEO OUTPUT
To VIDEO OUTPUT
To AUDIO OUTPUT (L)
To AUDIO OUTPUT (R)
To AUDIO | To COMPONENT |
VIDEO OUTPUT | |
OUTPUT (L/R) | Terminals |
Video Equipment with Component video (Component Color)
Output Terminals (Y, PB and PR)
•To watch video material playback
•Press the Remote’s INPUT button to select the VIDEO INPUT mode for the video equipment you wish to play.
•The external VIDEO INPUT mode will change as follows each time the INPUT button is pressed.
| AIR |
| INPUT | 1 |
| INPUT 2 |
| INPUT 3 (COMPONENT) |
|
| or | (IN 1) |
| (IN 2) |
| (IN 3) | |||
| CABLE | Rear |
|
| Front |
| Rear | ||
|
|
|
|
|
|
|
|
|
|
•When the AV cables are connected to the VIDEO INPUT 3 and COMPONENT Y, PB and PR terminals simultaneously, the COMPONENT terminal has priority over the VIDEO terminal.
•INPUT mode can be selected by pressing either the CH 8 on the TV remote control when the TV is set to the highest channel stored in memory, or by pressing the CH 9 when it is set to the lowest channel.
Note:
•When connecting video or audio equipment to the television, be sure that the power is turned off in order to prevent damage to either the television or the equipment being connected.
•The
•It is the intent of SHARP that this product be used in full compliance with the copyright law of the United States and that prior permission be obtained from copyright owners whenever necessary.
•For detailed information on the connection and use of auxiliary equipment, refer to the instruction manuals of the equipment being used.
•The connection cables/cords can be obtained from your local video store.
37
37 | 13/3/03, 12:33 PM |
Dimension: 140 X 215 mm
