USING EXTERNAL UNITS
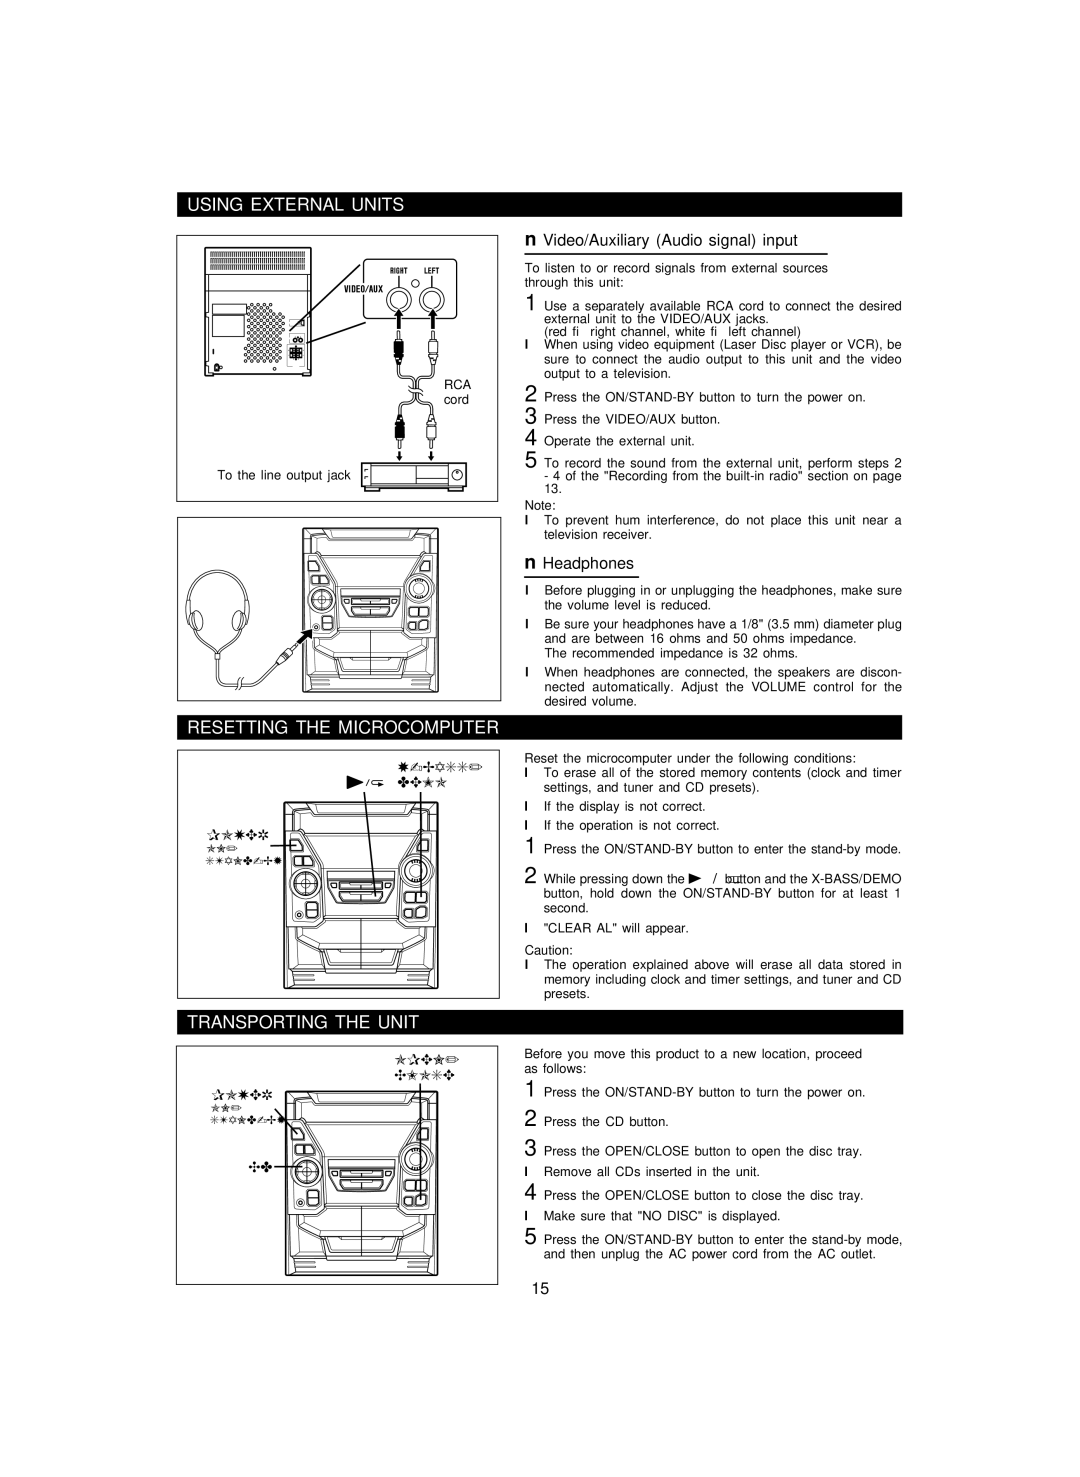
RCA |
cord |
To the line output jack |
RESETTING THE MICROCOMPUTER
X-BASS/
DEMO
POWER
ON/
TRANSPORTING THE UNIT
OPEN/
CLOSE
POWER
ON/
CD
■Video/Auxiliary (Audio signal) input
To listen to or record signals from external sources through this unit:
1 Use a separately available RCA cord to connect the desired external unit to the VIDEO/AUX jacks.
(red → right channel, white → left channel)
●When using video equipment (Laser Disc player or VCR), be sure to connect the audio output to this unit and the video output to a television.
2 Press the
3 Press the VIDEO/AUX button.
4 Operate the external unit.
5 To record the sound from the external unit, perform steps 2
-4 of the "Recording from the
Note:
●To prevent hum interference, do not place this unit near a television receiver.
■Headphones
●Before plugging in or unplugging the headphones, make sure the volume level is reduced.
●Be sure your headphones have a 1/8" (3.5 mm) diameter plug and are between 16 ohms and 50 ohms impedance.
The recommended impedance is 32 ohms.
●When headphones are connected, the speakers are discon- nected automatically. Adjust the VOLUME control for the desired volume.
Reset the microcomputer under the following conditions:
●To erase all of the stored memory contents (clock and timer settings, and tuner and CD presets).
●If the display is not correct.
●If the operation is not correct.
1 Press the
2 While pressing down the 0 / R button and the
●"CLEAR AL" will appear.
Caution:
●The operation explained above will erase all data stored in memory including clock and timer settings, and tuner and CD presets.
Before you move this product to a new location, proceed as follows:
1 Press the
2 Press the CD button.
3 Press the OPEN/CLOSE button to open the disc tray.
●Remove all CDs inserted in the unit.
4 Press the OPEN/CLOSE button to close the disc tray.
●Make sure that "NO DISC" is displayed.
5 Press the
15