SETTING THE CLOCK
(Main unit operation)
MEMORY/SET
POWER
ON/
CLOCK
TUNING/ TIME
(![]()
![]() )
)
2
3
4
AM 12:00 AM 0:00 0:00
5
6
7
8
9
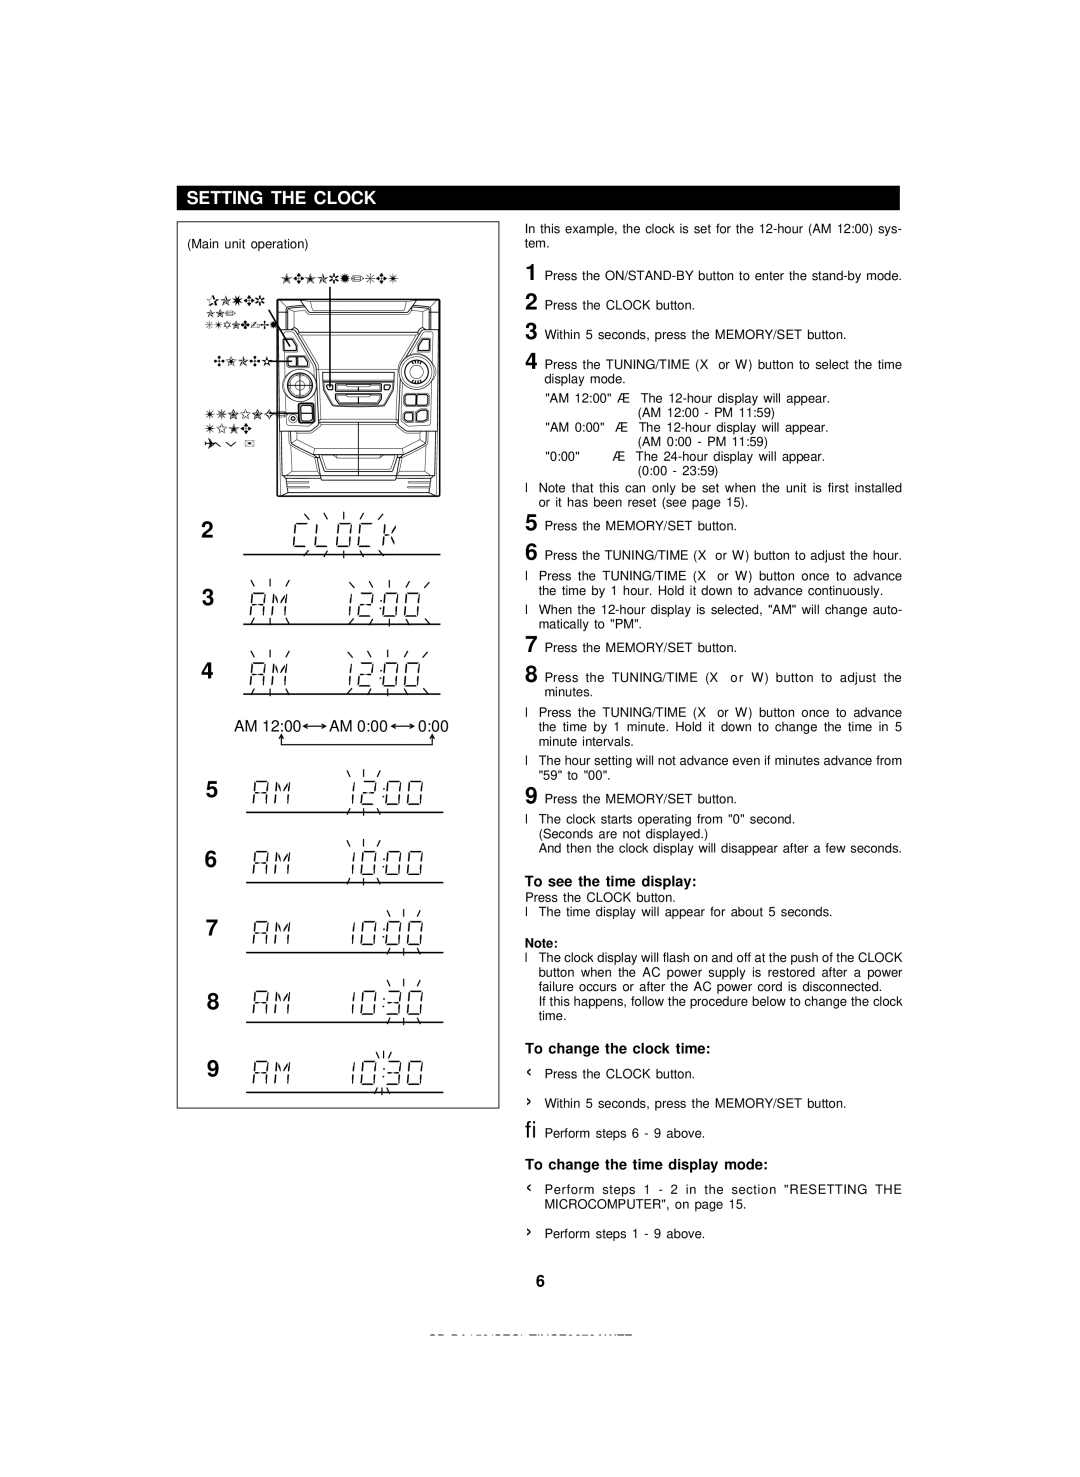
In this example, the clock is set for the
1 Press the
2 Press the CLOCK button.
3 Within 5 seconds, press the MEMORY/SET button.
4 Press the TUNING/TIME (X or W) button to select the time display mode.
"AM 12:00" → The
"AM 0:00" → The
"0:00" → The
●Note that this can only be set when the unit is first installed or it has been reset (see page 15).
5 Press the MEMORY/SET button.
6 Press the TUNING/TIME (X or W) button to adjust the hour.
●Press the TUNING/TIME (X or W) button once to advance the time by 1 hour. Hold it down to advance continuously.
●When the
7 Press the MEMORY/SET button.
8 Press the TUNING/TIME (X or W) button to adjust the minutes.
●Press the TUNING/TIME (X or W) button once to advance the time by 1 minute. Hold it down to change the time in 5 minute intervals.
●The hour setting will not advance even if minutes advance from "59" to "00".
9 Press the MEMORY/SET button.
●The clock starts operating from "0" second. (Seconds are not displayed.)
And then the clock display will disappear after a few seconds.
To see the time display:
Press the CLOCK button.
●The time display will appear for about 5 seconds.
Note:
●The clock display will flash on and off at the push of the CLOCK button when the AC power supply is restored after a power failure occurs or after the AC power cord is disconnected.
If this happens, follow the procedure below to change the clock time.
To change the clock time:
①Press the CLOCK button.
②Within 5 seconds, press the MEMORY/SET button.
③Perform steps 6 - 9 above.
To change the time display mode:
①Perform steps 1 - 2 in the section "RESETTING THE MICROCOMPUTER", on page 15.
②Perform steps 1 - 9 above.
6
