LC42SB45U specifications
The Sharp LC42SB45U is a standout model in the realm of LCD televisions, showcasing a harmonious blend of innovative technology and user-friendly features designed to enhance the viewing experience. This 42-inch television is particularly appealing for those who appreciate both performance and aesthetics in their home entertainment setup.At the heart of the LC42SB45U is its high-definition LCD display, which boasts a resolution of 1920x1080 pixels. This Full HD quality delivers crisp visuals and vibrant colors that bring movies, games, and shows to life. The screen is designed to minimize glare, ensuring that viewers can enjoy their favorite content in various lighting conditions without distractions.
The television is equipped with Sharp's proprietary Aquos technology, which enhances picture quality through advanced image processing capabilities. This technology enhances contrast and color accuracy, delivering a more immersive viewing experience. With a dynamic contrast ratio that enhances the depth of images, viewers can appreciate the subtleties in shadows and highlights more than ever before.
In terms of connectivity, the LC42SB45U offers multiple HDMI inputs, allowing for easy connection to modern devices such as Blu-ray players, gaming consoles, and sound systems. This versatility ensures that users can easily switch between different sources without the hassle of constantly unplugging and replugging cables. Additionally, the television supports various input formats, making it compatible with a wide array of devices.
Sound quality is another crucial aspect of the LC42SB45U. It features built-in speakers that deliver clear and rich audio, complemented by Dolby Digital technology, which enhances the overall sound experience. This is particularly advantageous for viewers who wish to enjoy an engaging auditory experience without the immediate need for external sound systems.
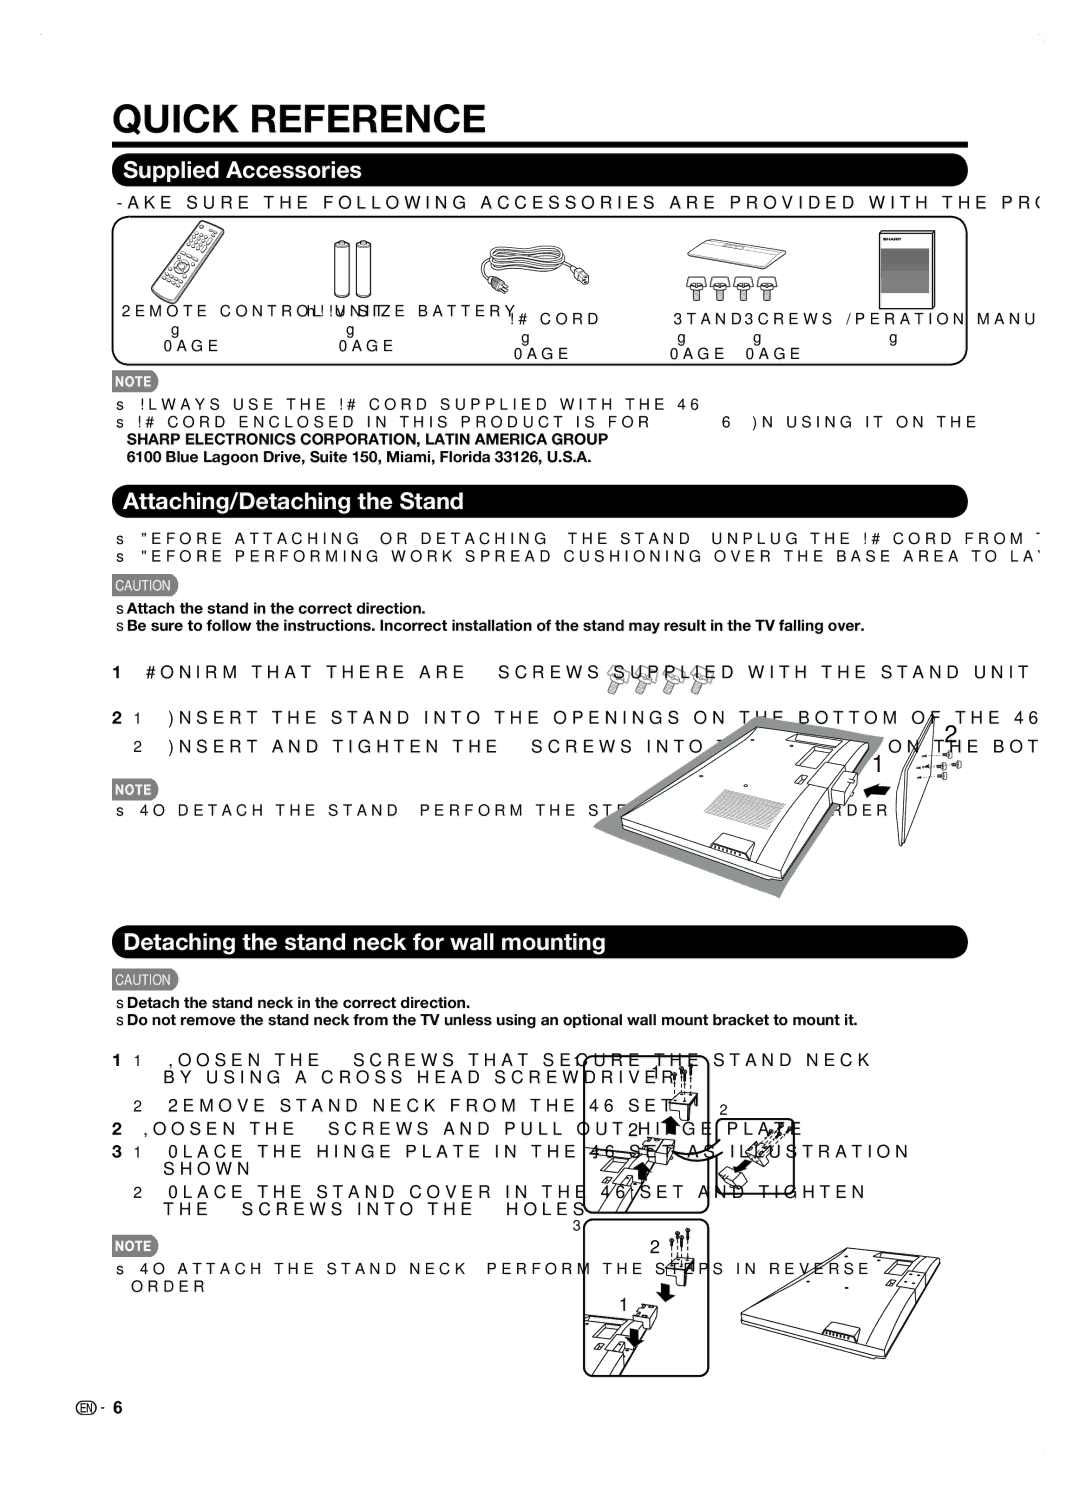
The design of the LC42SB45U is sleek and modern, making it an appealing addition to any living space. Its slim profile and minimalist bezels create a contemporary look that complements a variety of home decor styles. Furthermore, the TV can be mounted on a wall or placed on a stand, offering flexibility in how it can be displayed.
For users who value energy efficiency, the LC42SB45U incorporates features that reduce power consumption, making it an eco-friendly choice. Coupled with its reliability, this television is designed to last, ensuring that users can enjoy countless hours of entertainment.
In summary, the Sharp LC42SB45U combines cutting-edge technology, user convenience, and elegant design making it a compelling choice for anyone seeking a reliable and immersive Full HD television. Its range of features, from superior picture and sound quality to versatile connectivity options, positions it as a strong contender in the competitive television market.