BEFORE OPERATION

Plug in the oven. The oven display will display: “0:00”, an audible signal will sound once.

This model has a clock function and the oven uses less than 1.0W in stand by mode.

To set the clock, see below.

SETTING THE CLOCK

Your oven has a 24 hour clock feature.

1.Press the CLOCK/KITCHEN TIMER button once. The hour figure will flash and the clock indicator will illuminate.

2.Rotate the ENTRY dial until the correct hour is displayed, the input time should be within 0-23.

3.Press the CLOCK/KITCHEN TIMER button, the minute figure will flash.

4.Set the minutes. Rotate the ENTRY dial until the correct minutes are displayed, the input time should be within 0-59.

5.Press the CLOCK/KITCHEN TIMER button to start the clock. The icon “:” of the digital time will flash on the display and the clock indicator will disappear.

NOTES:

If the clock is set, when cooking is complete, the display will show the correct time of day. If the clock has not been set, the display will show "0:00".

To check the time of day during a cooking process, press CLOCK/KITCHEN TIMER button and the LED will display the time of day for 2-3 seconds. This does not affect the cooking process.

In the process of clock setting, if the STOP/CLEAR button is pressed, the oven will go back to the former setting.

If the electrical power supply to your microwave oven is interrupted, the display will intermittently show "0:00" after the power is reinstated. If this occurs during cooking, the programme will be erased. The time of day will also be erased.

KITCHEN TIMER FUNCTION

You can use the kitchen timer function in instances where microwave cooking is not involved for example to time boiled eggs cooked on conventional hob or to monitor the standing time for cooked/defrosted food.

Example:

To set the timer for 5 minutes.

1. Press CLOCK/KITCHEN

2. Rotate ENTRY dial to select

3. Press the START/+30sec/

TIMER twice.

time .

ENTER key to start the timer.

4.Check the display.

(The display will count down through the programmed time.)

When the timer arrives at 0:00, an audible signal will sound 5 times and the LED will then display the time of day.

You can enter any time up to 95 minutes. To cancel the KITCHEN TIMER whilst counting down, simply press the STOP/CLEAR button. NOTE: The KITCHEN TIMER function cannot be used whilst cooking.

MICROWAVE POWER LEVELS

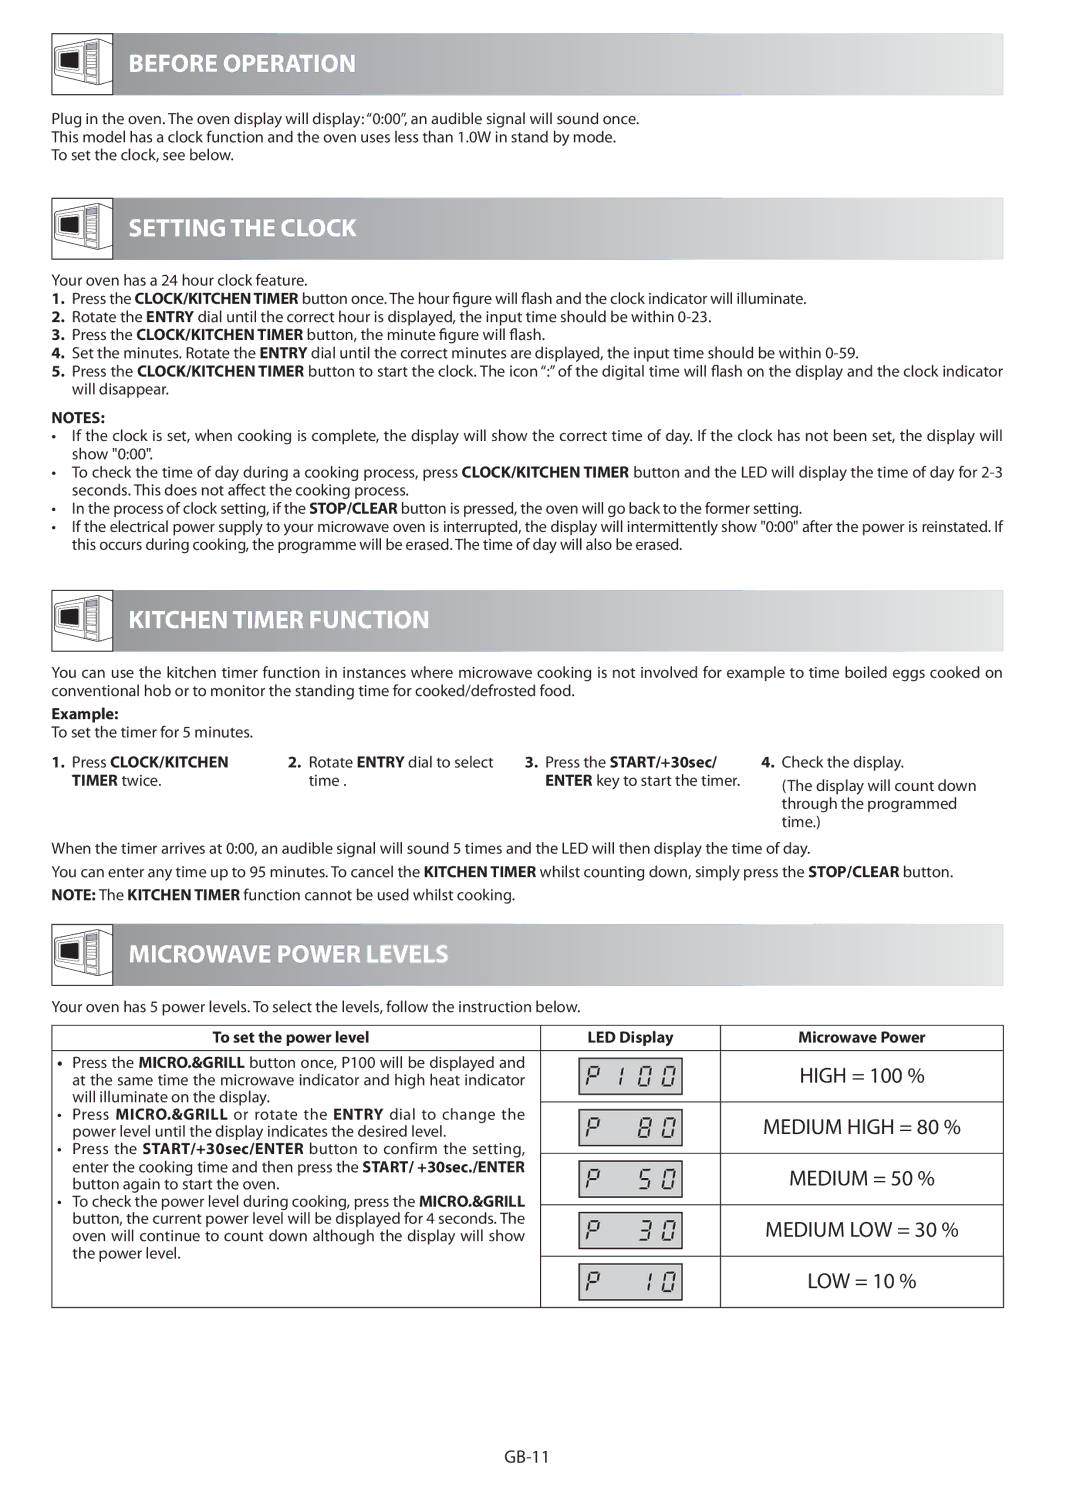
Your oven has 5 power levels. To select the levels, follow the instruction below.


To set the power level


LED Display

Microwave Power

Press the MICRO.&GRILL button once, P100 will be displayed and


HIGH = 100 %


at the same time the microwave indicator and high heat indicator


will illuminate on the display.


Press MICRO.&GRILL or rotate the ENTRY dial to change the


MEDIUM HIGH = 80 %


power level until the display indicates the desired level.


Press the START/+30sec/ENTER button to confirm the setting,


enter the cooking time and then press the START/ +30sec./ENTER


MEDIUM = 50 %


button again to start the oven.


• To check the power level during cooking, press the MICRO.&GRILL


button, the current power level will be displayed for 4 seconds. The


MEDIUM LOW = 30 %


oven will continue to count down although the display will show


the power level.


LOW = 10 %

GB-11

Page 12
Image 12
Sharp R-622STM operation manual Before Operation, Setting the Clock, Kitchen Timer Function, Microwave Power Levels

R-622STM specifications

The Sharp R-622STM is a remarkable microwave oven that combines innovative technology with user-friendly features to enhance cooking convenience. This model is particularly known for its impressive versatility, making it an attractive choice for households looking for an efficient kitchen appliance.

One of the standout features of the Sharp R-622STM is its 20-liter capacity, which provides ample space for various dishes. This makes it suitable for reheating meals, defrosting frozen foods, cooking popcorn, or even preparing simple meals from scratch. Its compact design allows it to fit comfortably in most kitchens without occupying too much counter space.

The microwave is equipped with a powerful 800 watts of cooking power, ensuring that food is heated promptly and evenly. Additionally, the Sharp R-622STM utilizes a combination of microwave and grill function, giving users the ability to not only cook but also achieve that desired crispy texture in certain dishes. The grill function is especially useful for preparing meats, vegetables, and toast.

The Sharp R-622STM features an intuitive control panel with easy-to-read buttons, allowing users to navigate its numerous settings effortlessly. It offers a variety of auto-cook programs that take the guesswork out of cooking, accommodating different food types and preferences. Whether you are cooking pasta, steaming vegetables, or baking potatoes, the pre-set cooking times and power levels simplify the process.

In terms of technology, the R-622STM is designed with user safety in mind, featuring a child lock function that helps prevent unintended operation, making it a family-friendly appliance. Additionally, its durable construction and sleek stainless-steel finish contribute to its aesthetic appeal and longevity.

Maintaining the Sharp R-622STM is hassle-free, as the interior is designed for easy cleaning. The removable turntable facilitates access, ensuring that spills and messes can be wiped away quickly.

In summary, the Sharp R-622STM stands out as a well-rounded microwave oven, thanks to its combination of performance, advanced features, and user-friendly design. Whether you're a busy professional or a parent managing meals for the family, this microwave is equipped to meet a variety of cooking needs efficiently and effectively.