R-959(SL)M-AA specifications
The Sharp R-959(SL)M-AA is a versatile microwave oven that combines modern technology with stylish design, making it a desirable option for contemporary kitchens. This model stands out with its multifunctional capabilities, ensuring that it caters to a wide array of cooking needs.One of the main features of the Sharp R-959(SL)M-AA is its grill function, which allows users to achieve a deliciously crisp finish on their meals. This feature is particularly useful for browning and grilling meats, making it an excellent complement to microwave cooking. The 900W microwave power ensures efficient cooking, while the grill power adds a robust browning capability to a variety of dishes.
The oven boasts a generous capacity of 25 liters, providing ample space for large dinners or multiple dishes. Its compact design allows it to fit conveniently on most countertops without taking up excessive space. The sleek and modern exterior, available in a stylish silver finish, complements any kitchen decor.
Equipped with innovative inverter technology, the Sharp R-959(SL)M-AA offers a more consistent cooking experience. Unlike traditional microwaves that use pulses of full power, this inverter system maintains a steady stream of energy, ensuring even heating and defrosting. This is particularly beneficial for delicate foods such as fish and sauces, which can be easily overcooked in conventional microwaves.
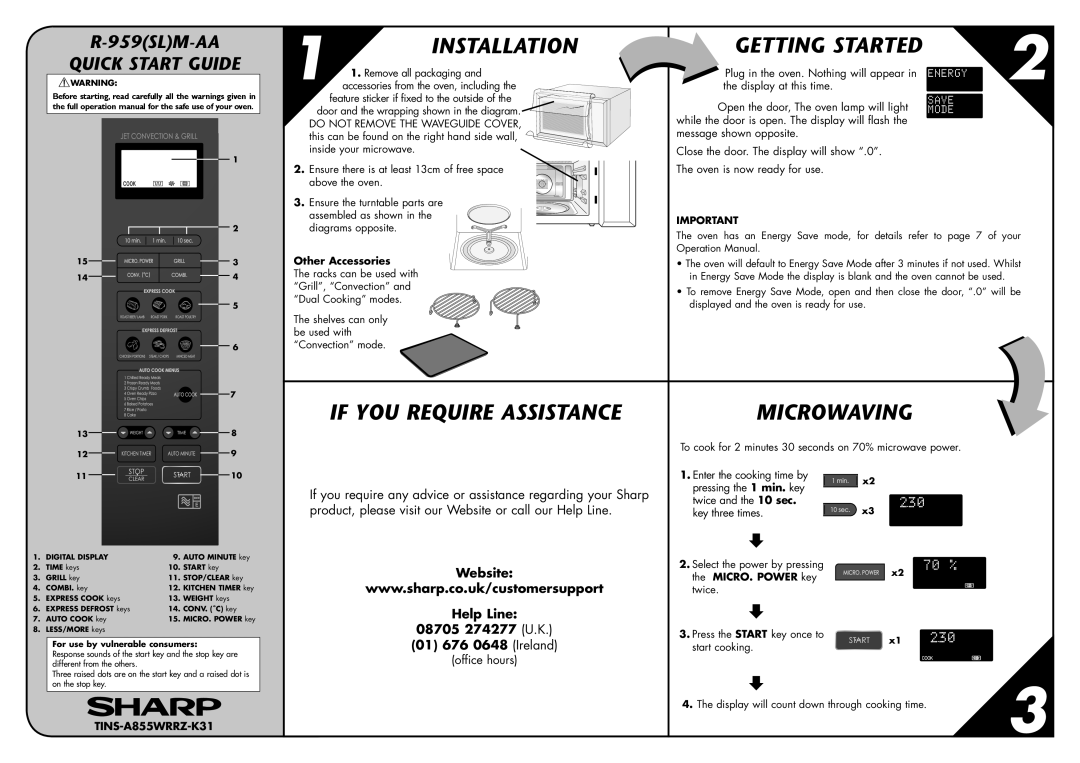
The user-friendly control panel includes a digital display and pre-programmed auto-cook menus, simplifying meal preparation. These auto-cook functions range from reheating leftovers to cooking specific dishes, allowing users to achieve perfect results with minimal effort. The easy-to-use interface is further enhanced by a child safety lock, ensuring peace of mind for families.
Another noteworthy characteristic of the Sharp R-959(SL)M-AA is its eco-friendly design, which incorporates energy-saving features. This microwave consumes less power in standby mode, aligning with modern energy efficiency standards.
Overall, the Sharp R-959(SL)M-AA is a well-rounded appliance that combines functionality, style, and advanced cooking technologies. Whether you're reheating food, defrosting ingredients, or cooking a complete meal, this microwave oven is designed to meet the demands of today’s busy households while adding a touch of elegance to the kitchen space.