Outdoor Remote Sensor Mounting Instructions
NOTE: Once you are ready to position your remote sensor and home receiver, ensure that the distance is not more than the effective transmission range of 100 feet. Some building materials and location of the home receiver or remote sensor can affect transmission quality and range.
Try various locations for best results.
The Remote Sensor comes with a table stand or can be wall mounted.
Table Stand
Simply slide out the attached stand from the mounting bracket.
Wall Mounting
Place a screw or nail in the desired hanging location.
A screw and wall anchor have been included for your convenience.
NOTE: Keep the remote sensor out of direct sunlight and rain. Do not mount on metal surface.
Outdoor Remote Sensor Low Battery Indication
When the battery is almost empty an icon will display on the remote sensor. Re- place the batteries as necessary and follow the setup procedure.
How to Use
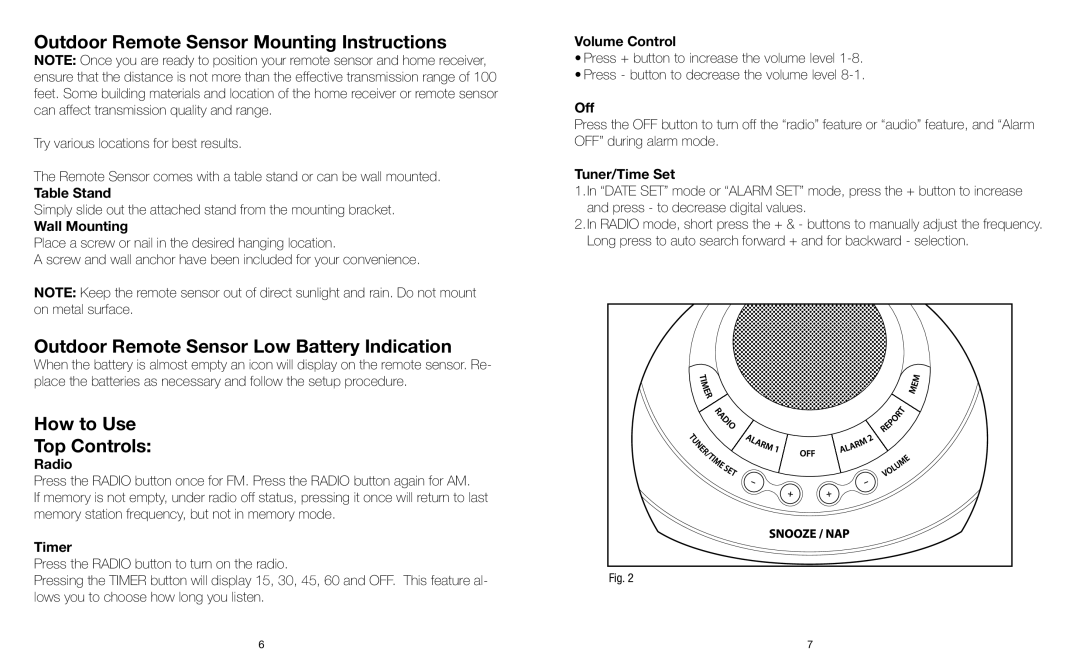
Top Controls:
Radio
Press the RADIO button once for FM. Press the RADIO button again for AM.
If memory is not empty, under radio off status, pressing it once will return to last memory station frequency, but not in memory mode.
Timer
Press the RADIO button to turn on the radio.
Pressing the TIMER button will display 15, 30, 45, 60 and OFF. This feature al- lows you to choose how long you listen.
Volume Control
•Press + button to increase the volume level
•Press - button to decrease the volume level
Off
Press the OFF button to turn off the “radio” feature or “audio” feature, and “Alarm OFF” during alarm mode.
Tuner/Time Set
1.In “DATE SET” mode or “ALARM SET” mode, press the + button to increase and press - to decrease digital values.
2.In RADIO mode, short press the + & - buttons to manually adjust the frequency. Long press to auto search forward + and for backward - selection.
Fig. 2
6 | 7 |
