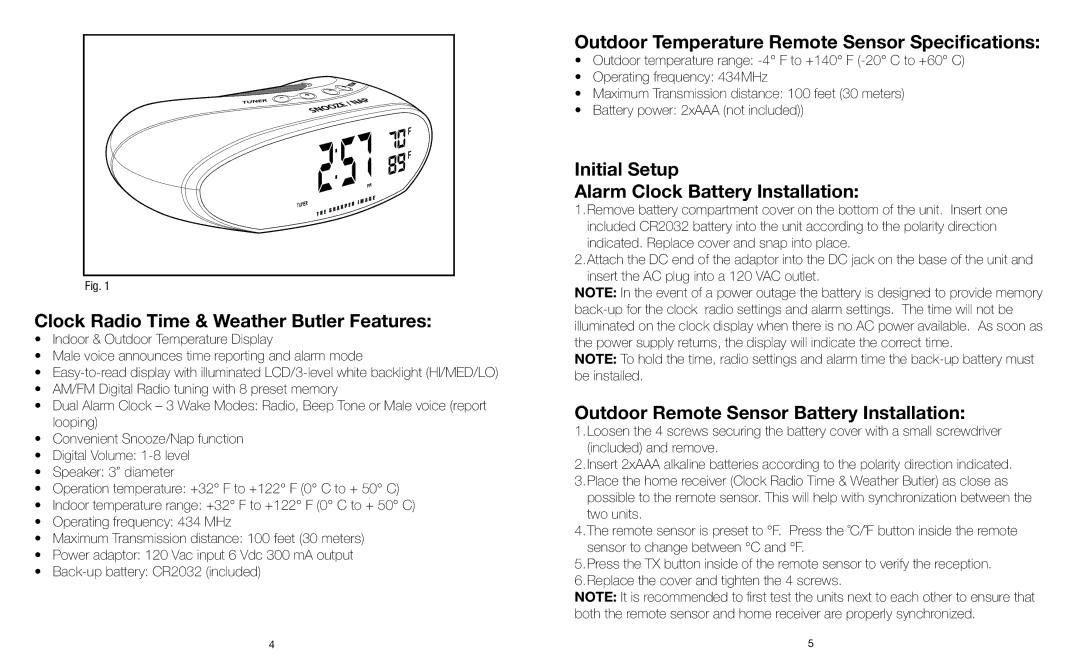
Fig. 1
Clock Radio Time & Weather Butler Features:
•Indoor & Outdoor Temperature Display
•Male voice announces time reporting and alarm mode
•
•AM/FM Digital Radio tuning with 8 preset memory
•Dual Alarm Clock – 3 Wake Modes: Radio, Beep Tone or Male voice (report looping)
•Convenient Snooze/Nap function
•Digital Volume:
•Speaker: 3” diameter
•Operation temperature: +32° F to +122° F (0° C to + 50° C)
•Indoor temperature range: +32° F to +122° F (0° C to + 50° C)
•Operating frequency: 434 MHz
•Maximum Transmission distance: 100 feet (30 meters)
•Power adaptor: 120 Vac input 6 Vdc 300 mA output
•
Outdoor Temperature Remote Sensor Specifications:
•Outdoor temperature range:
•Operating frequency: 434MHz
•Maximum Transmission distance: 100 feet (30 meters)
•Battery power: 2xAAA (not included))
Initial Setup
Alarm Clock Battery Installation:
1.Remove battery compartment cover on the bottom of the unit. Insert one included CR2032 battery into the unit according to the polarity direction indicated. Replace cover and snap into place.
2.Attach the DC end of the adaptor into the DC jack on the base of the unit and insert the AC plug into a 120 VAC outlet.
NOTE: In the event of a power outage the battery is designed to provide memory
NOTE: To hold the time, radio settings and alarm time the
Outdoor Remote Sensor Battery Installation:
1.Loosen the 4 screws securing the battery cover with a small screwdriver (included) and remove.
2.Insert 2xAAA alkaline batteries according to the polarity direction indicated.
3.Place the home receiver (Clock Radio Time & Weather Butler) as close as possible to the remote sensor. This will help with synchronization between the two units.
4.The remote sensor is preset to °F. Press the ˚C/˚F button inside the remote sensor to change between °C and °F.
5.Press the TX button inside of the remote sensor to verify the reception.
6.Replace the cover and tighten the 4 screws.
NOTE: It is recommended to first test the units next to each other to ensure that both the remote sensor and home receiver are properly synchronized.
4 | 5 |