Positioning the Microphone
The front of the KSM27 is marked by the 
 R logo. See Figure 1. Position this side of the microphone toward the sound source to be recorded. The rear of the microphone is marked by the
  logo, the low-frequency filter switch and the 15dB attenuation switch.
 Cardioid. Picks up sounds directly in front of the microphone and is least sensitive to those in back. Cardioid is the most commonly used polar pattern in studio recording and live-sound applications. See Figure 5.
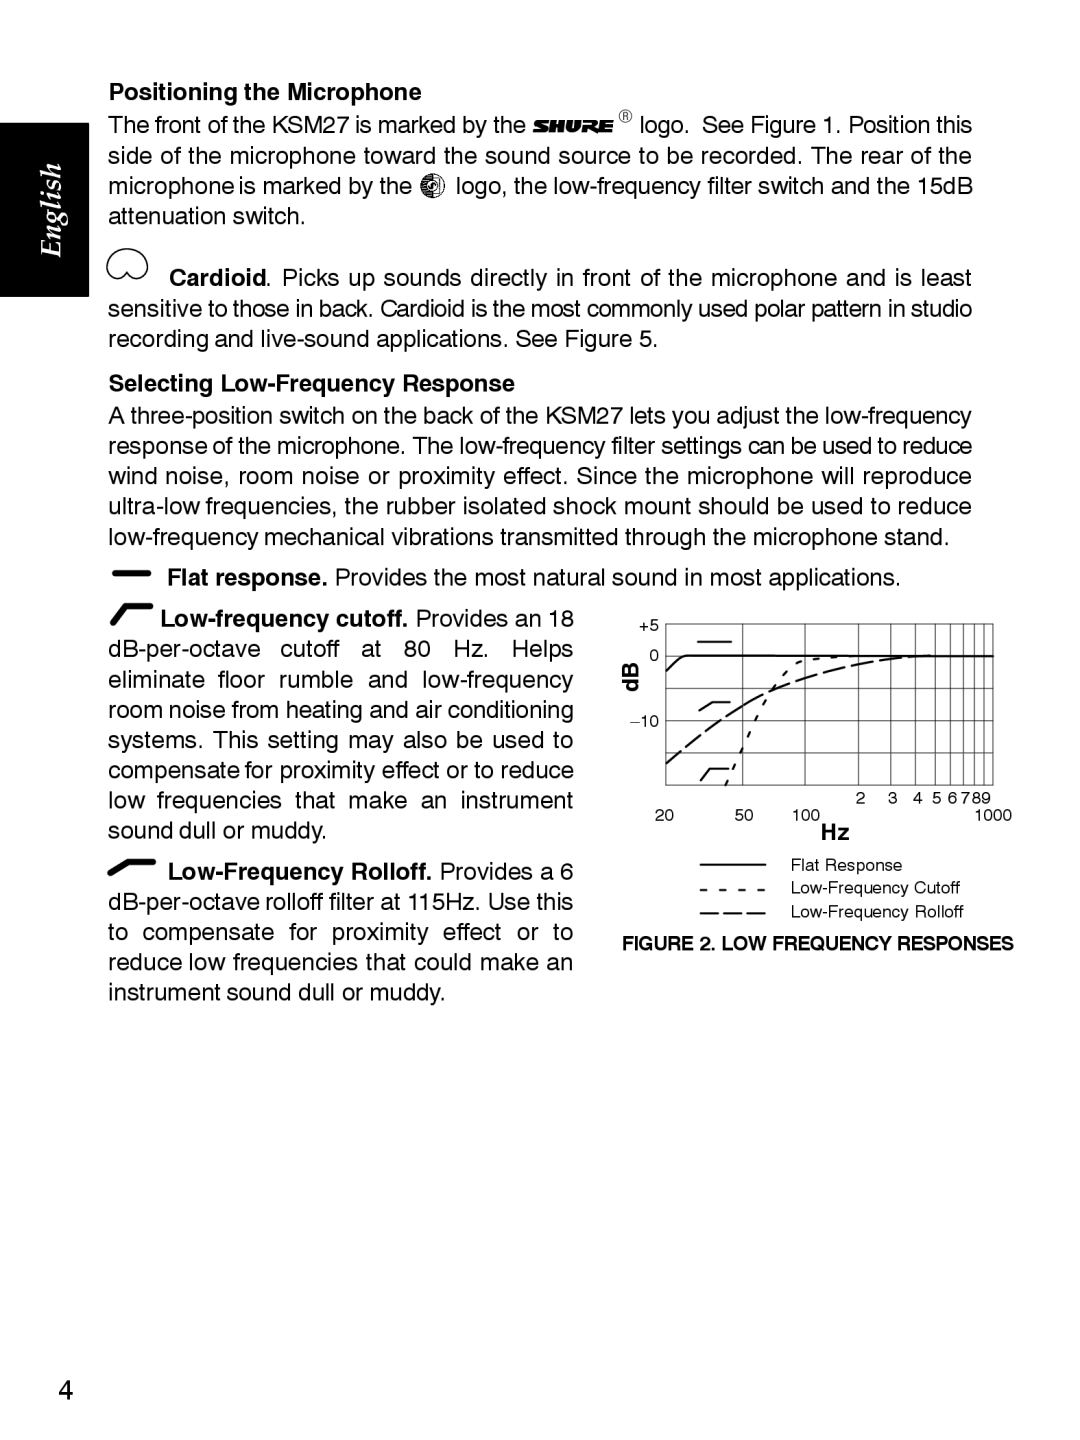
Selecting Low-Frequency Response
A three-position switch on the back of the KSM27 lets you adjust the low-frequency response of the microphone. The low-frequency filter settings can be used to reduce wind noise, room noise or proximity effect. Since the microphone will reproduce ultra-low frequencies, the rubber isolated shock mount should be used to reduce low-frequency mechanical vibrations transmitted through the microphone stand.
Flat response. Provides the most natural sound in most applications.
 Low-frequency cutoff. Provides an 18 dB-per-octave cutoff at 80 Hz. Helps eliminate floor rumble and low-frequency room noise from heating and air conditioning systems. This setting may also be used to compensate for proximity effect or to reduce low frequencies that make an instrument sound dull or muddy.
 Low-Frequency Rolloff. Provides a 6 dB-per-octave rolloff filter at 115Hz. Use this to compensate for proximity effect or to reduce low frequencies that could make an instrument sound dull or muddy.
+5
0
dB
–10
Flat Response
Low-Frequency Cutoff
Low-Frequency Rolloff
FIGURE 2. LOW FREQUENCY RESPONSES