ULX specifications
The Shure ULX series is a line of professional wireless microphone systems renowned for their reliability, audio quality, and versatility. Designed for a variety of applications, from live music performances to corporate events, the ULX series provides users with superior sound reproduction and seamless operation.One of the standout features of the Shure ULX system is its advanced digital signal processing, which ensures clear audio transmission over a wide frequency range. This technology minimizes interference and enhances audio quality, making it ideal for use in crowded environments with multiple wireless devices. With a frequency response of 20Hz to 20kHz, the ULX system captures the full spectrum of sound, resulting in rich and vibrant audio output.
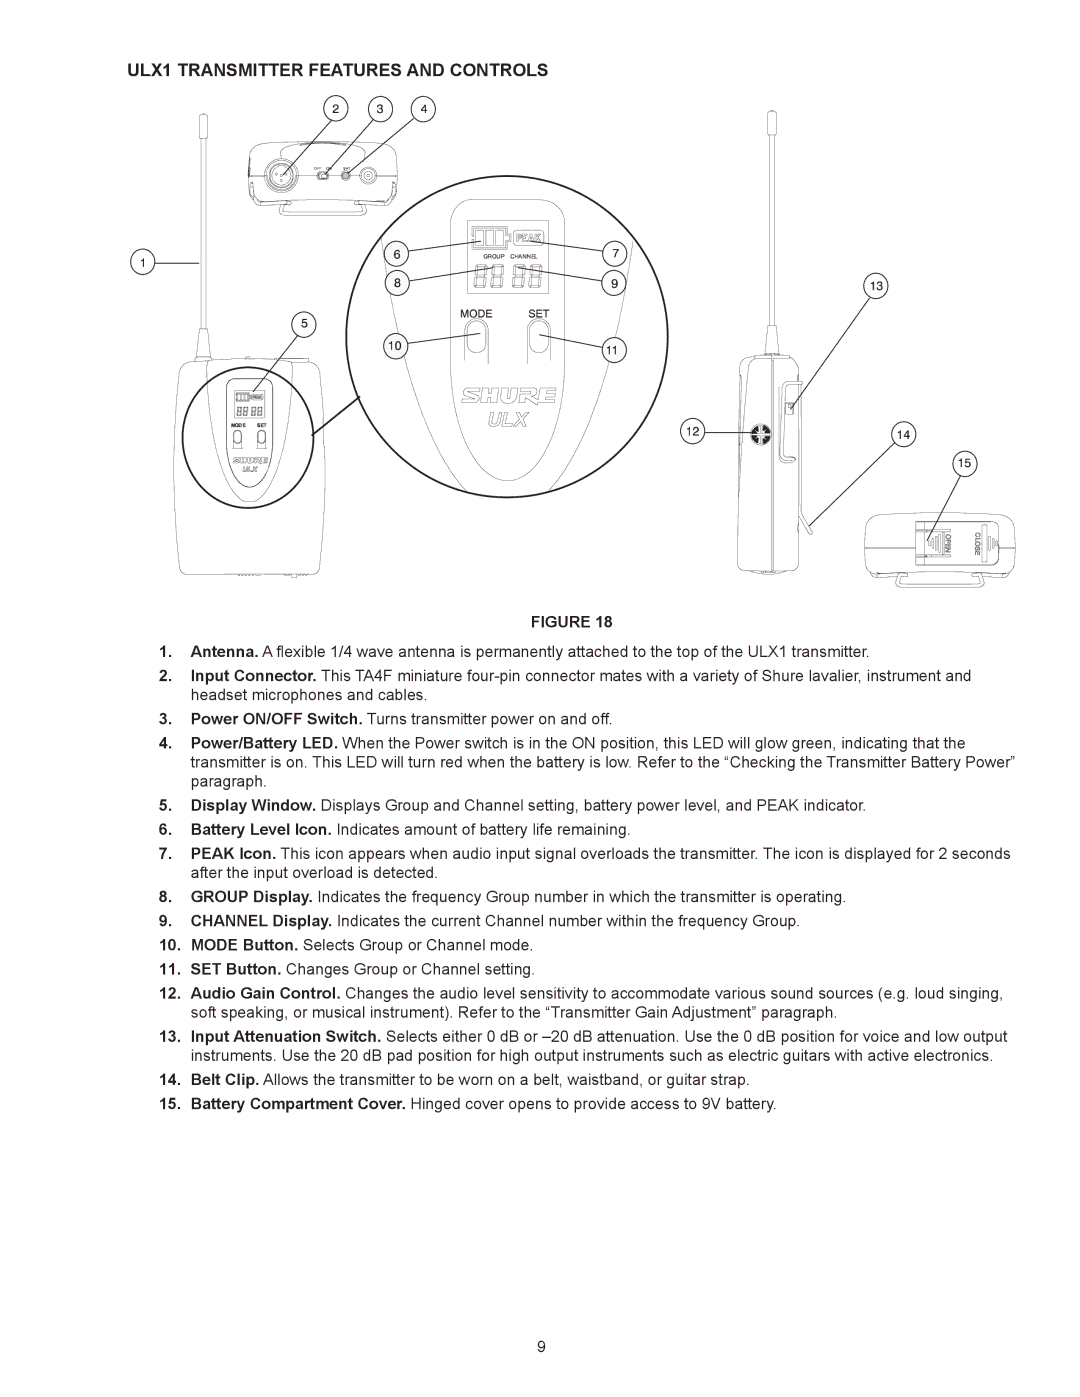
The ULX series supports a variety of transmitter types, including handheld, bodypack, and lavalier options, allowing users to choose the best solution for their specific needs. The handheld microphone transmitters are equipped with Shure's renowned condenser capsules, providing exceptional clarity and feedback rejection, while the bodypack transmitters can be easily concealed on clothing for unobtrusive use.
Another significant characteristic of the Shure ULX series is its intuitive interface. The systems feature a simple LCD screen that displays essential information such as channel selection, battery status, and signal strength, making it easy for users to monitor their wireless setup. Additionally, the ULX series offers automatic frequency scanning, which identifies and selects the best available frequencies, simplifying the setup process and ensuring reliable operation in dynamic environments.
Shure’s attention to build quality is evident in the ULX series, which features rugged construction designed to withstand the rigors of touring and professional use. This durability is coupled with a robust battery life, as the systems typically offer up to 14 hours of continuous operation on AA batteries, further enhancing their usability.
In summary, the Shure ULX series stands out in the realm of wireless audio solutions, thanks to its advanced technologies, user-friendly features, and exceptional durability. Whether for performers, presenters, or venues, the Shure ULX systems deliver reliable, high-quality sound that meets the demanding requirements of any professional audio setup.

