MOON PSX 5.3 Power Supply
Rear Panel Connections
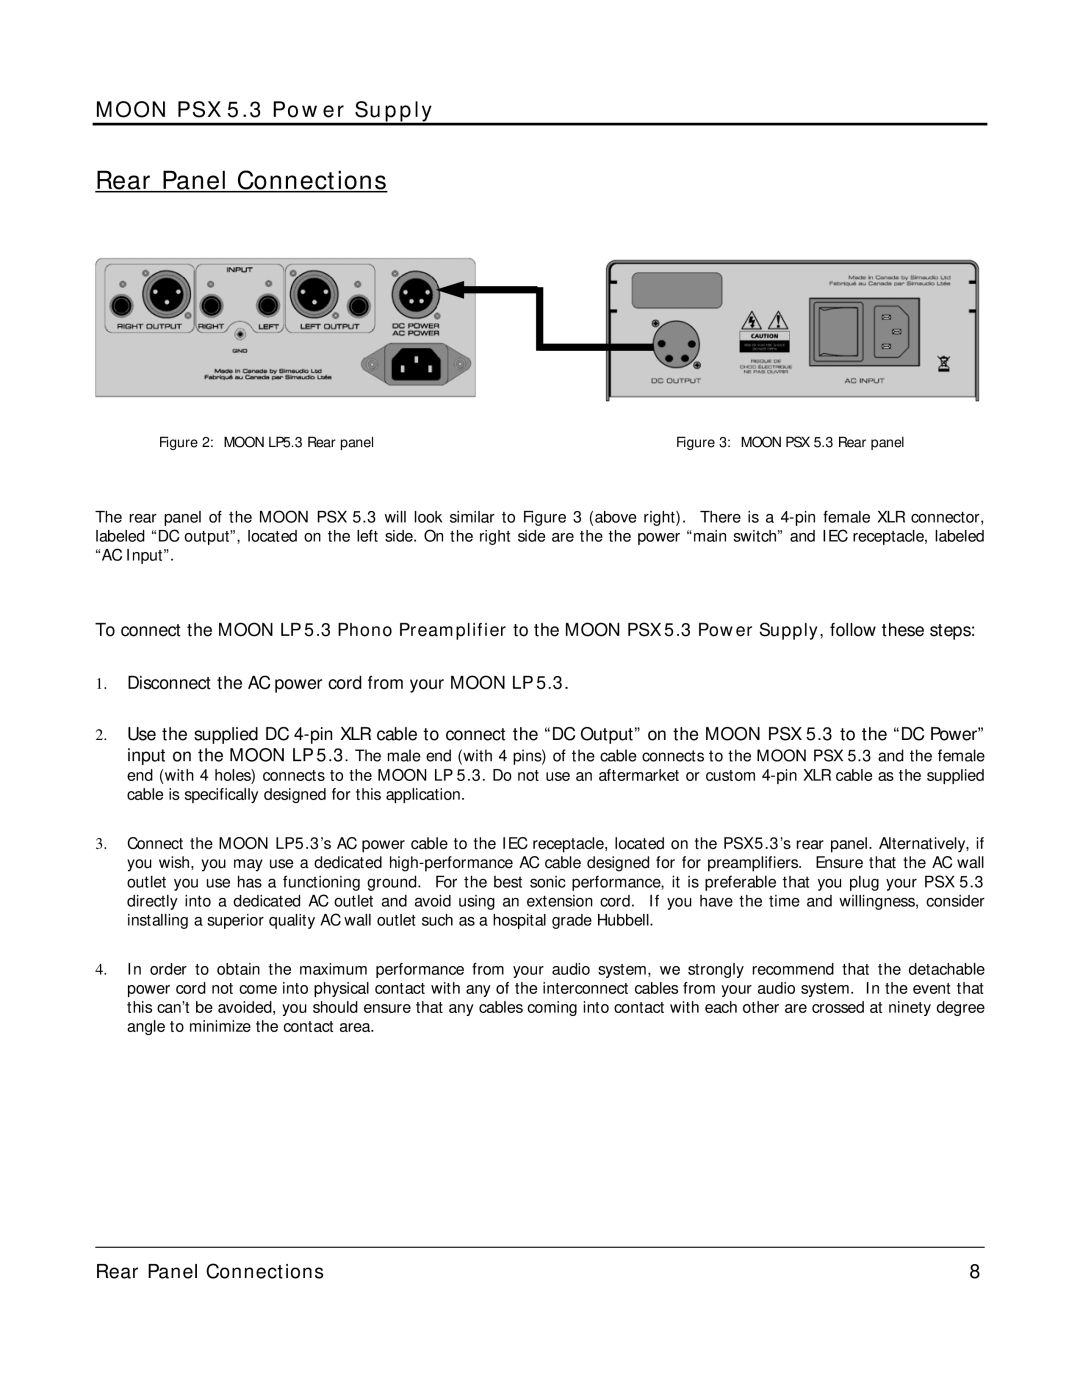
Figure 2: MOON LP5.3 Rear panel | Figure 3: MOON PSX 5.3 Rear panel |
The rear panel of the MOON PSX 5.3 will look similar to Figure 3 (above right). There is a
To connect the MOON LP 5.3 Phono Preamplifier to the MOON PSX 5.3 Power Supply, follow these steps:
1.Disconnect the AC power cord from your MOON LP 5.3.
2.Use the supplied DC
3.Connect the MOON LP5.3’s AC power cable to the IEC receptacle, located on the PSX5.3’s rear panel. Alternatively, if you wish, you may use a dedicated
4.In order to obtain the maximum performance from your audio system, we strongly recommend that the detachable power cord not come into physical contact with any of the interconnect cables from your audio system. In the event that this can’t be avoided, you should ensure that any cables coming into contact with each other are crossed at ninety degree angle to minimize the contact area.
____________________________________________________________________________________
Rear Panel Connections | 8 |