
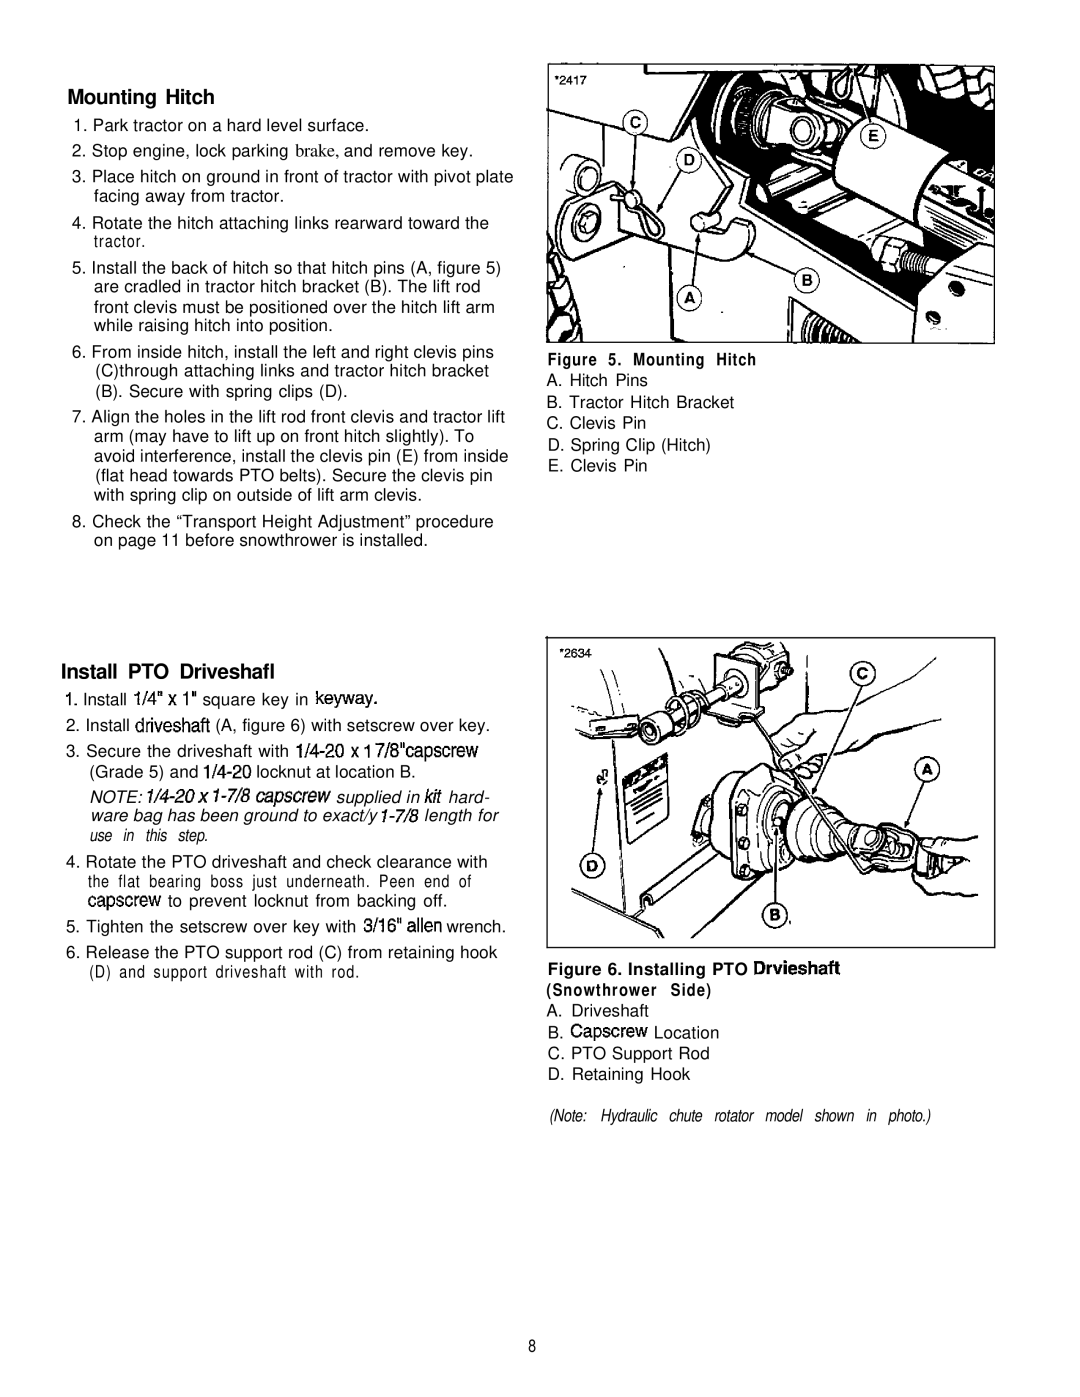
1692243, 1692244 specifications
Simplicity 1692243 and 1692244 are innovative products designed to enhance user experience through advanced technologies and thoughtful features. These models embody the principles of simplicity and efficiency, making them ideal for both casual and professional environments.One of the standout characteristics of Simplicity 1692243 and 1692244 is their sleek design. The streamlined profile and modern aesthetic make them visually appealing, while also ensuring that they fit seamlessly into any setting. The use of high-quality materials contributes to a premium feel and ensures durability, enabling them to withstand daily wear and tear.
When it comes to functionality, both models boast a host of smart features that cater to today's tech-savvy users. A key aspect is their user-friendly interface. Designed with simplicity in mind, the intuitive controls allow for quick navigation and seamless interaction. Users will appreciate the responsive touchscreens, which provide instant feedback and make operation effortless.
In terms of connectivity, Simplicity 1692243 and 1692244 support a variety of wireless options, including Bluetooth and Wi-Fi. This versatility enables users to easily connect to other devices, stream content, and access a wide range of applications without the hassle of tangled wires. The models are also compatible with popular smart home systems, allowing for integration into existing setups for additional convenience.
Both units come equipped with advanced performance technologies that ensure optimal functionality. These include energy-efficient components and enhanced processing capabilities. This means not only can users rely on consistent performance, but they can also enjoy longer usage times without frequent recharging, thanks to smart battery management systems.
Another notable feature is the emphasis on security. Simplicity 1692243 and 1692244 incorporate advanced encryption technologies and secure access protocols, ensuring that user data remains protected from potential threats. This focus on security demonstrates a commitment to user privacy and peace of mind.
In conclusion, Simplicity 1692243 and 1692244 represent a blend of modern design, smart technology, and user-centric features. With their high-quality construction, intuitive interfaces, robust connectivity options, and strong emphasis on security, these models stand out as reliable solutions for anyone seeking simplicity without sacrificing functionality. Whether for personal use or professional applications, they are set to enhance everyday experiences, making tasks not only easier but also more enjoyable.