BM 1619X01525
CHARGING THE TOOL
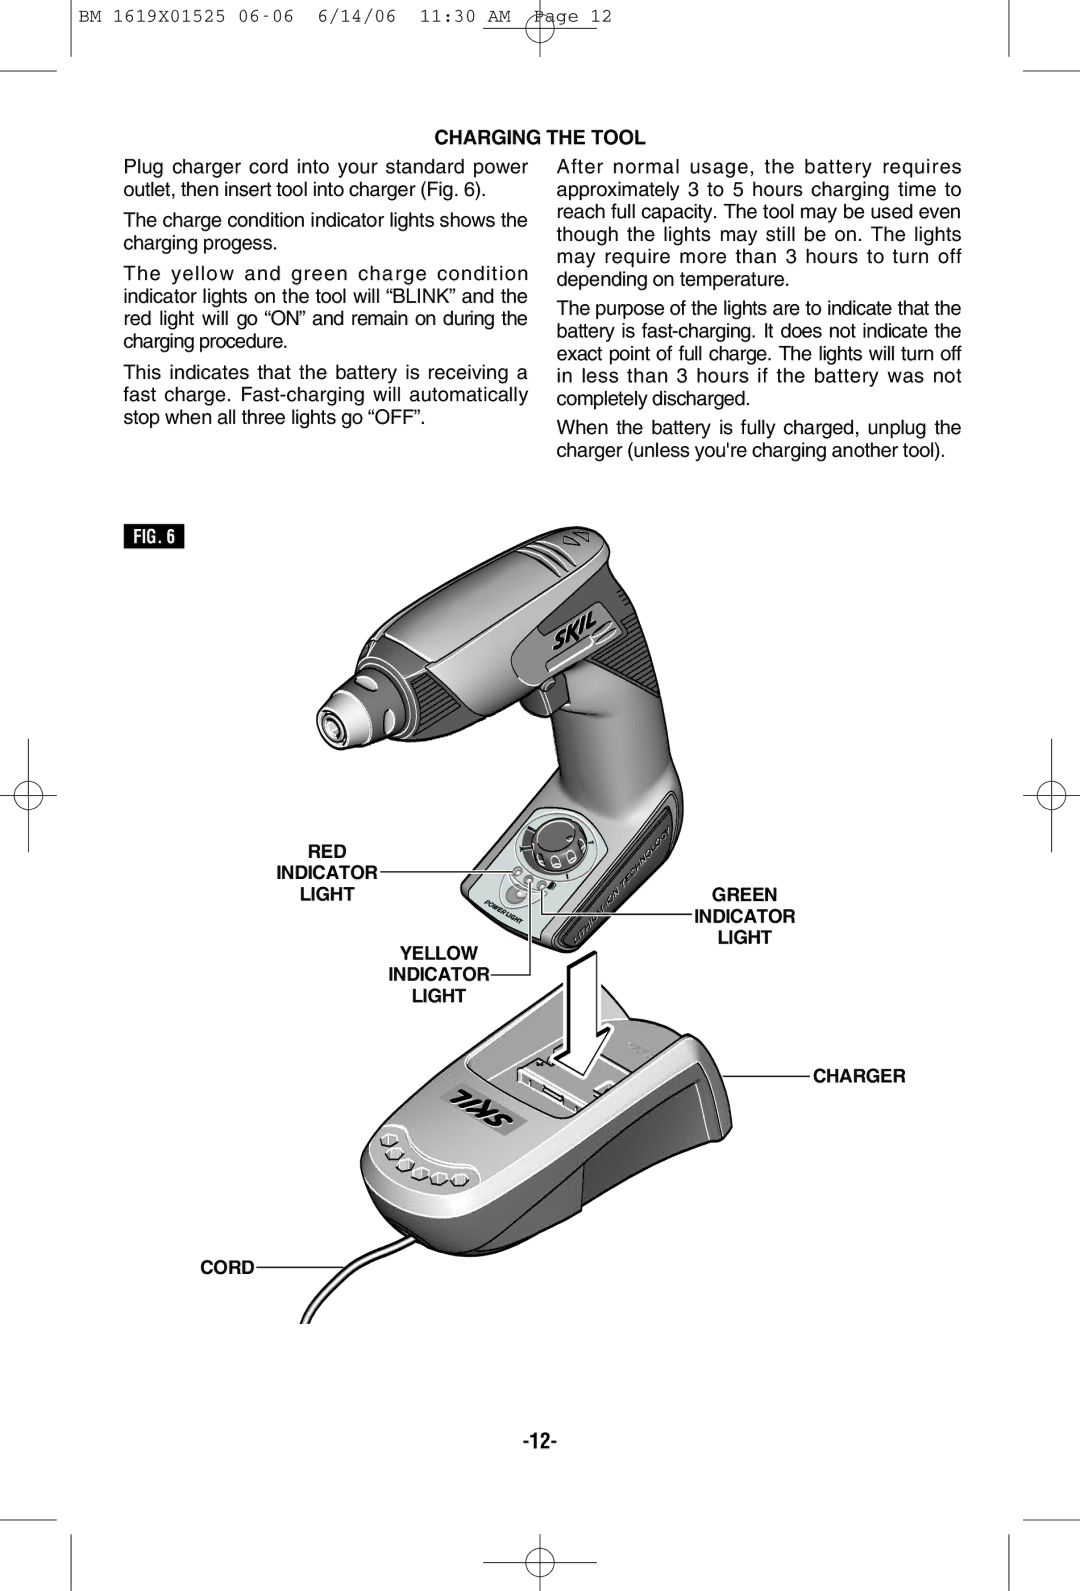
Plug charger cord into your standard power outlet, then insert tool into charger (Fig. 6).
The charge condition indicator lights shows the charging progess.
The yellow and green charge condition indicator lights on the tool will “BLINK” and the red light will go “ON” and remain on during the charging procedure.
This indicates that the battery is receiving a fast charge.
After normal usage, the battery requires approximately 3 to 5 hours charging time to reach full capacity. The tool may be used even though the lights may still be on. The lights may require more than 3 hours to turn off depending on temperature.
The purpose of the lights are to indicate that the battery is
When the battery is fully charged, unplug the charger (unless you're charging another tool).
FIG. 6
RED
INDICATOR
LIGHT
YELLOW
INDICATOR![]()
LIGHT
GREEN
INDICATOR
LIGHT