SM 2610930928 6-05 6/1/05 9:10 AM Page 8
CLEANING AND EMPTYING THE DUST CANISTER
!Your tool is equipped with WARNING a dust canister, empty it
frequently, after completion of sanding and before storing the sander. Be extremely careful of dust disposal, materials in fine particle form may be explosive. Do not throw sanding dust on an open fire. Combustion from mixture of varnishes, lacquers, polyurethane, oil or water with dust particles can occur if there is a static discharge, spark introduced in the box, or excessive heat.
To empty canister, hold canister and maintain a firm grip. Firmly push upward on tab on corner of lid, and remove from canister (Fig. 4). Knock excess dust out of the microfilter, or remove dust with your fingers or a soft brush (Fig. 5). You may notice that all the dust may not come out of the canister. This will not affect sanding performance but will reduce dust collection efficiency.
NOTE: Do not wash the micro filter with soap and water. Dust may become more firmly lodged in the pores, which will reduce dust collection, and damage the micro filter.
FIG. 4 |
| FIG. 5 |
VACUUM ADAPTER
For maximum dust collection when the dust canister has been removed, use the vacuum adapter supplied and a shop vacuum cleaner.
INSTALLING VACUUM ADAPTER
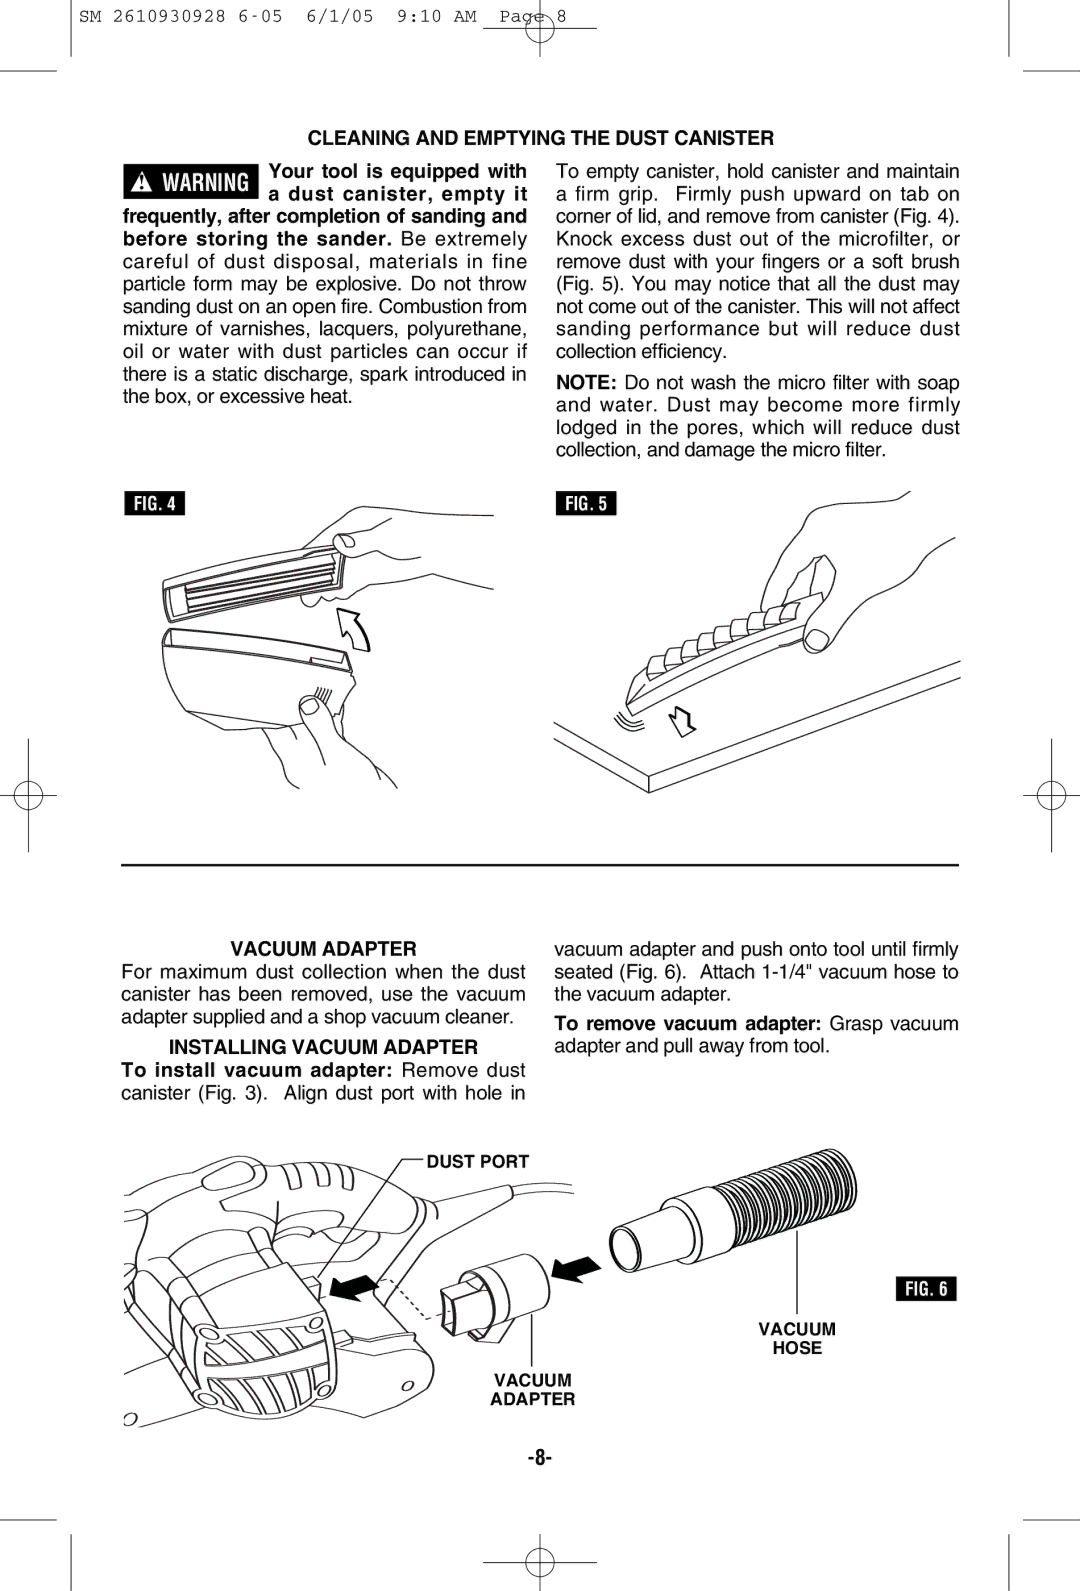
To install vacuum adapter: Remove dust canister (Fig. 3). Align dust port with hole in
vacuum adapter and push onto tool until firmly seated (Fig. 6). Attach
To remove vacuum adapter: Grasp vacuum adapter and pull away from tool.
DUST PORT
FIG. 6
VACUUM
HOSE
VACUUM
ADAPTER