WALL MOUNT INSTALLATION
1Locate the humidistat about 5 ft. above the floor, on an inside wall, away from discharge registers. Also, avoid areas with extreme variation in relative humidity levels; i.e. bathrooms and kitchens. When wall mounting, homeowners usually prefer the humidistat mounted beside, or in the vicinity of the heating thermostat.
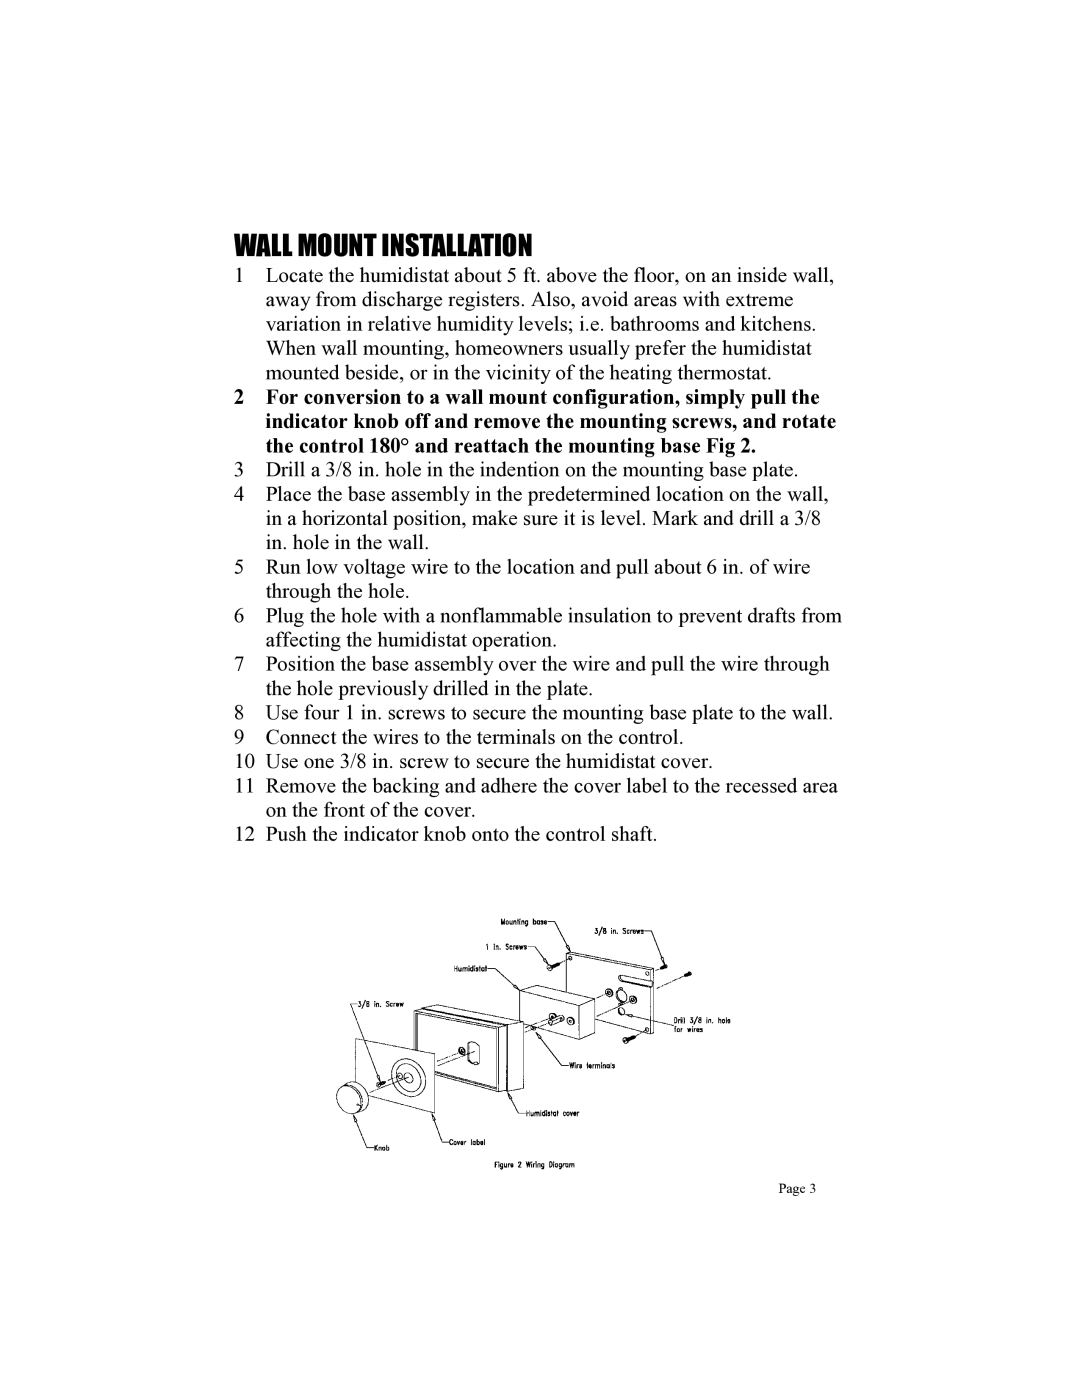
2For conversion to a wall mount configuration, simply pull the indicator knob off and remove the mounting screws, and rotate the control 180° and reattach the mounting base Fig 2.
3Drill a 3/8 in. hole in the indention on the mounting base plate.
4Place the base assembly in the predetermined location on the wall, in a horizontal position, make sure it is level. Mark and drill a 3/8 in. hole in the wall.
5Run low voltage wire to the location and pull about 6 in. of wire through the hole.
6Plug the hole with a nonflammable insulation to prevent drafts from affecting the humidistat operation.
7Position the base assembly over the wire and pull the wire through the hole previously drilled in the plate.
8Use four 1 in. screws to secure the mounting base plate to the wall.
9Connect the wires to the terminals on the control.
10Use one 3/8 in. screw to secure the humidistat cover.
11Remove the backing and adhere the cover label to the recessed area on the front of the cover.
12Push the indicator knob onto the control shaft.
Page 3