Motion Sensor | Model |
1. INTRODUCTION |
|
|
|
The Motion Sensor is designed to activate the Skylink’s swing door opener automatically when it senses motion nearby the door. The door will stay open for a period of time then closes if no further movement is detected.
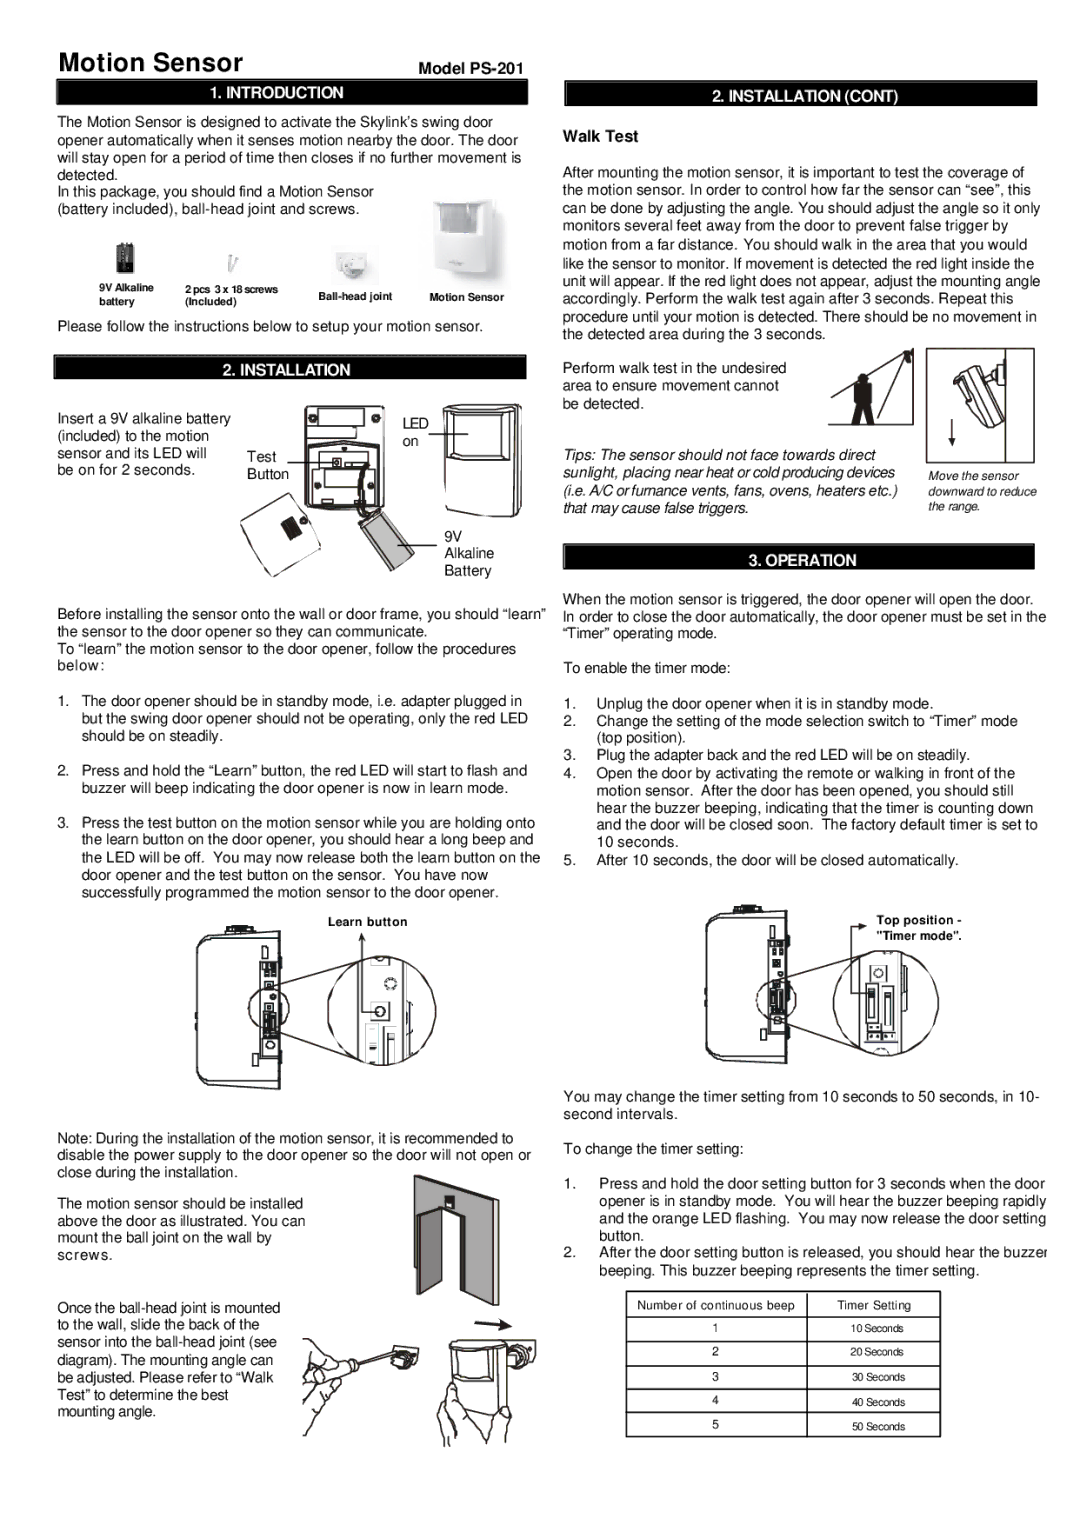
In this package, you should find a Motion Sensor (battery included),
9V Alkaline | 2 pcs 3 x 18 screws | Motion Sensor | ||
battery | (Included) | |||
|
|
Please follow the instructions below to setup your motion sensor.
2. INSTALLATION (CONT)
Walk Test
After mounting the motion sensor, it is important to test the coverage of the motion sensor. In order to control how far the sensor can “see”, this can be done by adjusting the angle. You should adjust the angle so it only monitors several feet away from the door to prevent false trigger by motion from a far distance. You should walk in the area that you would like the sensor to monitor. If movement is detected the red light inside the unit will appear. If the red light does not appear, adjust the mounting angle accordingly. Perform the walk test again after 3 seconds. Repeat this procedure until your motion is detected. There should be no movement in the detected area during the 3 seconds.
| 2. INSTALLATION |
| |
Insert a 9V alkaline battery | LED | ||
(included) to the motion |
| ||
| on | ||
sensor and its LED will | Test | ||
| |||
be on for 2 seconds. | Button |
| |
Perform walk test in the undesired area to ensure movement cannot be detected.
Tips: The sensor should not face towards direct sunlight, placing near heat or cold producing devices (i.e. A/C or furnance vents, fans, ovens, heaters etc.) that may cause false triggers.
Move the sensor downward to reduce the range.
9V Alkaline Battery
Before installing the sensor onto the wall or door frame, you should “learn” the sensor to the door opener so they can communicate.
To “learn” the motion sensor to the door opener, follow the procedures below:
1.The door opener should be in standby mode, i.e. adapter plugged in but the swing door opener should not be operating, only the red LED should be on steadily.
2.Press and hold the “Learn” button, the red LED will start to flash and buzzer will beep indicating the door opener is now in learn mode.
3.Press the test button on the motion sensor while you are holding onto the learn button on the door opener, you should hear a long beep and the LED will be off. You may now release both the learn button on the door opener and the test button on the sensor. You have now successfully programmed the motion sensor to the door opener.
3. OPERATION
When the motion sensor is triggered, the door opener will open the door. In order to close the door automatically, the door opener must be set in the “Timer” operating mode.
To enable the timer mode:
1.Unplug the door opener when it is in standby mode.
2.Change the setting of the mode selection switch to “Timer” mode (top position).
3.Plug the adapter back and the red LED will be on steadily.
4.Open the door by activating the remote or walking in front of the motion sensor. After the door has been opened, you should still hear the buzzer beeping, indicating that the timer is counting down and the door will be closed soon. The factory default timer is set to 10 seconds.
5.After 10 seconds, the door will be closed automatically.
Learn button
Top position - "Timer mode".
Note: During the installation of the motion sensor, it is recommended to disable the power supply to the door opener so the door will not open or close during the installation.
The motion sensor should be installed above the door as illustrated. You can mount the ball joint on the wall by screws.
Once the
You may change the timer setting from 10 seconds to 50 seconds, in 10- second intervals.
To change the timer setting:
1.Press and hold the door setting button for 3 seconds when the door opener is in standby mode. You will hear the buzzer beeping rapidly and the orange LED flashing. You may now release the door setting button.
2.After the door setting button is released, you should hear the buzzer beeping. This buzzer beeping represents the timer setting.
Number of continuous beep |
| Timer Setting |
| ||
|
|
|
1 |
| 10 Seconds |
|
|
|
2 |
| 20 Seconds |
|
|
|
3 |
| 30 Seconds |
|
|
|
4 |
| 40 Seconds |
|
|
|
5 |
| 50 Seconds |
|
|
|