ABOUT THE EZ SWITCH 10/100
SMC-EZ108DT
The EZ Switch™ 10/100
Features and Benefits
◆
◆ANSI/IEEE 802.3u compliance ensures compatibility with
◆
◆Half- and
◆Plug and play
◆
◆
◆Desktop and rack mountable
Front-Panel LEDs
The front panel of the switch provides a link status LED for each
Port and Switch Status LEDs
LEDs | Condition | Status |
|
|
|
Pow er | Green | Sw itch is receiving pow er. |
|
|
|
Link/Act | Green | Indicates that the connection betw een |
|
| port and attached device is valid. |
|
|
|
| Flashing Green | Indicates that the sw itch is transmitting |
|
| or receiving data. |
|
|
|
100M | Green | Indicates that the port is operating at |
|
| 100 Mbps. |
|
|
|
FDX | Green | Indicates that the port is operating in |
|
| |
|
|
|
| Flashing Green | Indicates a collision occured on the |
|
| port segment w hen operating in half- |
|
| duplex mode. |
|
|
|
Front-Panel Ports
The
Port 8 on the switch doubles as a crossover port and a
Rear Panel
The AC power receptacle is located on the rear panel of the switch.
INSTALLING THE SWITCH
The EZ Switch 10/100 can be placed on a desktop or shelf, or installed in a standard
Equipment Checklist
After unpacking the EZ Switch 10/100, check the contents of the box to be sure you’ve received the following components:
•EZ Switch 10/100
•Appropriate AC power cable
•Four adhesive foot pads
•SMC Warranty Registration Card
•This User Guide
Selecting a Site
Be sure to follow the site selection guidelines below when choosing a location:
υ Select a suitable location for the switch:
•It should be accessible for installing, cabling and
maintaining the switch.
•The temperature and humidity should be within
the ranges listed in the specifications.
• The status LEDs should be clearly visible.
•There should be adequate space (approximately two inches) on all sides for proper air flow.
υBefore rack mounting the switch, pay particular
attention to the following factors:
•Temperature: Since the temperature within a rack assembly may be higher than the ambient room temperature, check that the rack- environment temperature is within the specified
operating temperature range.
•Mechanical Loading: Do not place any
equipment on top of a
•Circuit Overloading: Be sure that the supply
circuit to the rack assembly is not overloaded.
•Grounding:
υMake sure
υMake sure that a properly grounded power outlet is within 8 feet (2.44 meters) of the switch and is powered from an independent circuit breaker. As with any equipment, using a filter or surge suppressor is recommended.
Instructions
1.Positioning the Switch: For desktop or shelf mounting, attach the four adhesive foot pads to the bottom of the switch. For
2.Applying Power: Plug one end of the power cable into the power receptacle at the back of the switch, and the other end into an appropriate electrical outlet. Check the Power LED to be sure it is on.
Note: It is not necessary to power off the switch before connecting or disconnecting any UTP cables, as these actions will not disrupt the operation of other devices attached to the switch.
3. Connecting PCs: Connect each PC to an
on the switch with a
Note: If an attached device does not support Auto- Negotiation, the data rate will be sensed automatically and the communication mode will default to half duplex.
4. Cascading Switches and Other Network Devices: If you need more ports, connect the
Note: Alternatively, you can cascade from any crossover port on the switch to a
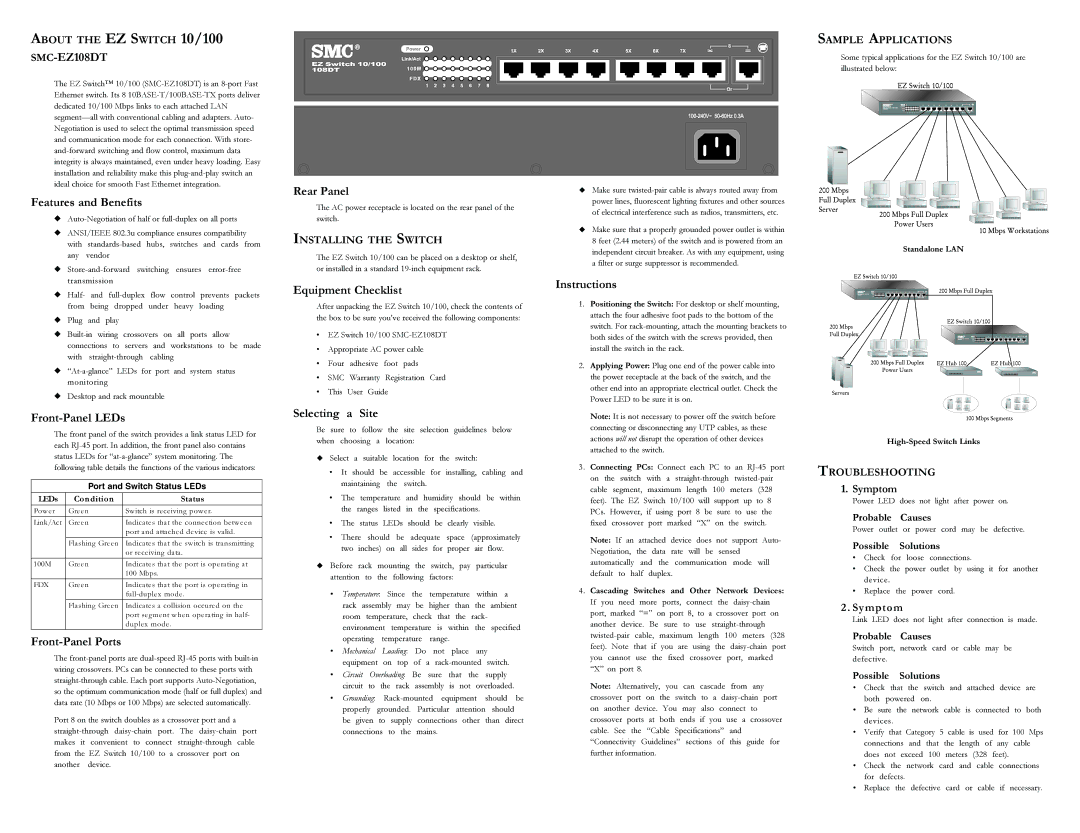
SAMPLE APPLICATIONS
Some typical applications for the EZ Switch 10/100 are illustrated below:
Standalone LAN
TROUBLESHOOTING
1. Symptom
Power LED does not light after power on.
Probable Causes
Power outlet or power cord may be defective.
Possible Solutions
• Check for loose connections.
•Check the power outlet by using it for another device.
•Replace the power cord.
2 . Symptom
Link LED does not light after connection is made.
Probable Causes
Switch port, network card or cable may be defective.
Possible Solutions
•Check that the switch and attached device are both powered on.
•Be sure the network cable is connected to both devices.
•Verify that Category 5 cable is used for 100 Mps connections and that the length of any cable
does not exceed 100 meters (328 feet).
•Check the network card and cable connections for defects.
•Replace the defective card or cable if necessary.