SMCGS24-Smart, SMCGS16-Smart specifications
SMC Networks has been a reliable player in the networking market, and its SMCGS16-Smart and SMCGS24-Smart switches are prime examples of the company's commitment to providing innovative solutions for both small and medium-sized enterprises and larger networks.The SMCGS16-Smart is a 16-port Gigabit Ethernet switch, while the SMCGS24-Smart expands that offering with 24 ports. Both switches are designed with versatility and performance in mind, making them suitable for various applications, including data centers, campus networks, and office environments.
One of the standout features of the SMCGS16-Smart and SMCGS24-Smart is their support for advanced Layer 2 functionalities. These smart switches facilitate traffic management via VLAN (Virtual Local Area Network) for effective segmentation of network traffic. This capability enhances network security and optimizes performance by isolating broadcast traffic and reducing congestion.
Their Quality of Service (QoS) features enable prioritization of traffic, ensuring that latency-sensitive applications, such as VoIP or video conferencing, receive the necessary bandwidth and low delay for optimal performance. Additionally, both switches support Link Aggregation Control Protocol (LACP), allowing multiple ports to work together for increased bandwidth and redundancy, which is crucial for high-availability environments.
Power over Ethernet (PoE) is another significant advantage of the SMCGS series. The switches deliver power to connected devices like IP cameras, access points, and VoIP phones, simplifying installation and reducing the need for additional power sources. This capability not only saves on installation costs but also enables greater flexibility in device placement.
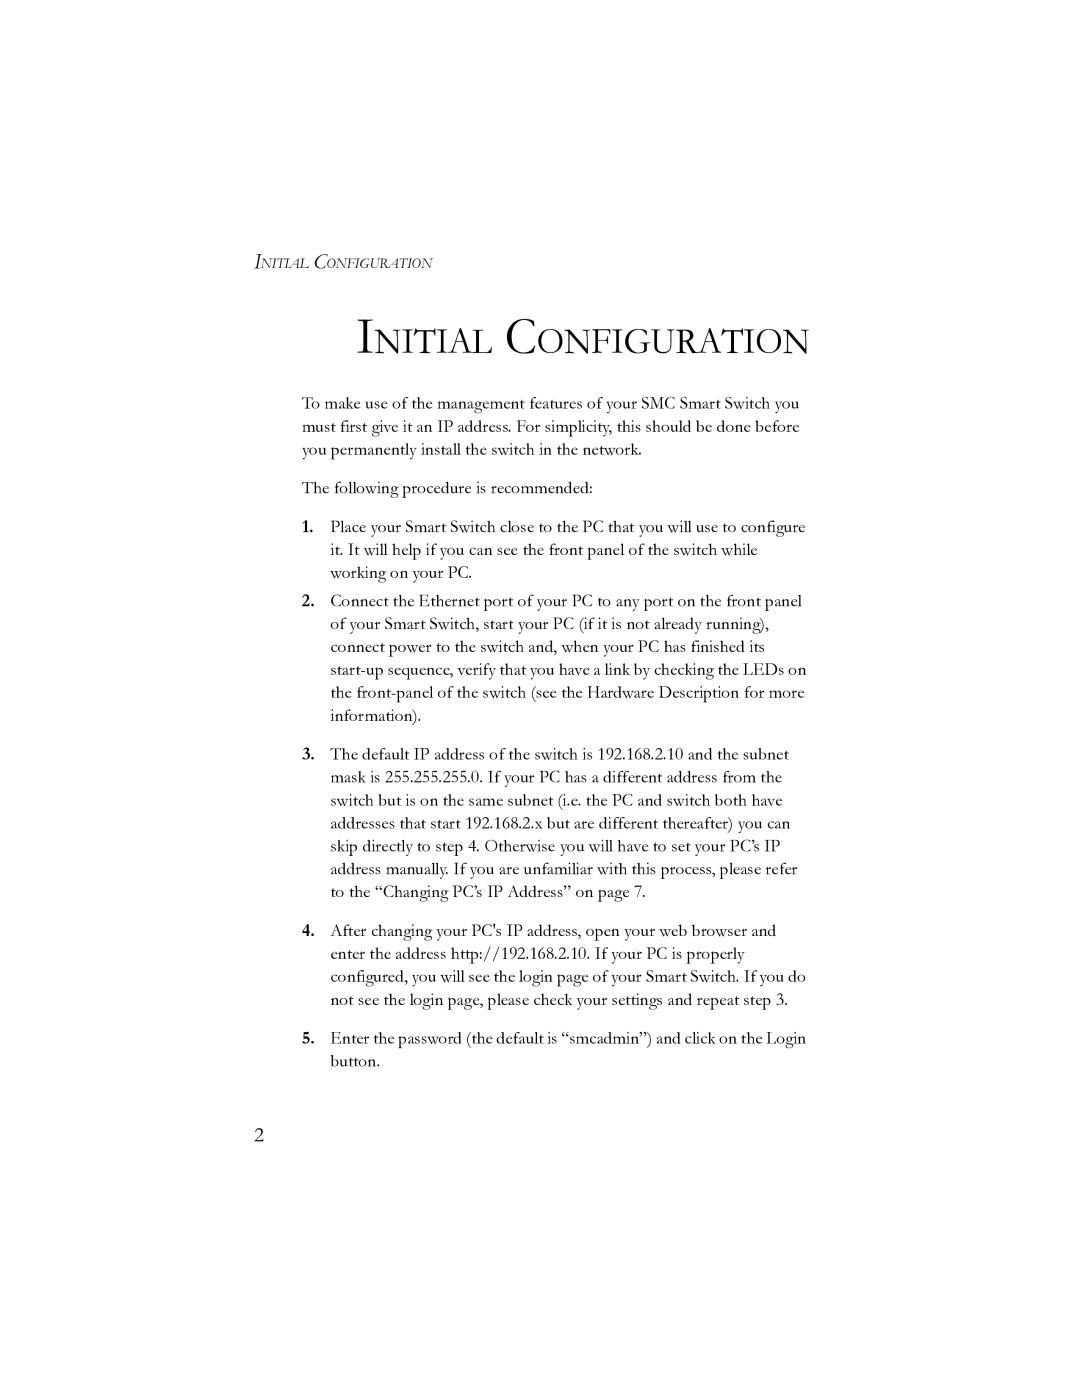
The user-friendly web management interface allows for easy configuration and monitoring of the switches' performance. It offers essential features like port mirroring and traffic monitoring, making it easier for IT administrators to troubleshoot and manage the network effectively.
Both switches come with a robust metal housing for enhanced durability and heat dissipation, ensuring reliable operation in various environments. This reliability, combined with their advanced features, makes the SMCGS16-Smart and SMCGS24-Smart valuable assets for any organization aiming to build a strong and efficient network infrastructure. SMC Networks has effectively positioned these switches as a solution for businesses seeking high performance, manageability, and scalability in their networking equipment.