
A1XCU6 specifications
The Smeg A1XCU6 is a premium freestanding cooker that harmoniously combines retro design with modern technology, making it a standout appliance in any kitchen. Known for its iconic Italian artistry, this cooker embodies both style and functionality, appealing to cooking enthusiasts and home chefs alike.One of the main features of the Smeg A1XCU6 is its spacious oven capacity. With a generous 70 liters of space, it allows users to prepare multiple dishes simultaneously, making it perfect for family gatherings and entertaining guests. The oven is equipped with multiple cooking functions, including conventional, fan-assisted, grill, and pizza settings, providing versatile cooking options to suit every culinary need.
The Smeg A1XCU6 employs advanced technologies such as the “Circulaire” cooking system. This innovative feature ensures even heat distribution throughout the oven, allowing for perfectly cooked meals without the need to rotate trays. Additionally, its self-cleaning function utilizes pyrolytic technology, which heats the oven to high temperatures to burn off any food residues, making maintenance a breeze.
A notable characteristic of the Smeg A1XCU6 is its dual fuel configuration, combining the precise heat control of gas burners with the consistent heat of an electric oven. This hybrid setup not only enhances cooking performance but also offers the flexibility to create a variety of dishes. The six gas burners on the hob come with different power levels, providing precise control for simmering sauces or boiling pasta.
Another appealing aspect of the Smeg A1XCU6 is its sleek stainless steel finish, complemented by elegant retro knobs and handles. This design not only adds a touch of elegance to the kitchen but also ensures durability and easy cleaning.
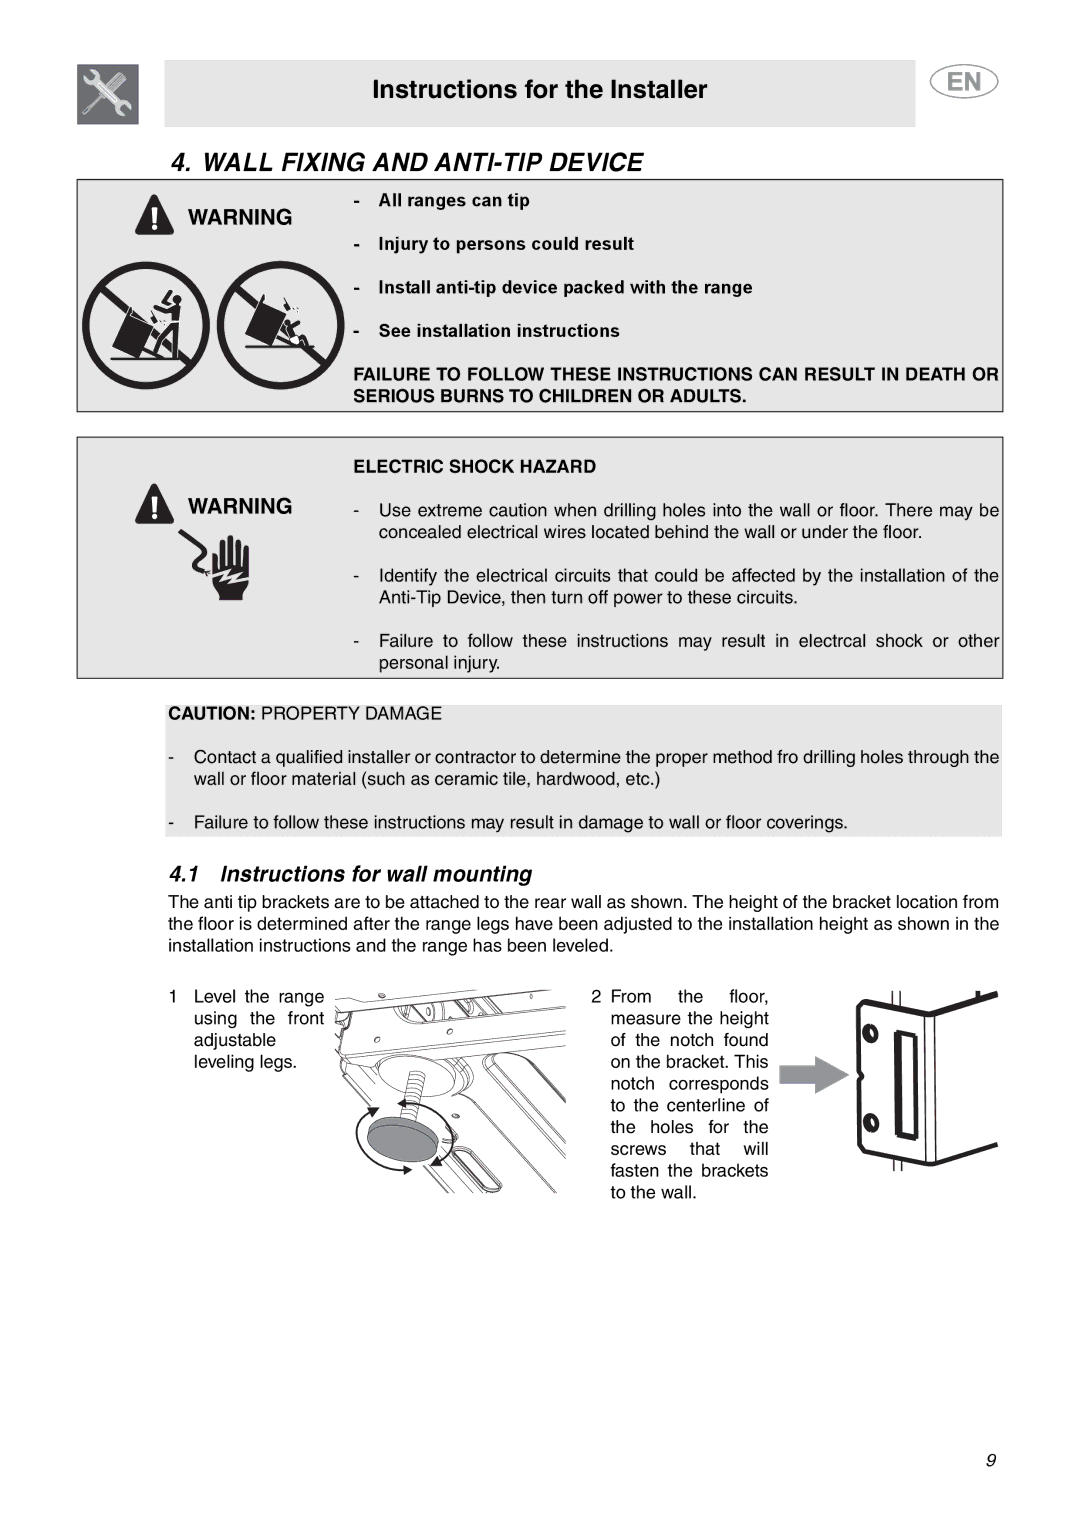
Safety is a key consideration in the Smeg A1XCU6, featuring flame failure devices that automatically shut off the gas supply if the flame is accidentally extinguished. Furthermore, the cooker is designed with a sturdy construction, ensuring stability and longevity.
In summary, the Smeg A1XCU6 is an exceptional freestanding cooker that blends aesthetic appeal with technological sophistication. Its spacious oven, versatile cooking functions, ease of maintenance, and enhanced safety features make it an ideal choice for anyone seeking a reliable and stylish addition to their kitchen. With the Smeg A1XCU6, culinary creativity knows no bounds.